|
|
Post by albacore on Sept 24, 2013 20:39:45 GMT
Welcome to my modular build, agreed to in a reckless moment following discussions with the family. I should have realised that it was their intention only to eat the ensuing pizzas - I was to build it all! I do have to admit that it has always been a bit of a dream of mine to build a wood fired oven and the time was now right, fuelled by some lovely sunny weather - and a few beers, of course! After much reading in the forums, I decided to go with the Woodfire gourmet 12 part kit. Others seem to have used this kit with good results as far as I can tell, the size is right for me, and the support before and after purchase has been excellent. Now on to the build; first pick your spot. Make sure it's constrained by a patio, a fence and a gnarly tree, ready to spike you in the head! 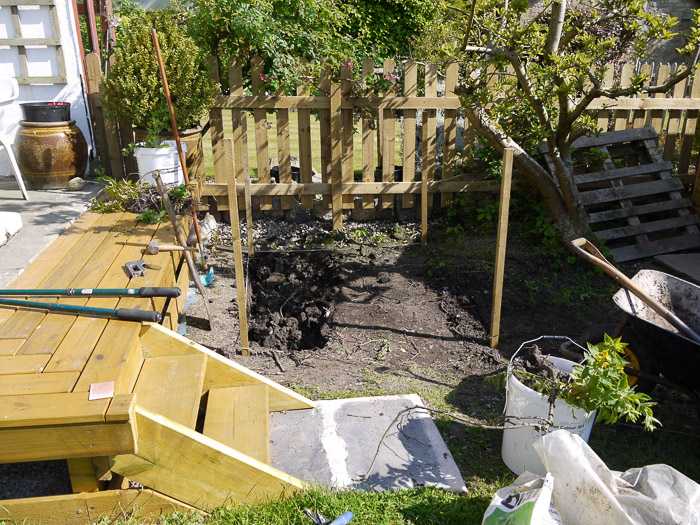 This is the wettest part of the garden, so it was down to the clay, after much digging, followed by backfill with a good layer of 20mm limestone chippings: 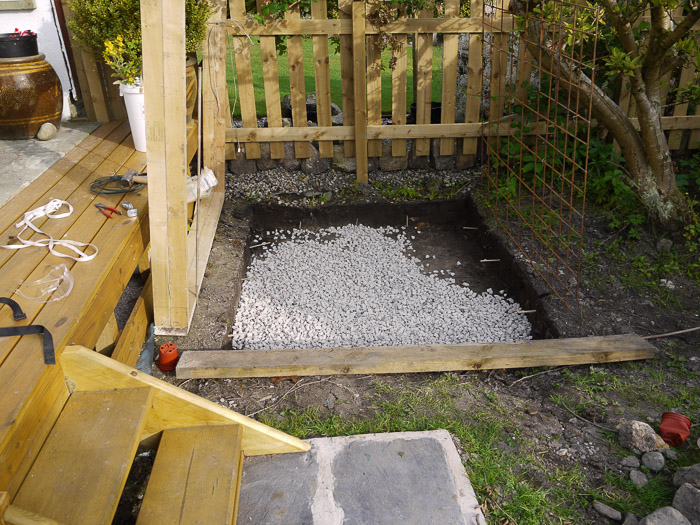 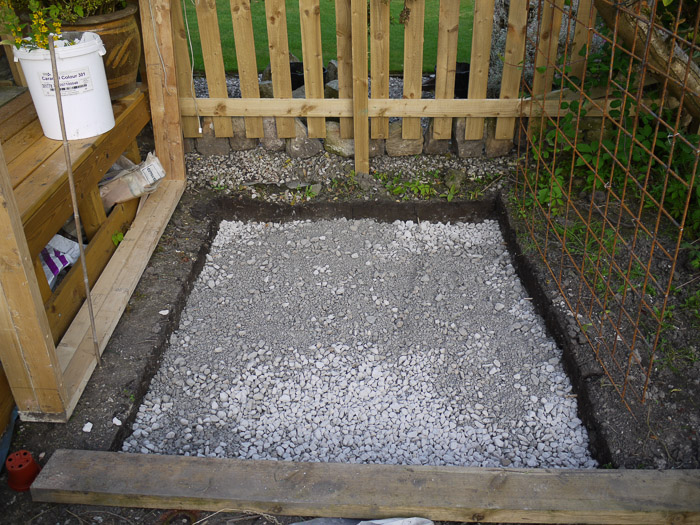 Then time to mix and poor the dreaded concrete: 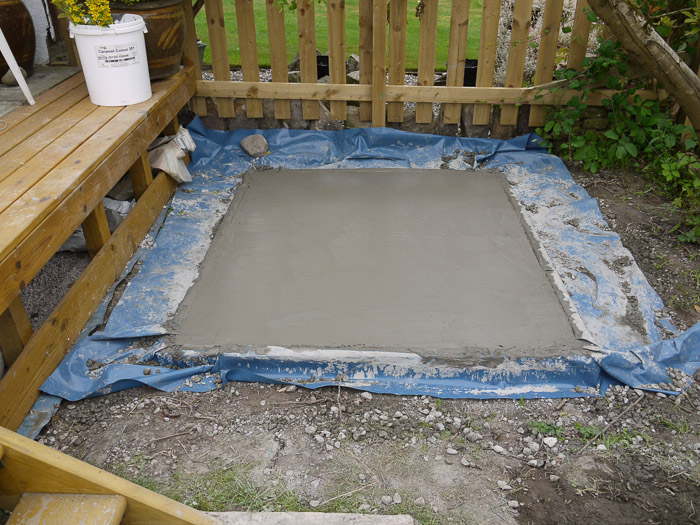 Complete with obligatory cat's paw print (naughty Bagpuss!):  Then on to the build proper. I made the walls out of 140mm solid concrete blocks, as I wanted to chamfer off the edges to give the whole structure a rounded edge look when finished. The other novel feature was to use a block and beam construction, based on three 100mm galvanised steel box sections that I got off Ebay. I really did not want to make another concrete plinth! 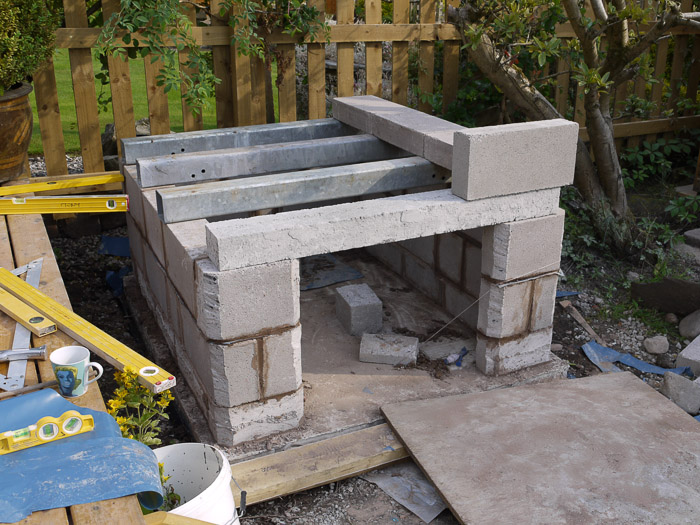 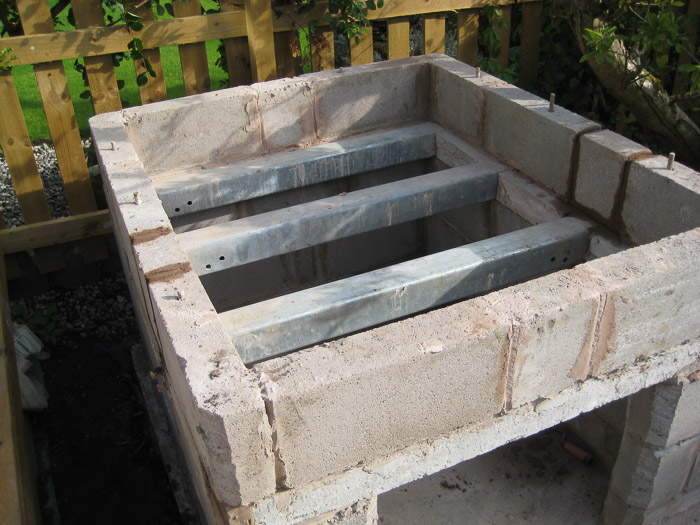 More to follow soon! |
|
|
|
Post by bookemdanno on Sept 25, 2013 6:50:35 GMT
Welcome to the crazy gang Albacore!
Neat Start!
You planning to infill with Thermolites now?
Good luck!
Danno
|
|
|
|
Post by albacore on Sept 25, 2013 7:51:27 GMT
Hi Danno, no, first a layer of 100mm dense blocks for strength: 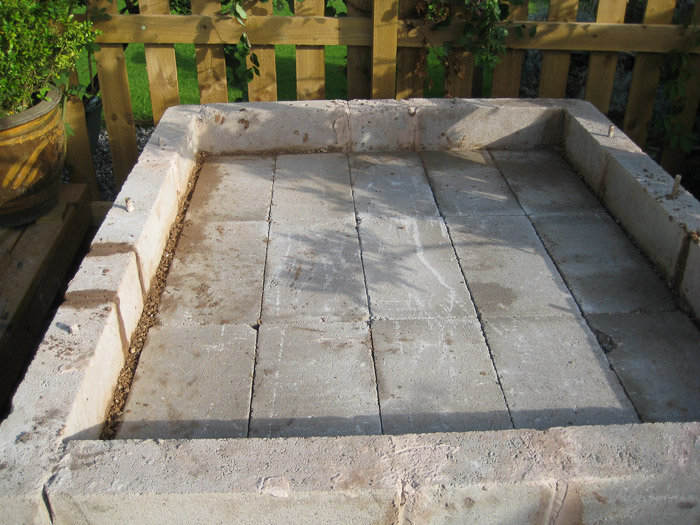 Then the Thermolites: 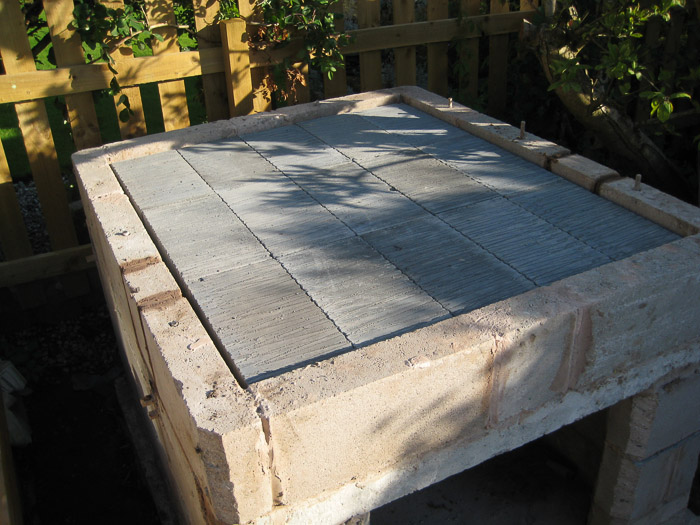 This left me with about 40mm to fill to get the height level with the sides, so I made a quick frame with the redundant plinth shuttering and filled with 60mm vermicrete mostly, but mortar at the edges over the side blocks: 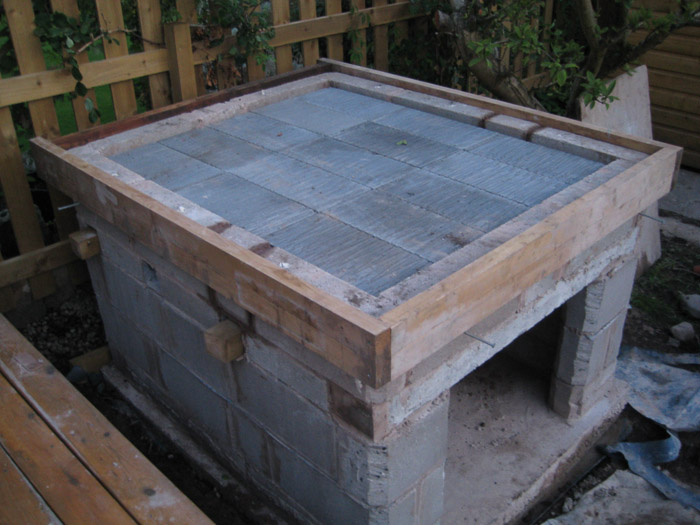 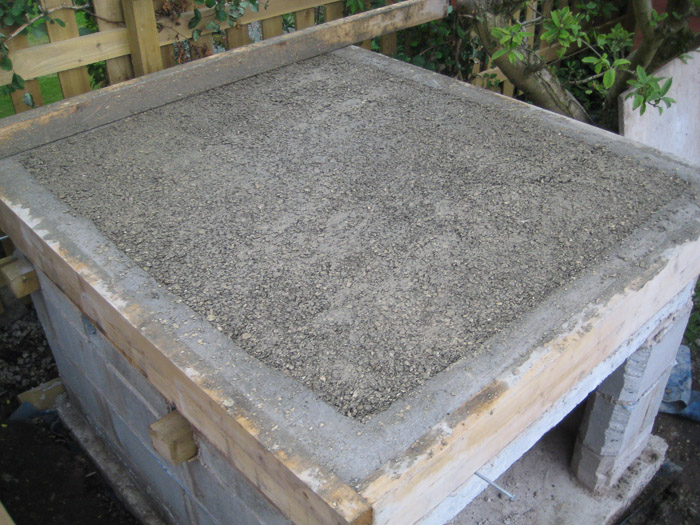 So I had to do a bit more shuttering after all! - but at least no concrete! I was hoping to use Thermolite turbos or Celcon solars for the infills as they have a lower U value, but the truth is that you can't buy them round here - they are in the builders merchants catalogues, but try getting any in 100mm unless you want a wagon load. I have to say (small rant!) that I find sourcing building materials rather frustrating. You never know what price it's going to be without getting a quote; I've been charged four different prices for a bag of Mastercrete at TP! Also what you can actually get is a fraction of what's in the catalogue. If blocks came in more sizes, there'd be less cutting needed and less building dust created, which the HSE is trying to reduce. My neighbour was not a happy chappie when I was cutting concrete blocks at 7pm on a Saturday night with the devil's own power tool (9" angle grinder)! Rant over! |
|
|
|
Post by bookemdanno on Sept 25, 2013 12:22:12 GMT
Don't worry about ranting about the British Building Trade, its no easier when your in it! Stuff will always be expensive when the demand is low too, if its not a basic material that's yet to be used in the myriad of Legoland Estates that have been going up at alarming rates, then you'll be paying for the pleasure. The branches will only hold what's getting used the most in their area too. The best one, is when you got into a Merchants to be asked whether you've been quoted a price over the phone, you just say yes, give it and they blindly agree to it, with no reference or check with anyone! I've been charged anything from £12 to £24 for a bag of NHL too, by the same guy, in the same branch! I was so flabbergasted, that i didn't realise until days later!  Anyways, i like your slant on the design of the base and hearth insulation, nice work. |
|
|
|
Post by albacore on Sept 25, 2013 19:40:56 GMT
Thanks Danno - agree with you about the crazy gang! How many people have built more than one oven for love? Even for profit, I'm not sure how you'd make any money. Next it was time for the base; this was in five sections set upon a creamy mix of fireclay supplied as part of the kit. This bit was tricky as there was too much suction with the fireclay mix to stay creamy plus bits of vermiculite kept flaking off and getting into the mix. A thin screed might have helped. As you can see, a couple of the base sections had cracked in transit - I don't think this refractory material is very strong. I cemented them together with some fire cement that Woodfire Gourmet sent down. They won't show in the final build. 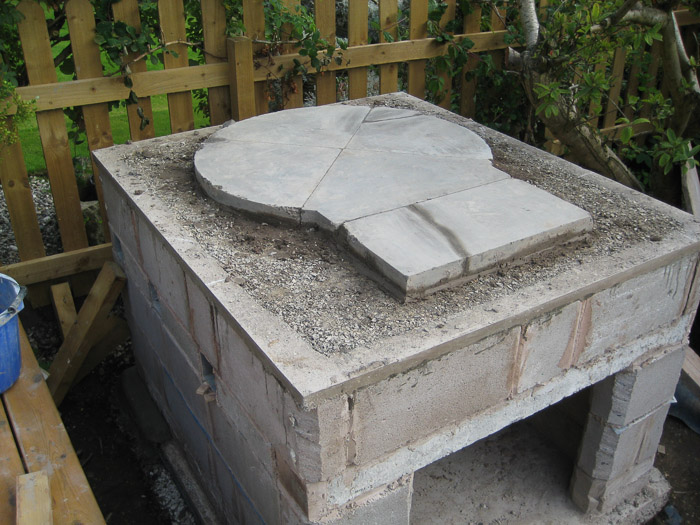 Eventually I got the rest of the sections cemented in place - not an easy job this, as they were seriously heavy! 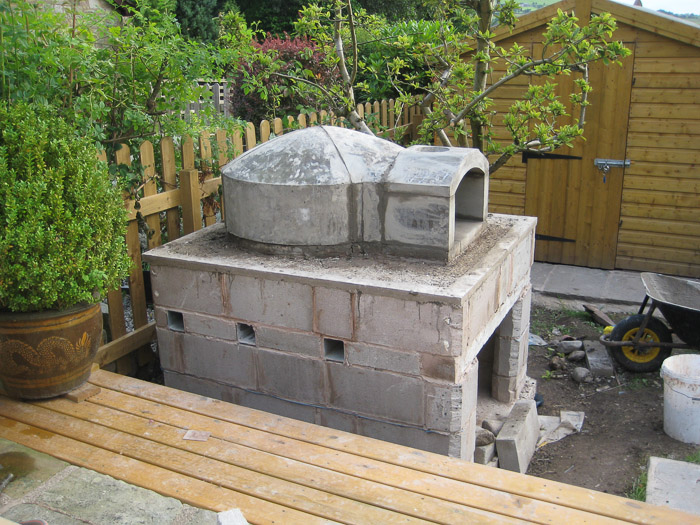 Next step I turned to the flue. WFG recommend a 1000mm length of twinwall. I decided to make an adaptor to sit this in its chosen postion. Well, I did most of it! Phil the Welder kindly did the custom sized pipe with lugs (I've promised him lots of Pizzas!): 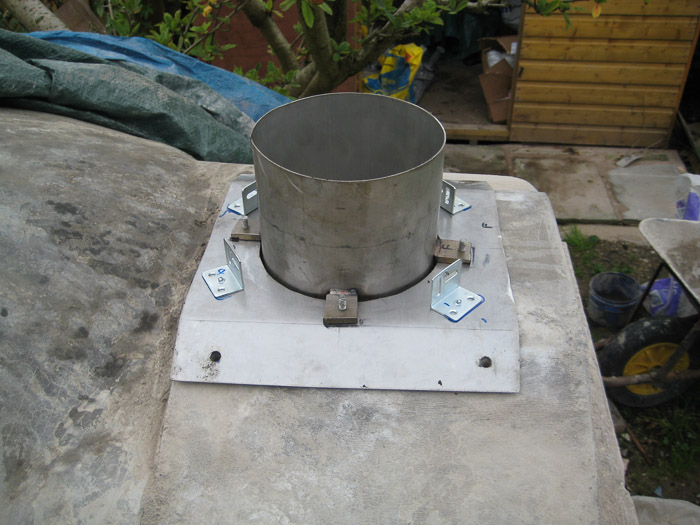 I then screwed the plate to the transition on the oven with concrete screws (no plastic to melt) with some fireclay paste to seal. The top of the adaptor will sit inside the flue and the four small brackets are pop-riveted to the outer skin of the flue. Then time to fabricate a chinaman's hat for the top of the flue. I don't recommend doing this in hindsight, as it took far too long; it's not just making the hat, it's getting it central and square to the flue (think jigs!): 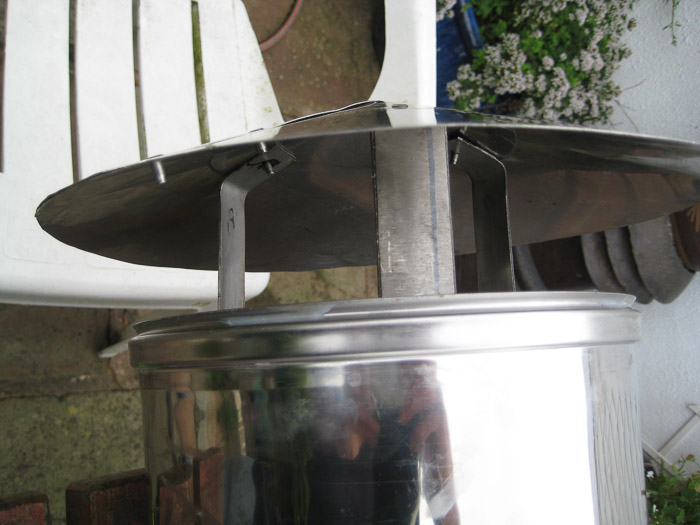 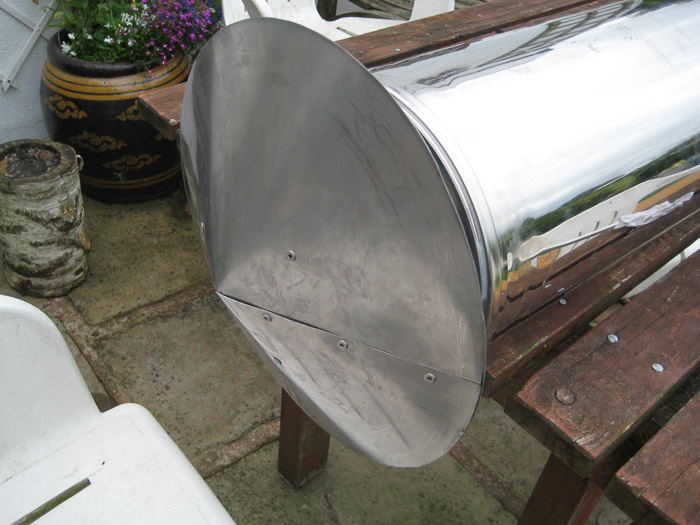 At last, the flue in place! 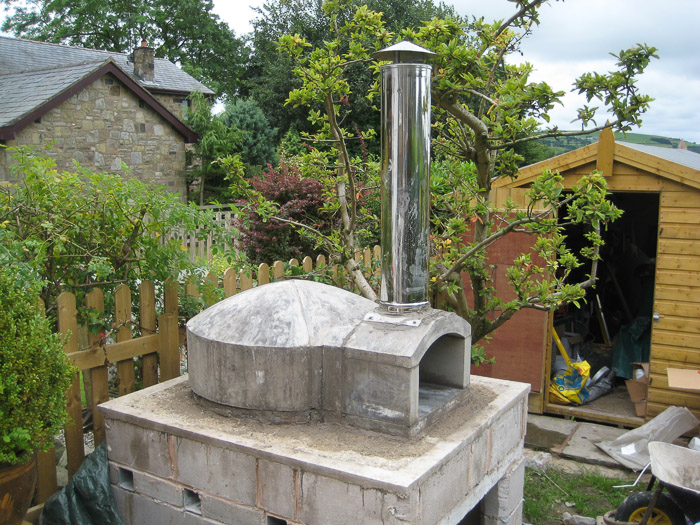 |
|
|
|
Post by rockrocky on Sept 26, 2013 8:51:14 GMT
Looking good :-)
|
|
|
|
Post by albacore on Sept 26, 2013 20:17:03 GMT
Thanks, Rockrocky! Next on was the ceramic fibre blanket. I bought a full box with 7.3m of 610mm x 25mm in. Tip: get the Mexican stuff - it's cheaper! This gave around 50mm thickness - there was a bit left, so I put this on top: 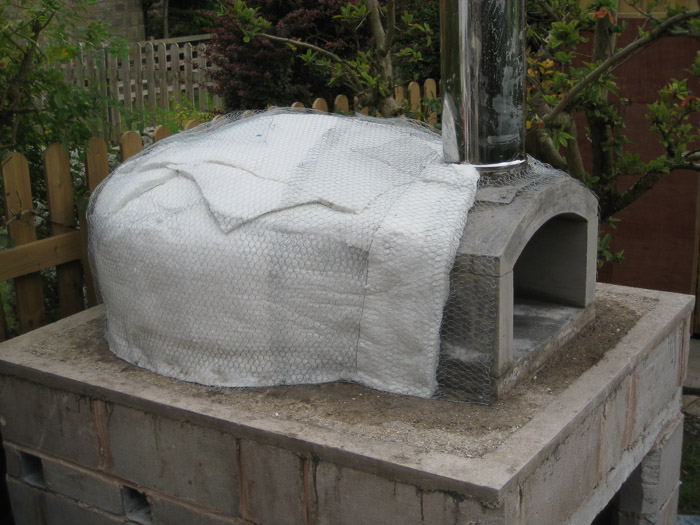 I made the mistake of getting chicken netting with too small a mesh size (12mm), so when I put the vermicrete on, it wouldn't push through the mesh easily to bond; I got round this by making a mix of sharp sand, vermiculite and cement and used this as a thin bonding layer first, then the proper vermicrete. Better though to get 25mm mesh size. I made the vermicrete quite strong at 5:1 - I've seen all ratios from 5:1 to 10:1 specified, but I thought it would be easier to apply to the sides at 5:1 and be a better substrate for the final render: 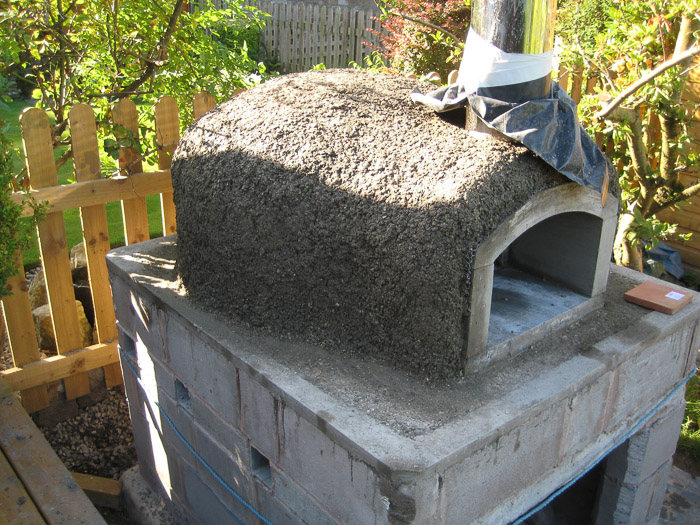 Then it was time to tile. I went with genuine down-home terracotta tiles, just to make life a little more difficult! Also note the plasterer's lath screwed and glued to the chamfered block edges. This comes on a roll 110mm wide: 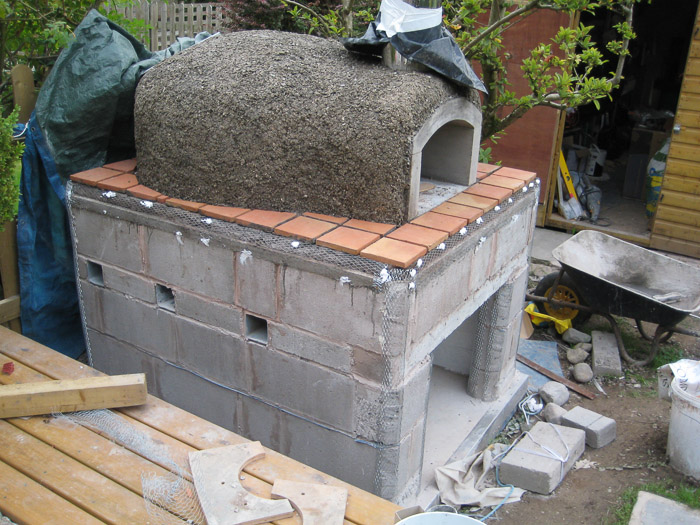 I laid the tiles on a thick standard mortar bed, to put them at the same level as the hearth. Once they are dry, you then have to put on two coats of boiled linseed oil mixed with white spirit, prior to grouting, but that came later. Next it was time for rendering the base, first a scratch coat of 4:1 rendering sand and cement with waterproofer. Tip: use rendering or plastering sand. Sharp sand (at least round here) is much coarser and best only for concreting. Another tip: If you want to save your hands (and you should), wear gloves. Don't bother with latex or vinyl - they tear too easily. Go for the thin nitrile ones (often blue) - they will last for a while. It doesn't help when you see the broken glass that they mix into the concrete blocks now! 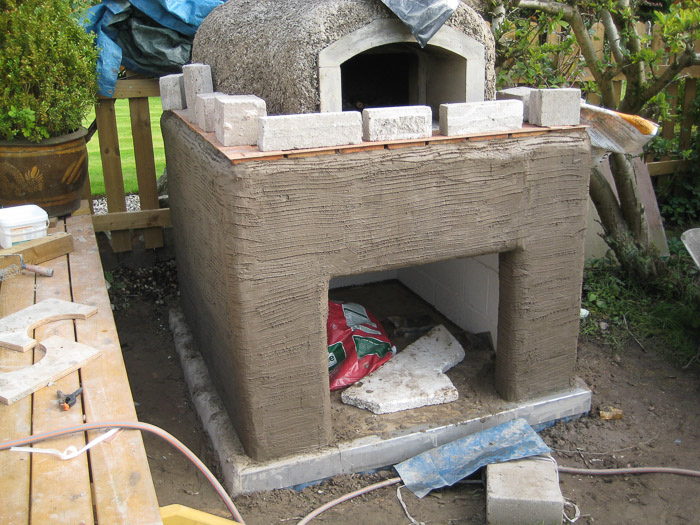 The thin plywood strips weighted down with blocks that you can see are designed to give a flat 10mm grout border round the tiles. Then the top coat. I chickened out here and got Duncan the plasterer to spread it for me! I've also grouted the tiles when I took this shot. 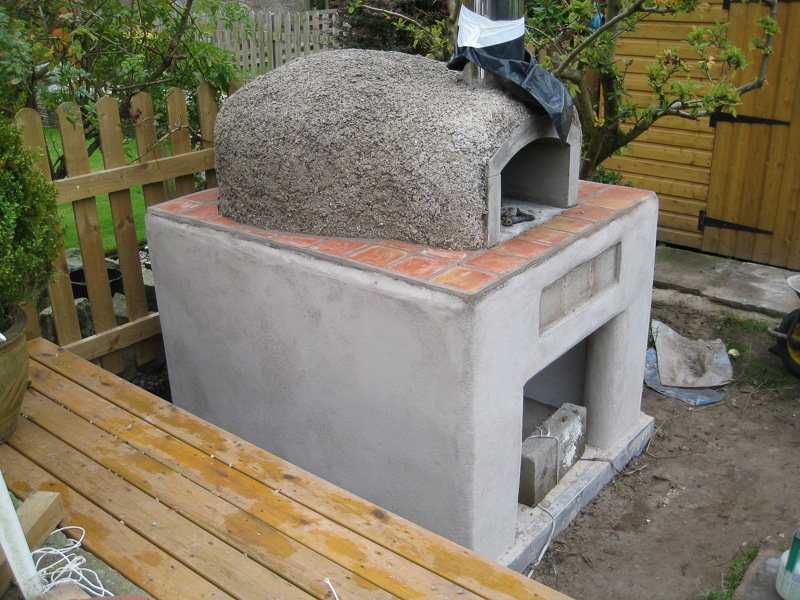 |
|
|
|
Post by albacore on Sept 30, 2013 22:34:47 GMT
Well, it was a great weekend round here for oven builders! Got plenty done, nearly there, so here's a few more pics: First that terracotta tile grouting in a bit more detail: 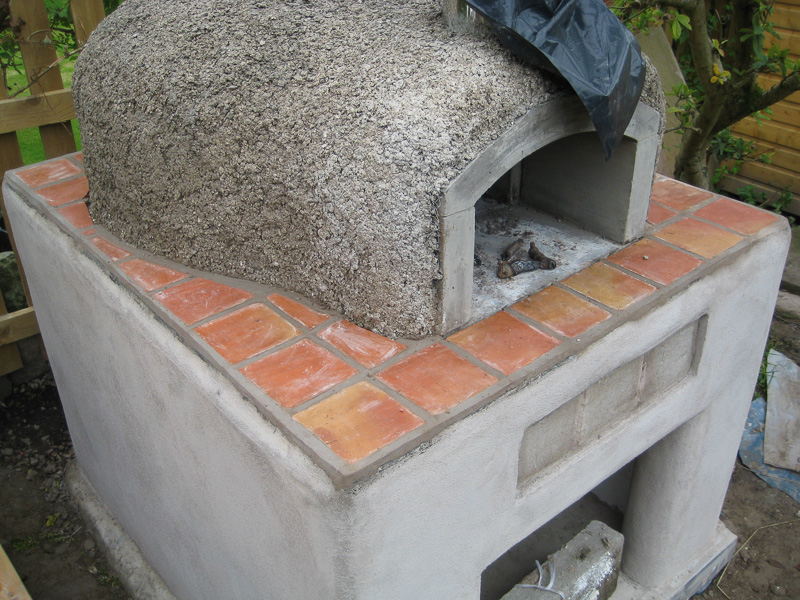 Here's my favourite tile, where a passing bird decided a leave it's clawprint!: 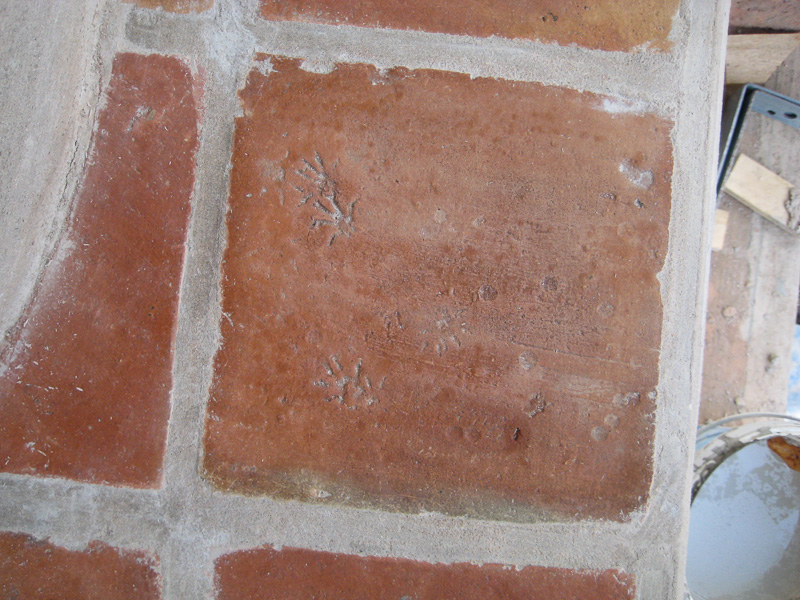 I just used standard mortar for the grout at 1:1/2:4 The white stains still need cleaning up with brick cleaner. The last thing you need to do with the tiles is brush on a coat of Cotto wax and buff it up, but that was later. The tiles have all got a good fall to minimise the effect of standing water. Next it was time to render the dome. First a scratch coat of 1:1:5 with waterproofer: 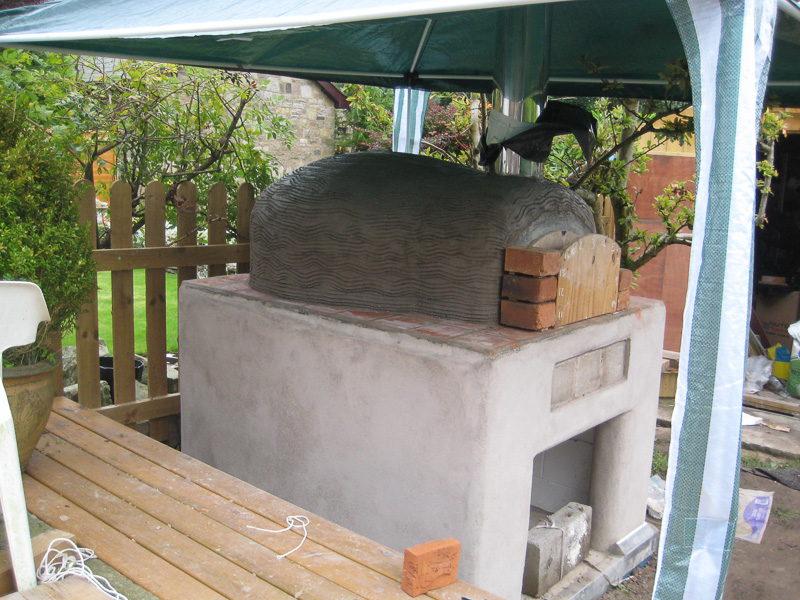 I added 100g of 3mm polyprop fibres to both dome coats to try and reduce cracking. By weight these fibres must be the most expensive polypropylene ever! They are a bit of a pig to mix into the render mix if you are hand mixing - I found the best thing was to mix them into most of the gauging water with a plaster mixing paddle (the kind that fits into a drill) and then some of the sand to make a slurry. Tip this into the barrow and mix as normal. Next day it was time for the finish coat: 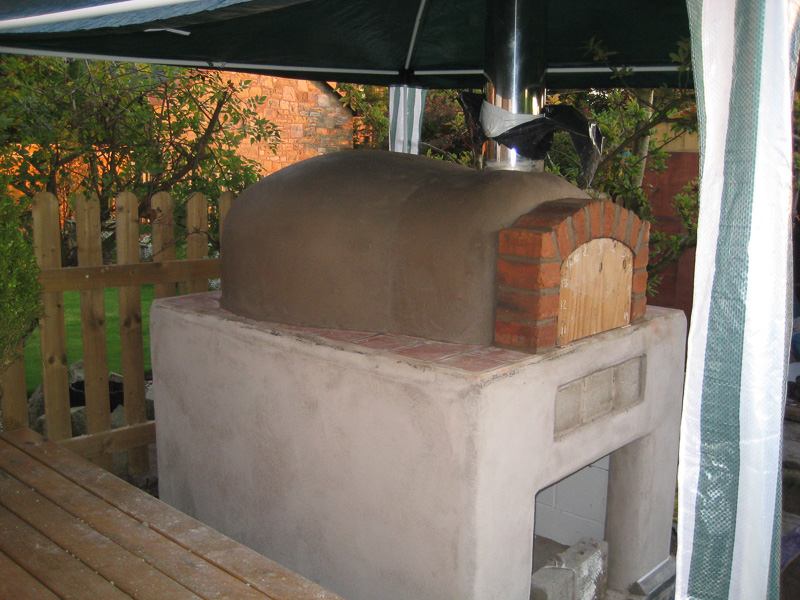 This was the same mix as for the scratch coat. I don't think you're supposed to put waterproofer in the top coat but I did! Surely you want this to shed water most of all? I put the render on with a medium trowel and a gauging trowel for the tightest curves. I used a long finishing trowel to rule up round the straight sloping sides and a tilers sponge for the curved parts. I went over everything with a finer textured sponge when it was starting to firm up. Once the render was set, I built the front arch from reclaim brick. All seemed good until I started to remove the plywood form the day after, when the arch started to crack and collapse! I quickly put the form back while I had a think. I soon realised that, although the arch had that famous "self supporting" feature, the side pillars are anything but! They were just standalone single brick pillars, so no wonder they started to break up when any sideways force was exerted on them. I rebuilt the left side pillar and decided to tie the pillar into the front refractory of the oven with two L brackets, sat in the brick mortar courses and concrete screwed to the refractory. I know you're not supposed to do this, but at the time I couldn't think of anything else. We'll see how it goes... Then for the right hand pillar I had another idea. This pillar was intact, so I didn't want to pull it apart. Instead I ground out the mortar on the external brick face and drilled through the dome render with an 8mm masonry bit. I then glued in a length of 8mm threaded rod to tie the bricks to the render, before re-mortaring over it. Hopefully this will be strong enough - we'll see. 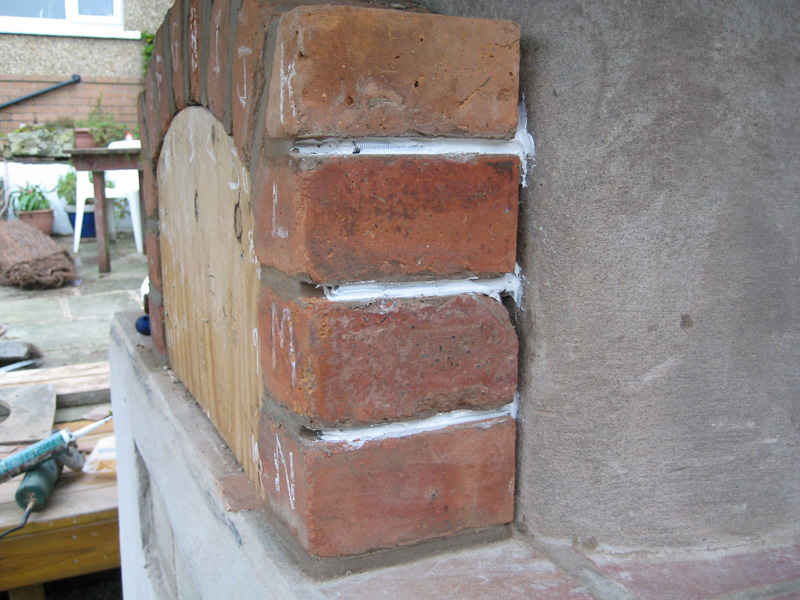 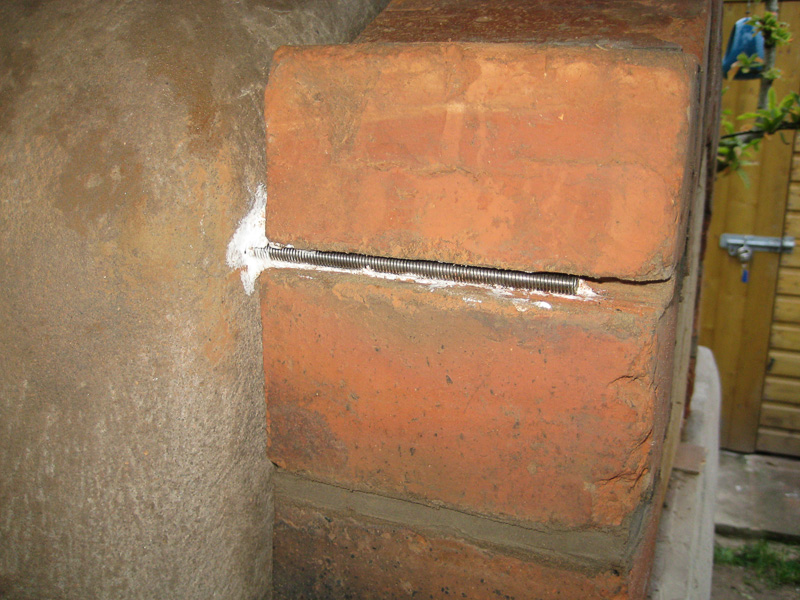 |
|
|
|
Post by cannyfradock on Oct 1, 2013 19:47:56 GMT
Albacore
I think you've done wonders with your initial Modular oven kit. Even when you had a piece that was broke, you have made a simple correct fix.
Looks like you have made plenty of individual touches with design and insulating layers to make that modular oven into a true working bread oven that holds it's massed heat and will be economical and efficient to run....already looking good. Can't wait to see the finished result.
Terry
p.s.....Really do like your support wall render finish and quarry? tile
|
|
|
|
Post by albacore on Oct 1, 2013 20:18:15 GMT
Just to go back a bit, regarding the base, I put a DPC under the slab, but the question then is what to do with the cut edge of the DPC? If you leave it loose and unfinished, I reckon water would run down the base and collect on top of the DPC with no means of draning off, giving a worse problem than no DPC at all! The best I could come up with was to form a "kerb" over the protruding edges of the base, encapsulating the edge of the DPC. You can see it here in it's painted fashion: 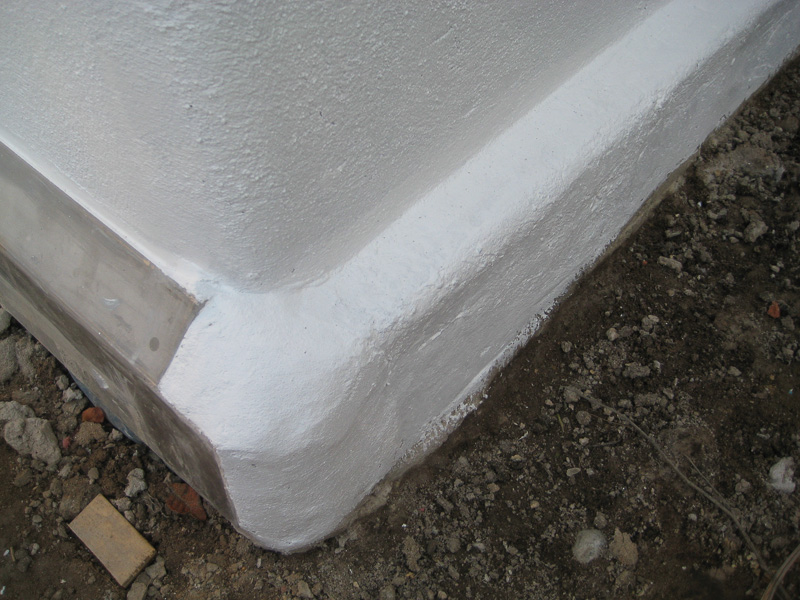 At the front the kerb idea wouldn't have been suitable, so I made an apron out of some scrap stainless sheet that I was able to lay my hands on. This overhangs the cut edge of the DPC and is glued and screwed in place:  Another problem I had with the base was raining in in the wood store! I had set the base back from the edge of the slab by 50mm and it soon became obvious that when the rainwater ran down the blocks it ended up on the slab and then into the wood store. Pretty obvious, but I never saw any warnings about it! My solution was a couple of deflectors each side of the wood store opening and a deflector above the opening - I made this out of some smaller terracotta tiles I had left over from another job. I epoxied a hard wood strip to the back of each tile: 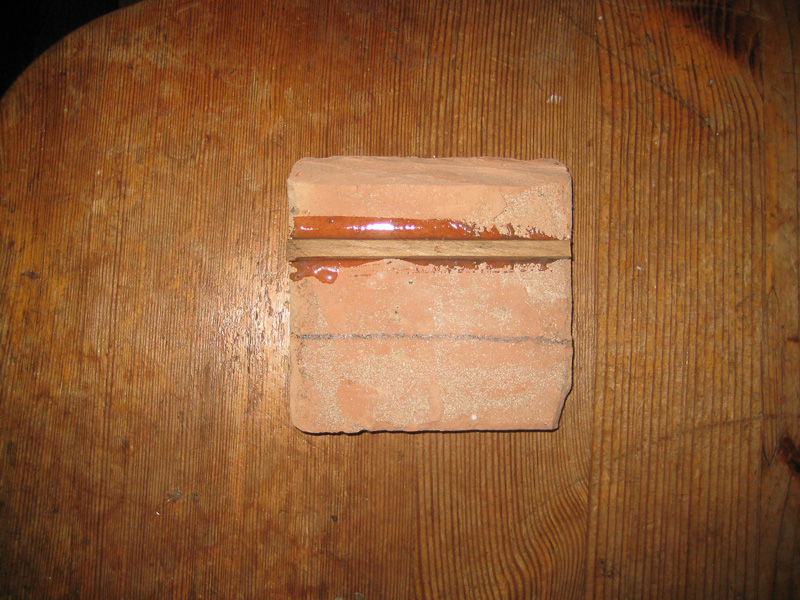 The tiles were then glued to a 45 degree mitred wood strip screwed and glued above the opening. This had a groove rebated in it to locate the tiles: 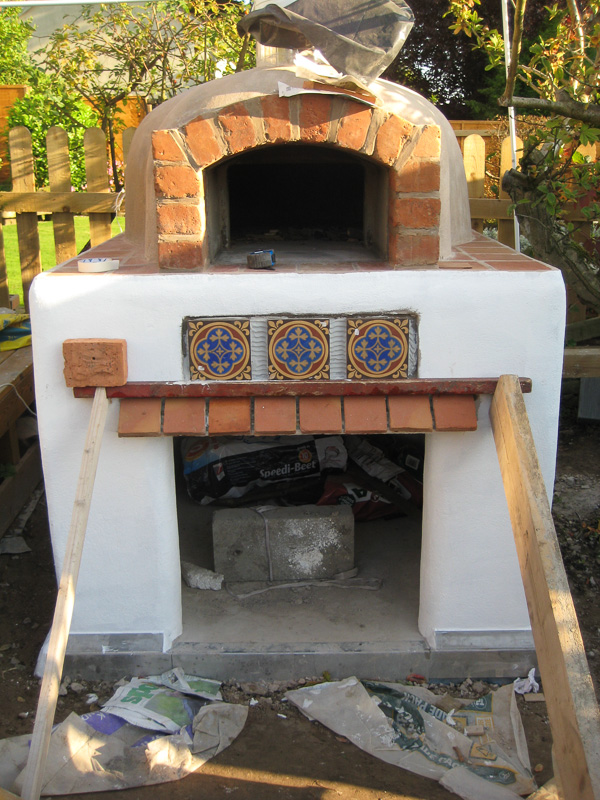 You can also see my three antique Minton's encaustic tiles being cemented into place in that picture. Then all the tiles were pointed up. This was a bit tricky with the encaustic tiles as they are an inch thick and so protrude out from the surface of the render. some bevel edged render had to be fashioned: 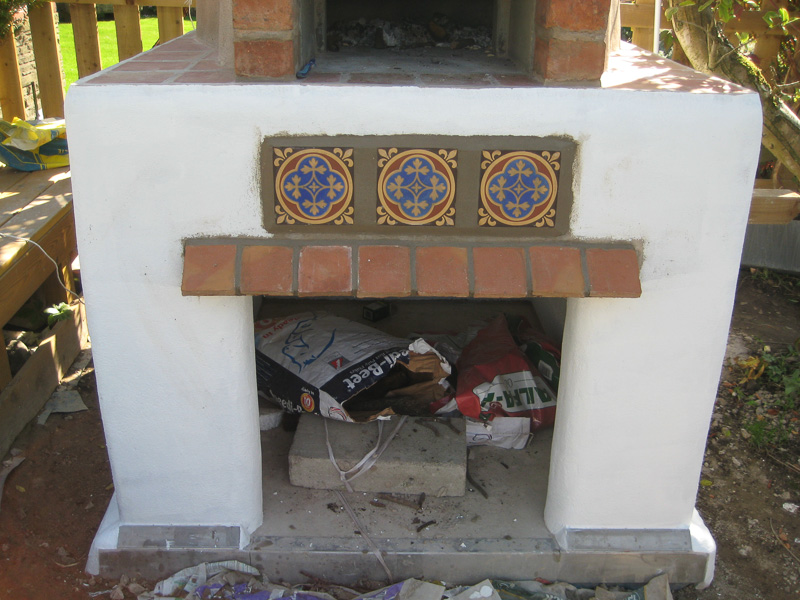 Nearly there now just tidy up time and the finishing touches. Here's me in clean up mode: 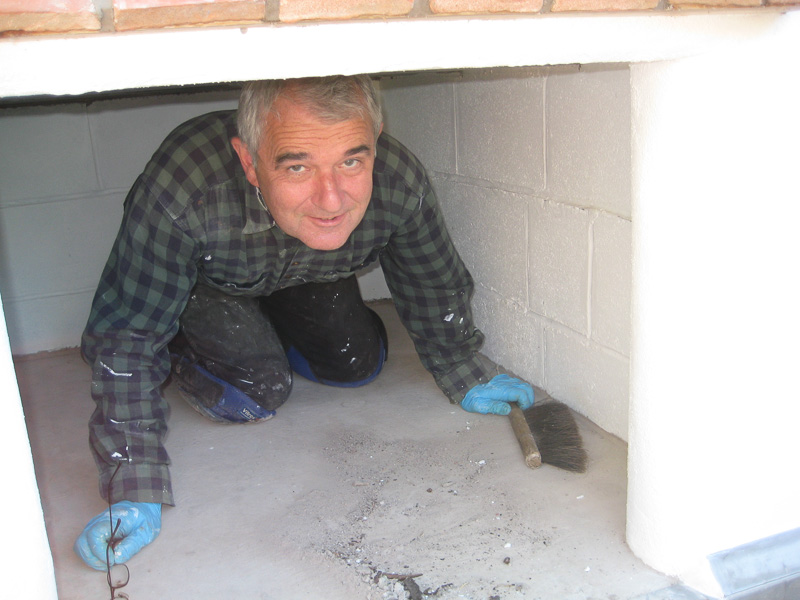 Bagpuss returns to the scene of the crime: 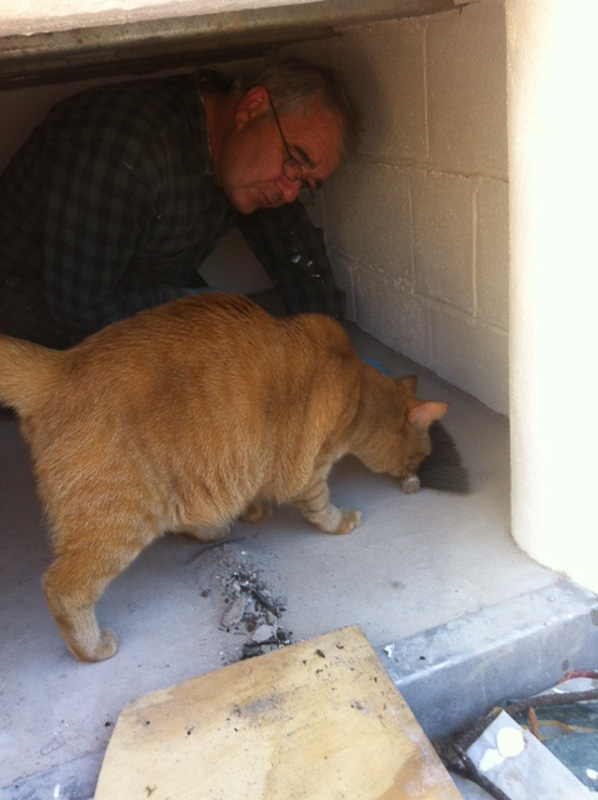 And then for the Rolls Royce of wood stores!: 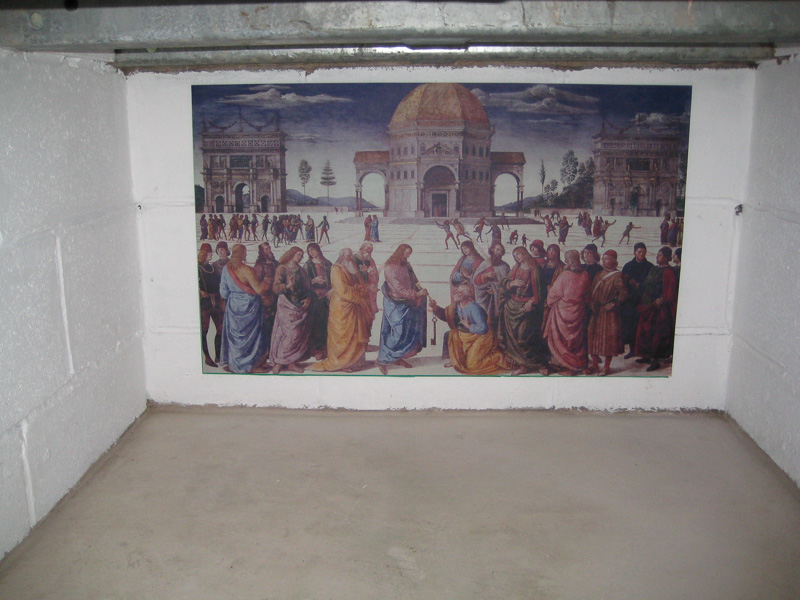 |
|
|
|
Post by albacore on Oct 1, 2013 20:39:31 GMT
Thanks for your kind words Terry - without all the knowledge that I picked up on here it wouldn't have been possible.
I thought I'd try and give plenty of build detail so future builders might pick up a few tips off me.
|
|
|
|
Post by albacore on Oct 14, 2013 19:11:15 GMT
Just a bit of an update with a couple of more finished pictures, though the surrounding area needs finishing off: 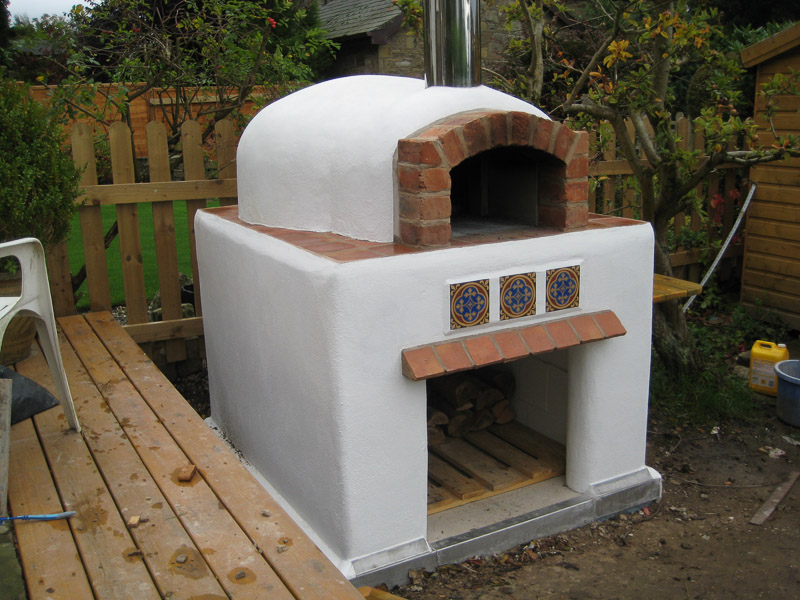 The steel box sections came in useful; I wedged and foamed in two 6 ft fencing posts prior to rendering and these became supports for three deck boards to make a shelf: 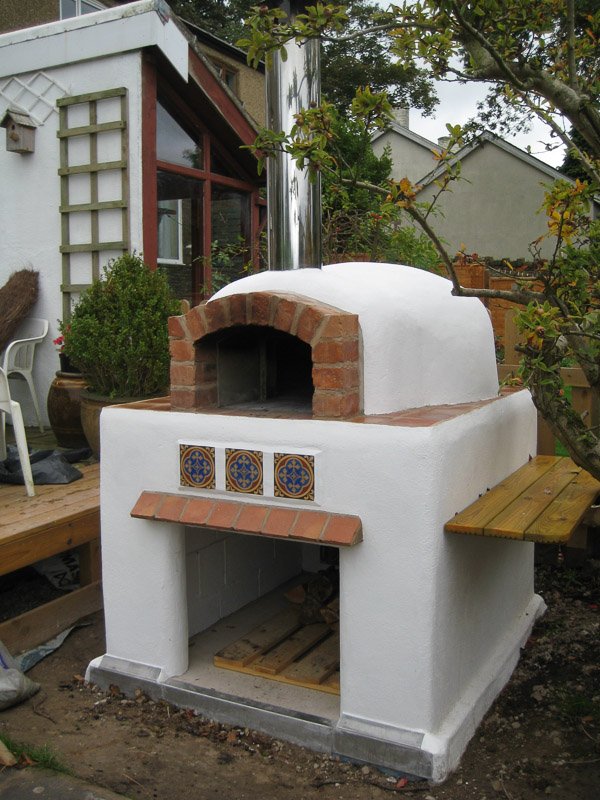 I've used smooth masonry paint on the dome - hopefully this will keep the worst of the winter weather at bay! I'm toying with the idea of making some kind of tent-like cover for the winter, but this could be a whole new project in itself! A ridge pole circumventing an 8" flue pipe will need a bit of creativity! |
|
|
|
Post by albacore on Nov 4, 2013 19:58:54 GMT
I'm struggling to get the oven hot enough - does anyone have any ideas?
Pizzas cook, but take around 10 minutes!
I've done plenty of curing fires and I'm pretty sure that the residual moisture is long gone.
I'm a bit stuck; I think I'm building quite big fires - does it need to be massive?
All replies appeciated, especially from anyone with the same oven kit.
Thanks
|
|
|
|
Post by muddy4x4 on Nov 4, 2013 23:31:18 GMT
Hi, I have only used a large masonry twice, but I was surprised how much wood was needed to bring it up to temperature. I used 2 large sacks of wood and got the oven up to temp (got it to 550oC). had to let it cool down then to 500 to start cooking the Pizzas !
|
|
|
|
Post by bookemdanno on Nov 5, 2013 13:11:48 GMT
About twenty to twenty five wrist sized seasoned logs around 9" in length set behind your starting fire, giving a fire over the whole base of the oven for around 45-60 minutes should see the soot clear and give full temps. If it were a car, it'll be the equivalent of a good thrashing so that you hear the exhaust tinging and smell the brakes when you get home!  I doubt you're letting her rip enough! |
|