|
|
Post by faz on Jun 1, 2012 8:27:06 GMT
I was contemplating cutting some brick to lay flat, so that there is more resistance to the sideways thrust from the arch. Saying that, once everything is mortared in I don't suppose it really makes much difference!!
|
|
|
|
Post by bookemdanno on Jun 1, 2012 11:48:41 GMT
Nice work Faz! Just how i've imagined my hearth build to go...great minds!  How did the Storage Heater brick cut? Would a grinder still cope? Very clever use of the Heater bricks to build the dome too! I think i've seen one on FB where the guy quartered them and the thicker edge went to the outside of the dome, almost creating the correct inwards angle. Good luck with the build, and i look forward to seeing more pics. I see a lot of those style cars on their way up to Yarmouth Stadium, have you been there yet? |
|
|
|
Post by cannyfradock on Jun 1, 2012 19:09:04 GMT
Faz It looks like a "still saw" you are using. but I was more interested in where you bought the blade (what make of diamond disc) I missed the post on which type of sand.......I live beside an estuary so all our sand (what I call) sharp sand....is dredged and washed. 4:1 is the usual ratio for mortar......again 3 or 4:1:1:1 is the homebrew ratio. I am currently building a Pompeii oven on a rooftop terrace in London ukwoodfiredovenforum.proboards.com/index.cgi?board=pompeiiovens&action=display&thread=437 As this is "inland" the normal sand is pitsand.....and is very fine. For normal mortar I would push towards 5/6 :1 ratio........same ratio also for homebrew. Terry p.s.....what a brilliant hobby for a 12 year old lad !!! |
|
|
|
Post by faz on Jun 1, 2012 19:20:08 GMT
Terry, The disc was bought from B&Q for the princley sum of 40 quid - I have seen others far cheaper since then, so I guess it was a lesson learned. At least it is good quality, I have cut all the stand blocks and the heater bricks and it is still going strong so I can't complain really. The saw itself is like a Stihl saw, just a different make. Bookemdanno - you can cut the bricks with a grinder but I think you'd still be best off with a diamond disc on there rather than a normal abrasive wheel. Some of the blocks have really hard bits in which spark like crazy as you cut through them. I also got a load of sparks when I cut half way through part of my workmate whilst cutting a brick earlier!! I have done two courses today and have used the thicker part of the brick at the rear as you aid. On the second course this almost gave me the angle I needed for my oven, so it is quite useful A lot of my time today has been spent cutting bricks. I am glad I got a decent dust mask as there is a load of dense horrible purple dust that comes of thebricks when they are cut. My shorts have turned purple! I have never been to Yarmo as it is a bit of a trek from this end of Kent all the way up there - I guess 2 and a half or maybe 3 hours. Hopefully the weather will be ok tomorrow and I can get a lot more of the dome done and also get the arch in place. |
|
|
|
Post by faz on Jun 2, 2012 21:55:59 GMT
Busy day today and although it was raining first thing it turned in to quite a nice day. And as a little bonus we saw a couple of Spitfires on their way to London and the Red Arrows doing a practice V flypast during the afternoon. I assume they had been at Manston airport which is only 10 miles away and were on their way to pay their respects to the old dear in Buck Palace . Anyway, here is today's progress. First 4 courses done using halfed bricks laid lengthways. 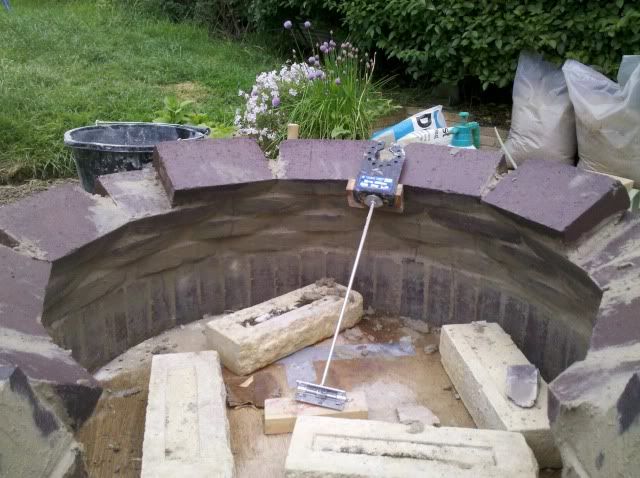 Courses 5 & 6 laid using mostly quartered bricks, but some slimmer ones (sixths or eights) to avoid the joints lining up. 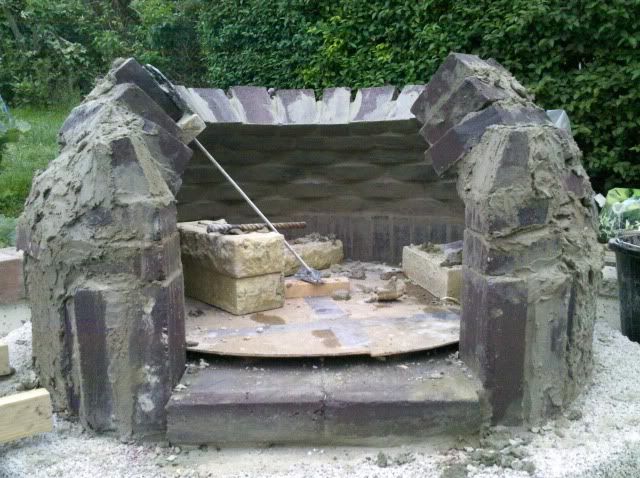 View from above. 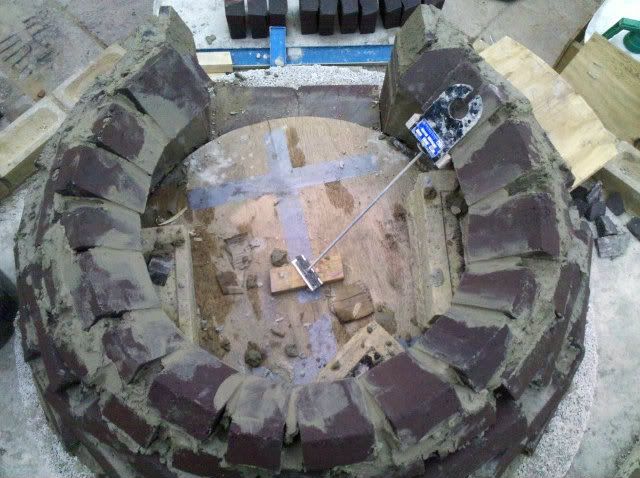 Last pic. 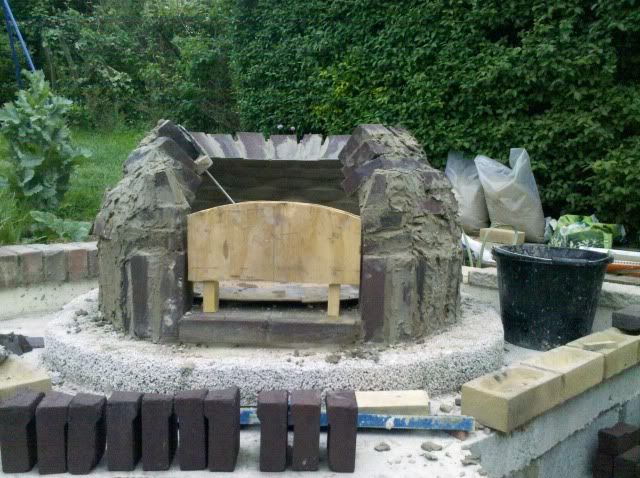 You will notice that the arch is not there even though the dome is quite high now (the bricks laid out in front of the oven are the arch bricks, all cut to size ready to go on). I only managed to mortar in the supports for the arch this morning, and then didn't leave them long enough for the mortar to set properly before I tried to build the arch. It didn't take long before I knocked them off and had to re-mortar them. So I will be leaving them for a while to make sure they have plenty of strength this time. It looks like really bad rain tomorrow anyway so it may be Monday or even Tuesday before I get to build it anyway. |
|
cec
WFO Team Player

Posts: 160
|
Post by cec on Jun 3, 2012 6:53:02 GMT
I was going to lay some fire bricks that way ( flat ) I think it looks cool inside , the only reason I didn't was the bricks where only good for 500 c , oh they was for pence aswell , 6" x 1" x 3" , I still might make something out of em .
Keep it up
|
|
|
|
Post by bookemdanno on Jun 3, 2012 7:26:05 GMT
nice work, and yet another take on the shared theme!
|
|
|
|
Post by faz on Jun 5, 2012 6:40:07 GMT
After the wash out that was Sunday, yesterday turned out to be a lovely day in the afternoon, despite the windy and wet morning. I had a few hours between the rubbish weather in the morning, and a few people coming round in the early evening and made some good progress. Even if I was still going at it when people turned up and spent the evening wearing clothes covered in dust and cement splashes! I am also relieved that the burns/worn out bits on the end of my fingers are starting to heal up. I had to paint over the holes with paint on plasters to stop any crud getting in to the wounds. Gloves are recommended when working with lime! Anyway, here are the pictures : Arch completed and a view of the start of the arch/dome transition. I had a few head scratching moments doing this bit and there are a few bricks with fiddly cuts. 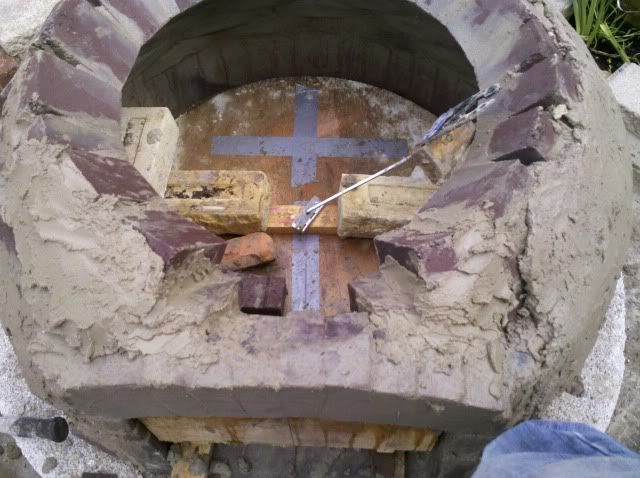 View of the transition from the other side. 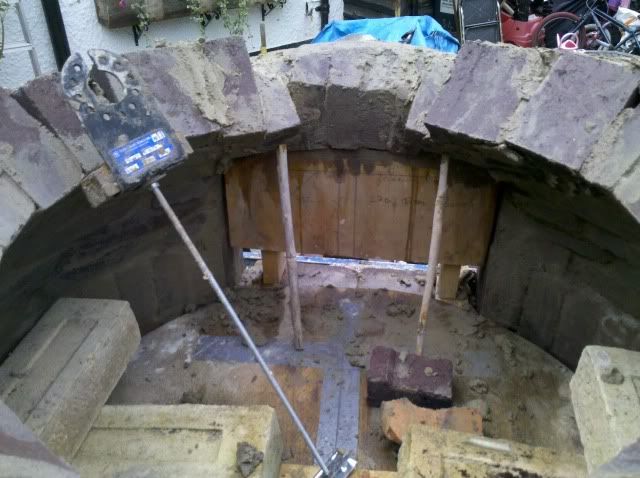 Due to the levels of the bricks in the dome and the height of the arch, I had to bring one of the rows up higher in order to get it to sit on the arch and therefore get some support. I thought these might be the last two bricks requiring a special cut (alas I was wrong and there were a few others which also needed a trim later on!)  Completed rows over the top of the arch. There were a few other bricks which needed a trim to get everything nice and level. Fortunately the rows are now nice and level for the final few rows. I am also pleased how round it still is 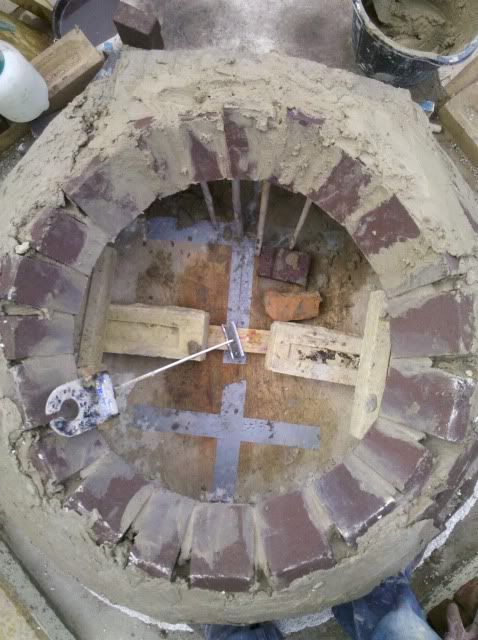 View from the front, showing the arch. I used the natural angle provided by the shape of the storage heater brick quarter to give the curve. I spent ages grinding the faces of the bricks to get them to fit snuggly. I used quite a wet mix of mortar to fit them, then used a hammer to gently tap them to squeeze the excess mortar out from between the joints. I still had to spend a bit of time taking more material off the keystone bricks in order to get them to fit and then gently tapped them in to place. I will leave it a couple of days before I remove the former to make sure everything is set. 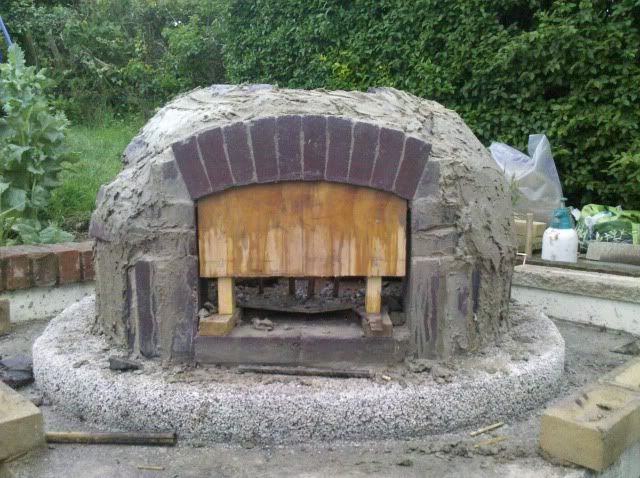 And the last pic, same thing from a different angle  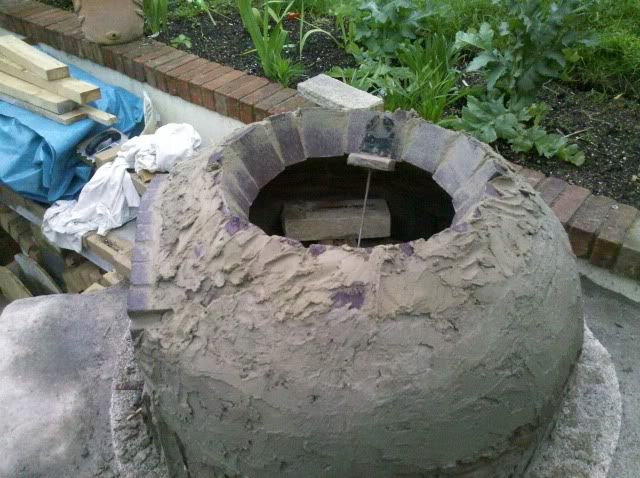 |
|
|
|
Post by faz on Jun 5, 2012 21:08:52 GMT
Managed to get the dome closed today. I was having problems getting the bricks to adhere as I got close to the top, so I knocked together a form which I perched on top of a bucket. I don't have any pics of the finished oven, as the weather turned bad and I spent the last 30 or so minutes in the rain finishing off. Hopefully the extra water won't have affected anything too badly. I had to do angled cuts in the bricks in the last few rows to avoid huge gaps. 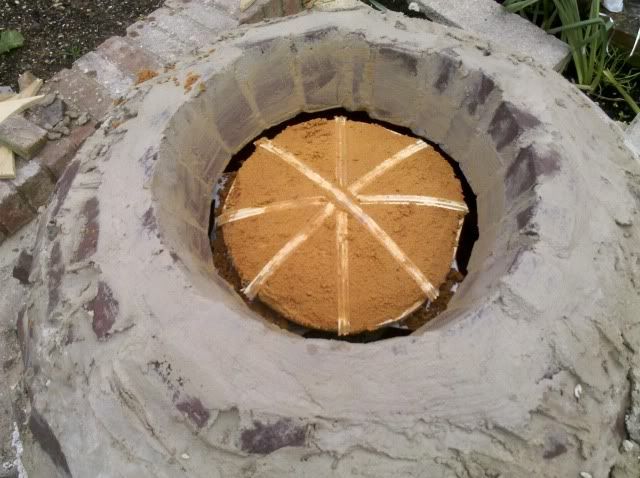 I will have to remove the form tomorrow and tidy up the inner joints - hopefully they won't be too bad. Looking forwards to a few days away from the oven while everything cures and my back recovers. PS for some reason the form made me whistle God Save the Queen - the Sex Pistols versions |
|
|
|
Post by cannyfradock on Jun 6, 2012 17:15:51 GMT
Faz
......It's really nice when that last brick goes in to close the dome.....well done !!!
The final course over the internal arch is always a head scratching moment.....more so for you as those storage heater fire bricks look a right bugger to cut (I have just saved 44 of the same bricks from ending up in a skip).
I admire you guys who use a jig to build your dome, although you used a very similar system for the last courses and keystone as I did.
Terry
|
|
|
|
Post by bookemdanno on Jun 6, 2012 20:18:43 GMT
Just a quick question about using the Heater Bricks...
Did you find it took a long while for the mortar to begin to set, with the bricks taking a while to stay/hang in place?
I'm wondering of they may be relatively low in suction, compared to normal bricks?
|
|
|
|
Post by faz on Jun 7, 2012 5:02:37 GMT
You need to get the wetness of the brick just right (not too wet otherwise the mortar slides off to start with) and the stickiness of the homebrew just right, then they seem to stick just fine. I haven't used normal firebricks so can't make a direct comparison, but from reading comments on here they seem to have similar properties.
If you spray water on them you can see it rapidly soak in to the brick. A dunk in a bucket for 30 seconds to a minute seems to be just right.
|
|
|
|
Post by faz on Jun 9, 2012 5:20:23 GMT
Bookemdanno & Turkey - thanks for your support of the other forum |
|
|
|
Post by faz on Jun 16, 2012 20:06:07 GMT
Here's another update. The entry is now complete and the other brick work around the oven is nearly done. Just need to pop on a chimney pot, and put the blankets, vermiculite and render on and then the oven will be done. Then just the BBQ to build and tiling to do, and render over the rest of the structure. Should only take 5 minutes This is the entry, showing apprx 4 inches of vermicrete between the hearth bricks and the rest of the entry floor. This has now been tiled. One thing I realised today is that it would have been better if I had placed a piece of cardboard between the poured concrete and the wall of the entry, as it make expand and push against the wall, causing a crack. Maybe! 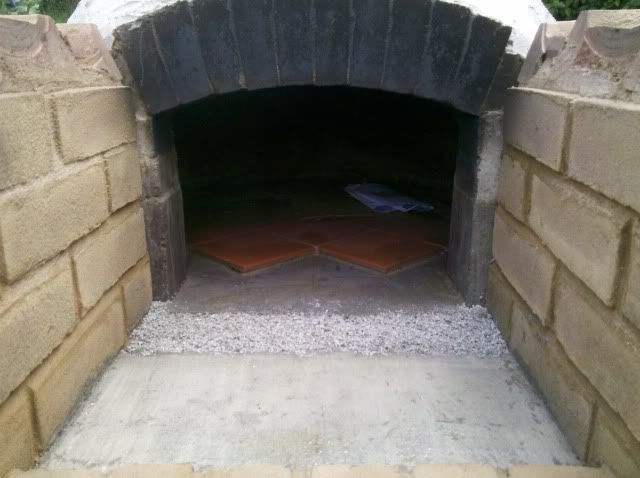 The front arch, complete with hole for chimney pot (yet to be purchased) to be added. I think I will do one or two courses of bricks before sticking the chimney on, but I don't want much more height. 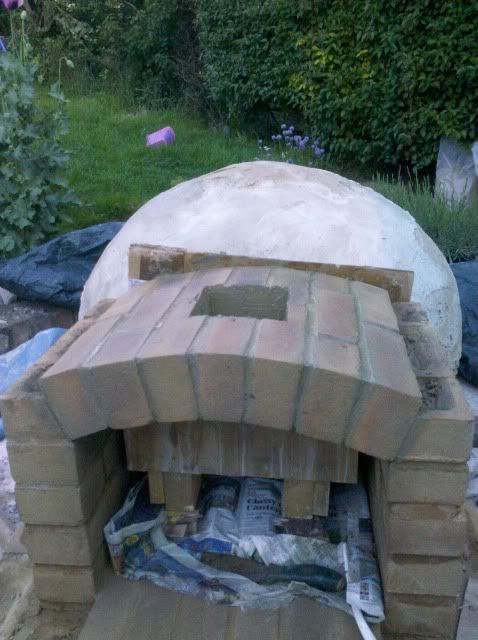 Tomorrow I'll be adding the blanket and vermiculite over the dome - I'm not looking forwards to handling the blanket but I have some disposable overalls and a dust mask to wear while I am doing it so I hope to avoid too much itchiness. |
|
|
|
Post by turkey on Jun 16, 2012 20:26:49 GMT
a very smooth arch and chimney void, very nice indeed, seems a shame to seal in that other lovely heater brick arch. Always amazed how everyone seems to make a perfect arch when mine fell down a couple of times and generally is wonky lol.
for the chimney are you going with clay pot or a piece of modern stainless flue? Or is it a case of whatever ebay throws up cheap?
btw I love the bricks used width ways inside he dome, it looks really rustic like an old flint wall or similar, I think the dark colour helps, very sexy, in fact its so rustic its almost modern due to the even nature and straight lines.
|
|


