|
|
Post by faz on Jun 16, 2012 20:39:07 GMT
Thanks Turkey. I like the inside of the oven too, although each brick is straight it appears to be curved and the wall looks like it is woven - though that optical illusion will be difficult to see easily now the entry is completed.  My wife really wants a chimney pot like this, but we are planning on visiting a reclamation yard and seeing what else is available. I love seeing all the different designs of chimneys when I have been browsing around on the interweb but the rook is probably good as it is quite simple and comes in a small size suitable for the oven. |
|
|
|
Post by bookemdanno on Jun 17, 2012 8:02:30 GMT
Cracking bit of work there Faz, well done! I like it!
Hope your not too purple from all that Heater Brick dust!
|
|
|
|
Post by cannyfradock on Jun 17, 2012 11:26:04 GMT
Faz
Great work. I admire the way you made all those awkward cuts to finish the arch transition. (I've also just completed an arch transition and was slightly short of closing that top gap. I managed to wedge some carbon fibre rods in the perps of the bricks and used homebrew to fill the gap)
Use a long blade type stanley knife to cut down any bulges in the blanket, so it fits tight on the dome. It will make it easier to put on the vermecrete. I have yet to find an easy way of putting on the vermiculite......it needs lots of patience ......and a pair of marigold gloves.
Terry
|
|
|
|
Post by faz on Jun 17, 2012 22:04:43 GMT
Thanks for the comments gentlemen. The vermicrete is now on - although it was messy I didn't find it too difficult to apply. I mixed it in 100 litre batches in a builders bag with 10l cement and 1l lime, each batch took around 35 litres of water before it got to the right consistency. Putting it on I used one hand to support the side and one to pat it down - a bit like a video I saw of someone making a clay oven. Anyway, here's the pics. Putting the blanket on. I used chicken wire over the top and used the tip that some body on here gave about tightening the wire up by twisting it with a pair of pliers. 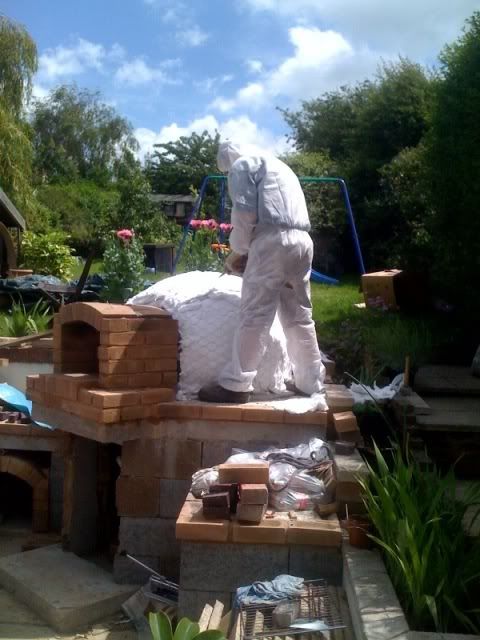 A close inspection of build quality being carried out by the boss.  Roughly half way there. Nice even layers seemed to make it go on easier. 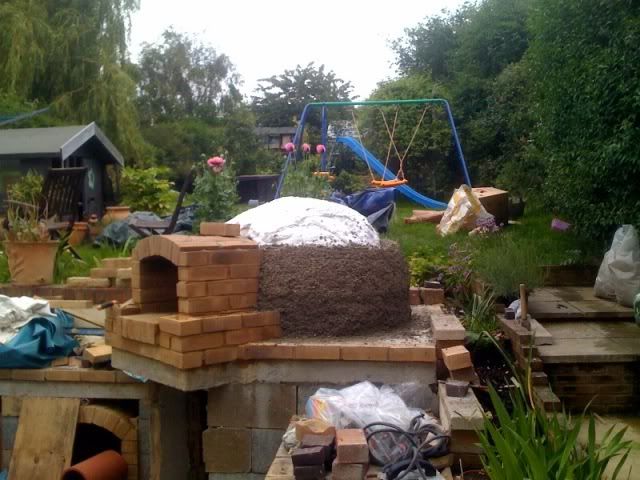 Finished. Now we need some time to let the vermicrete cure and dry a little, before rendering. Do I fire it up before I render or afterwards?? Note the handy shelf by the entry which can be used for tea lights or bottles of beer, depending on whether it is me or the wife putting things on there  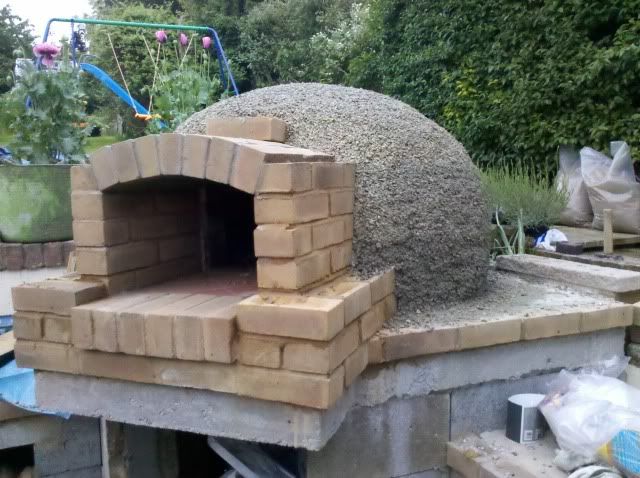 Final picture, showing completed entry with quarry tiles. 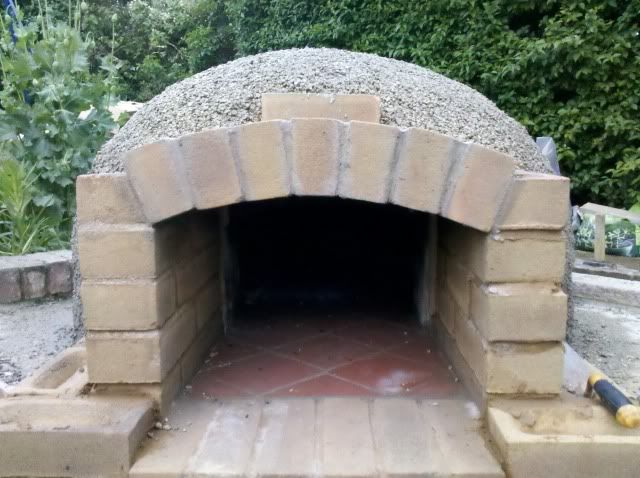 |
|
|
|
Post by turkey on Jun 18, 2012 7:37:42 GMT
I can't believe your vermicrete went up so smooth, I think you hit the right consistency and also made it the correct width. I think my layer was too thin so the lower section was not really strong enough to hold the upper part and had a few land slides lol.
cob oven construction technique seems to be the way to go.
love the overalls btw, that blanket is pretty scratchy hut I had a helper which ment it needed hardly any handling as we could run it round or over in one clean motion.
|
|
|
|
Post by cannyfradock on Jun 18, 2012 19:12:27 GMT
Faz
Some people worry about arch transition, but the thermal blanket and vermecrete layer are also......soooo important. Your method of laying on these 2 very important thermal layers are spot on in application......thanks for sharing these progress pics.....
Terry
|
|
|
|
Post by hoss on Aug 1, 2012 12:22:47 GMT
faz why does every one use hollow blocks and fill ,can't you just lay blocks and mortar
|
|
|
|
Post by faz on Aug 1, 2012 13:49:27 GMT
I followed the Forno Bravo instructions for the base, because it is easy to dry lay the blocks then fill. Others on here have used blocks and mortar. I don't suppose it makes much difference really, so it is pretty much down to your personal preference.
|
|
|
|
Post by tonyb on Aug 1, 2012 16:22:12 GMT
I think the US reason for using hollow blocks is so that they can add reinforcing bars to help protect against their increased likelihood of earthquake. Not really an issue here in the UK. Choice of materials here in the UK is more about aesthetics/costs/ease of laying.
|
|
|
|
Post by faz on Aug 5, 2012 20:33:42 GMT
Right, it is time to update this thread as it is many weeks since I posted pictures and the build is now 99% finished - chminey completed, dome and structure rendered, BBQ built, all surfaces tiled and grouted, oven door built. Now it's just a lick of paint and some coping stones for garden wall that is left to do. Oh, and some doors for the spaces under the counters. Anyway, here is the what it looks like now : 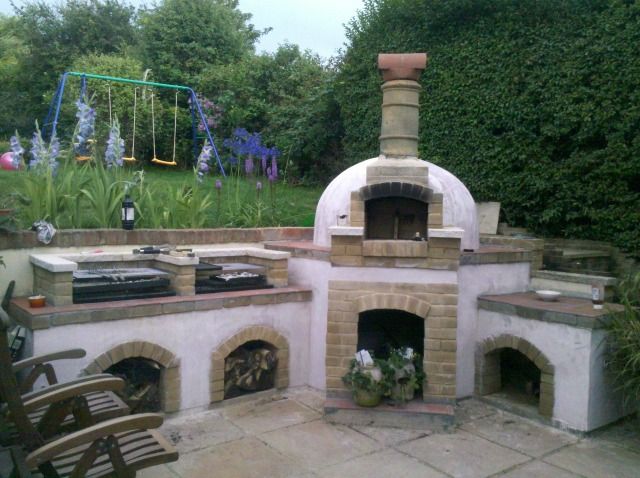 Close up of the entry and front of the oven. The arch at the bottom does not support the slab above and was built last. I had to cut the rear of the top row of bricks in order to get them to fit flush with the slab. 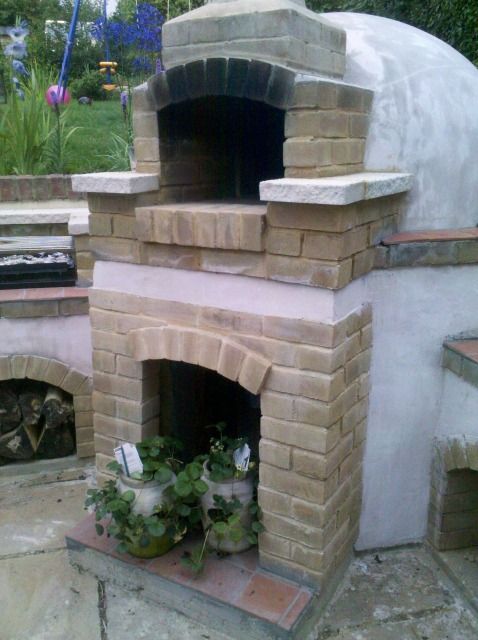 Another view of the entry. I am not sure where the small child came from!  |
|
|
|
Post by faz on Aug 5, 2012 20:38:15 GMT
View from the side. I added a pigment to the final render but it came out a bit patchy, I think because it rained before the render completely went off, but also because I had to spray water on it and I think it diluted the colour in the surface. So the render will be painted. B&Q have Sandtex 25% off at the moment so it looks like I'll be using that 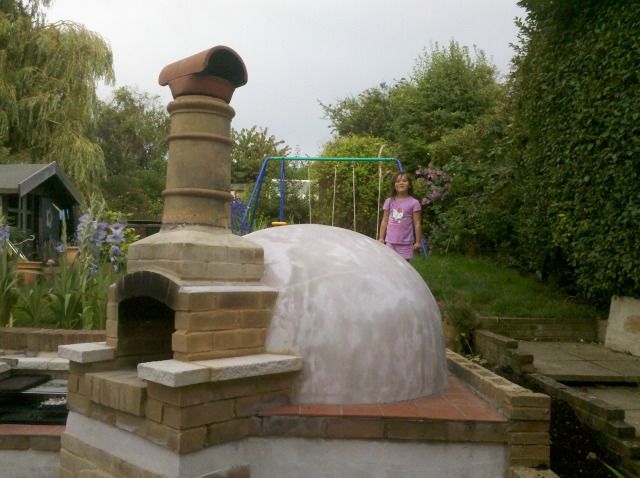 Pics of BBQ area : 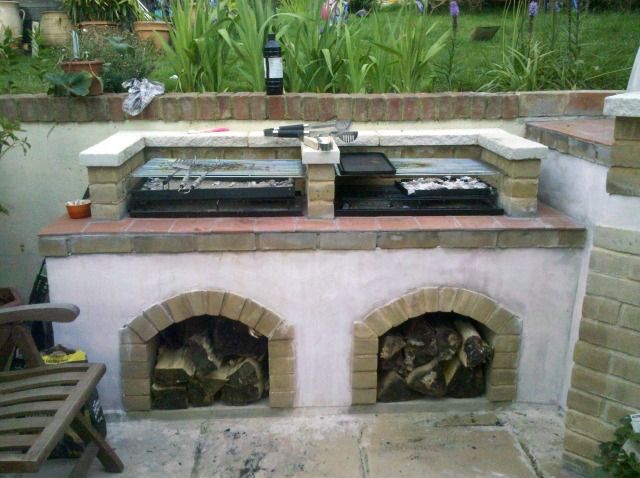 One side for meat products 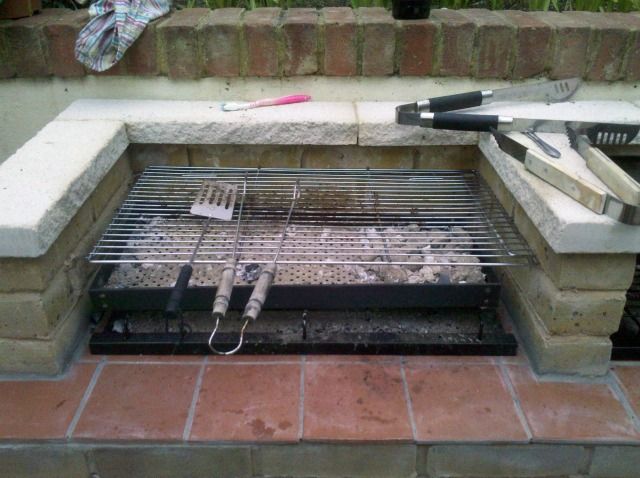 And the other for vegetarian stuff 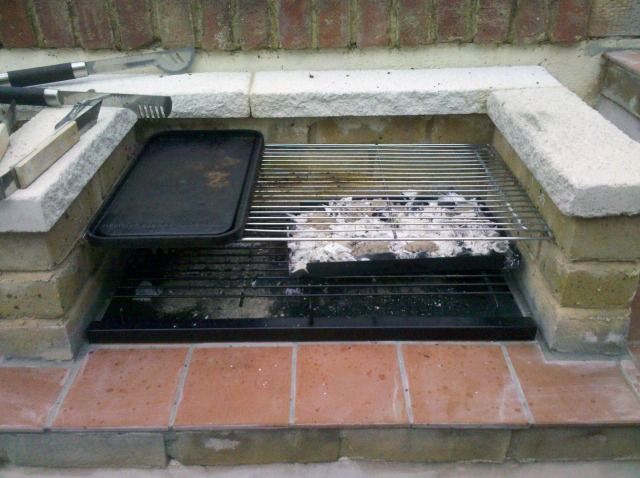 |
|
|
|
Post by faz on Aug 5, 2012 20:43:23 GMT
And finally, pictures of the door I made for the oven. It is made from a double layer of inch thick oak which has been finished with danish oil. I haven't used it with a hot oven yet so I am not 100% sure how it will perform. All the screws have been put in from the outside with the intention of minimising how much heat will travel up the screws. I have to admit to taking some inspiration from scottme's door which he posted in the 'Building an oven door' part of the forum. 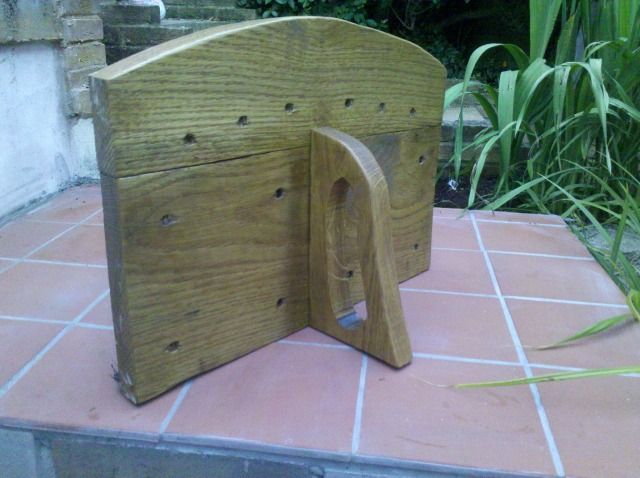 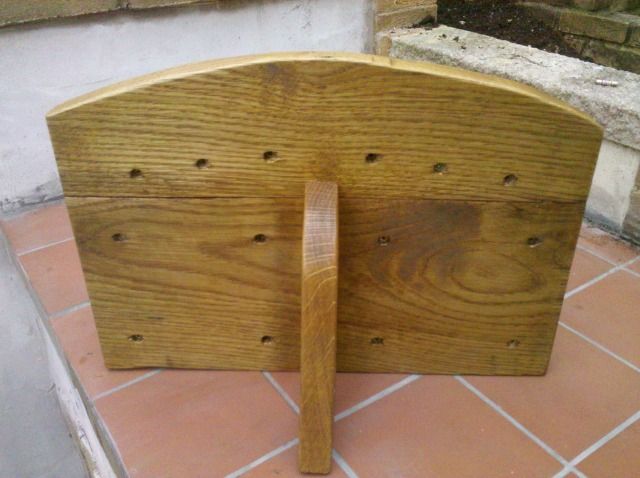 And the rear, with rope seal glued in place. 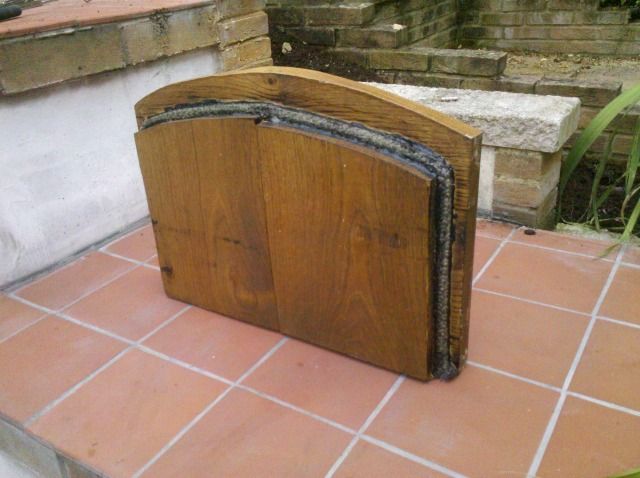 |
|
|
|
Post by rivergirl on Aug 5, 2012 20:48:43 GMT
just loving this build !!! as obviously your daughter does as well !!!!
|
|
|
|
Post by faz on Aug 5, 2012 21:01:47 GMT
Thanks rivergirl. Also forgot to post these pics of the oven's first proper firing, and the obligatory pic of the first pizza, from a few weeks ago before the rendering was done. 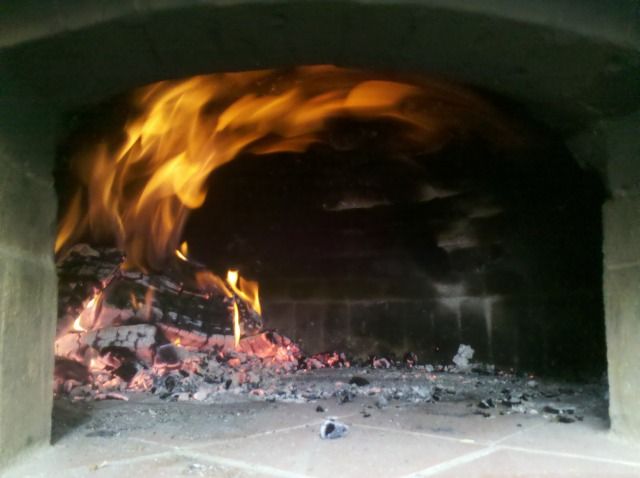  First pizza, complete with grubby little fingers waiting to grab hold of it 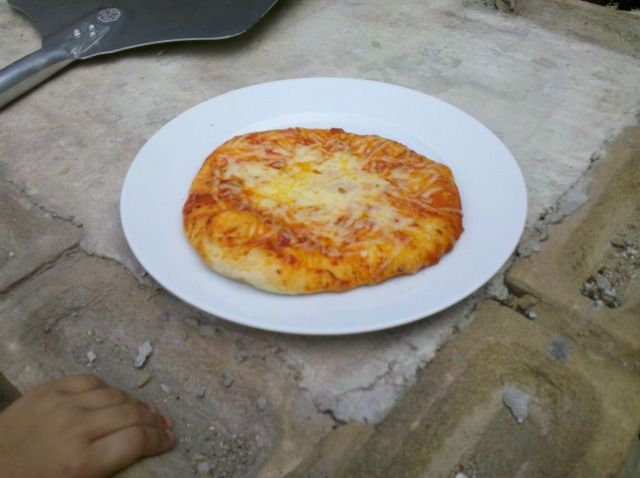 |
|
|
|
Post by cannyfradock on Aug 6, 2012 10:32:10 GMT
Faz......brilliant!!!
Love the pics......especially the "flowing flame" pic. Nice to see you've christened the oven.
Terry
|
|


