|
|
Post by garyou on Jun 3, 2012 9:21:15 GMT
Update 03/06 First proper fire lit yesterday, oven took much longer than I anticipated to warm, hopefully these times will improve. Cooked pizza n chicken and also did a blind taste test, same pizza base/sauce/toppings one cooked outside and one inside in the kitchen oven. Everyone could easily tell and favoured the outdoor cooked pizza. After two or so hours smoke appeared to be coming out from under the insulation blanket (haven't rendered yet in case the was a fault). However this turned out to be steam from the gobbo moisture. Where does the door want to go when I make it, between the chimney and fire or before the chimney just in the entrance to the oven so smoke etc can still escape?   oops stone and strimmer come together cutting the grass ready for the firing  |
|
|
|
Post by faz on Jun 3, 2012 9:40:02 GMT
Your door needs to go between the oven and the chimney, so you can use it to stop heat escaping from the oven - which wil be necessary if you want to do any baking or roasting. You can also consider a decorative outer door to keep the weather out, I am toying with the idea of doing this but not 100% if it is worth the effort!!
And looking at your last pic - OOOOOOPPSSSS!!!
|
|
|
|
Post by cannyfradock on Jun 3, 2012 10:04:28 GMT
Gary
Brilliant job......and another different individual design of achieving the same result.
I would use the double thickness of the blanket if you have it. Vermecrete seems to me the easiest option to finish the thermal layers......it dries to a hard crust which cab rendered with waterproof render.
Vermecrete is difficult stuff to use. The best method I have found is to empty a bag of vermiculite into an empty one ton jumbo bag....add half a bucket of water, mix well and leave overnight. The following day add cement and more water if needed ...then use.
Terry
|
|
|
|
Post by surfingspider on Jun 3, 2012 10:56:21 GMT
some people have two doors, one as faz says is your baking door that is between the oven and chimney. Get the best fit possible so heat is not just leaking out of gaps (if you are going for only one just do this one). The second door is a firing door between the chimney and entrance (and heat proofed). you use the firing door when you are lighting the fire to let in air at the bottom of the door and direct smoke up the chimney better. Apparently it can get your oven up to temp faster and dramatically reduces the smoke produced in early stages (my neighbours would like that). When you fire without a door you can see a line where smoke is coming out and air is going in. a bit of wind can disturb that divide and it the fire doesn't burn as well. I wish I had left space for this style of chimney myself.
This guy is talking about cob ovens but it is the same principle. he talks about fire doors and explains it a lot better than I ever could how well they can work. The interesting bit starts at about 1m48s. The flames licking out the top are very impressive!
|
|
|
|
Post by cannyfradock on Jun 3, 2012 12:35:32 GMT
Gary....I missed your earlier post..... There will still be a LOT of moisture in your oven.....I normally recommend 2 weeks of curing firing, starting small and building up to a full firing. .....Even then it will only be until your 4th or 5th full firing you will see a marked improvement on heating up times and heat retention. If you have put too much heat into the oven too early the mortar may have cracked (don't worry, cracks happen more often than not and don't affect the integrity or performance of the oven)....so you may have seen smoke. If you want "piece of mind" you can remove the thermal blanket and check for cracks....then parge up the crack with homebrew.....if you do this and see cracks larger than 3/4mm then you will know to keep going with smaller curing fires (there's always a lot of moisture needs driving out of these ovens) The door......normally a rebate for the door is created when the opening or entrance arch is built slightly larger than the inner opening, thus creating a rebate... 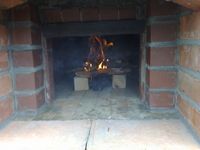 ..... ..this is a photo from Dave Beasley's build.. www.gardenoven.com/ ....he has hundreds of photo's on his blog. If a rebate isn't created when building the oven, then a piece of angle iron can be drilled into place either side to create a rebate. If the chimney is situated inside the oven then a damper system can be installed in the vent.......a damper system can be bought incorperated within a flue liner....or with the use of an angle grinder or a 6mm drill bit you can create a sleeve in a brick chimney for a sliding damper. Terry nb....A general guide on Pompeii, Barrel/Vault and Cob oven construction is well overdue at the top of our home page....I shall create this over the next few days. |
|
|
|
Post by garyou on Jun 3, 2012 13:06:08 GMT
It was definately steam, it had the damp gobbo smell plus it started to condensate in the chicken wire thats wrapped around the blanket (2 layers). After 3 hours the entire barrel was steaming away.
Had a good look inside, can't see any issues.
I only had a 300'c over thermometer, held if for a minute or two in the top of the oven, the needle went off the temp scale and then glass cracked so there were some decent temps.
I lit the fire in the wrong place, just inside the oven opening. This caused the oven to choke itself as the smoke couldn't get past the fire so the oven filled with it. By pushing it to the back the temps were much better and air entry and smoke exit were much better balanced.
|
|
|
|
Post by garyou on Jun 3, 2012 20:44:54 GMT
the shopping list for the project (includes footings) so far, just the render to go.
20 bags wickes all in ballast (very cheap if you buy 10 or more), used 23 but 20 would suffice
10 M8 1m threaded bar (set in the concrete under where the walls were going) - Toolstation
7 25kg bags cement (again wickes very cheap if you buy 5 or more)
10 25kg bags building sand (ditto if you buy 10)
1 bag hydrated lime - Travis Perkins
1 bag fire clay - Kilnlinings
1 100ltr bag vermiculite - Travis Perkins
50 7n concrete blocks - bought through ebay but delievred by my local Jewson merchant
2 wickes 1.2m pre stressed concrete lintels
20 class B engineering bricks - wickes
150 facing bricks - Wickes
80 solid class b engineering bricks - Travis Perkins
6 600mm x 600mm x 38mm pavcing slabs - Wickes
10 stretcher 3.1 bricks for chimney shoulders & arch shoulders - Travis Perkins
1 Catnic single leaf 1200mm lintel (cuts into 2 x 600mm for wood storage opening) - Travis Perkins (25% cheaper than Jewsons who didn't stock it)
1 roll 100mm x 30m DPC
32 x Fire bricks 42GD - 230 x 114 x 76mm - Kilnlinings
1 x CF Blanket 1260GD - 7.32M - 610 x 25mm (Density 96kg) - Kilnlinings
1 x Screwfix 25mm chicken wire 6m x 0.9m
|
|


