|
|
Post by victor on Feb 13, 2012 5:05:18 GMT
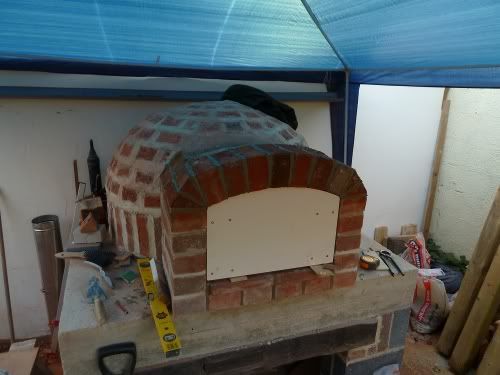
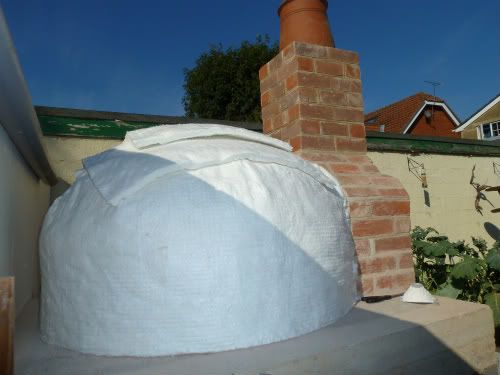
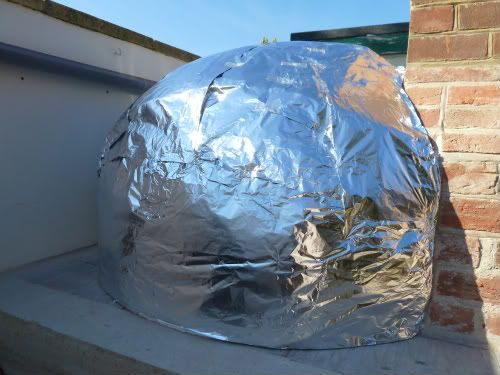
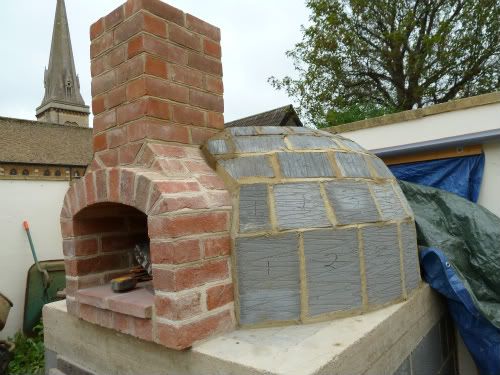
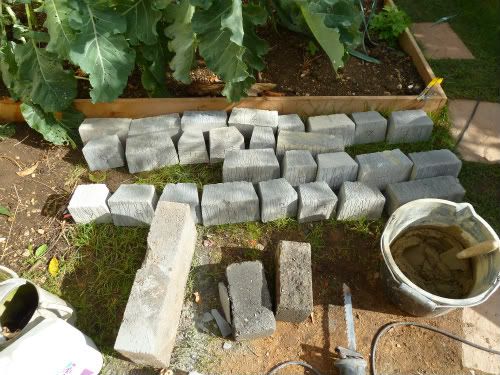
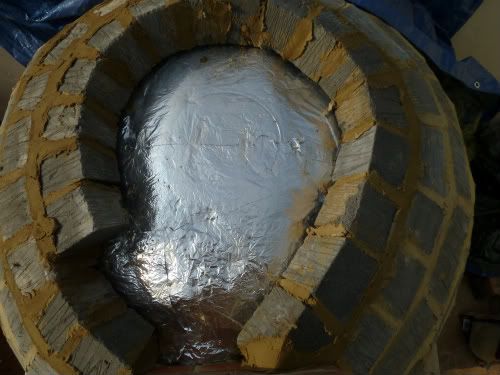
I have made quite some headway with my Pompeii oven build, and I thought best to give you all an idea of how things are progressing. Cost has been kept down with the use of reclaimed bricks and some terracotta tiles I had for the sole of the oven, these were laid on old red bricks. I did splash out twenty five pounds on the old oak beam for the lintel, which I will leave exposed after the render coats. The base slab is an extension of some existing concrete that was already down no rebar and just one skin of blocks to sides and back, adequate in my view given that the ground is solid (ex lorry park) and the oven in it's self is not going to have a brick work enclosing it all. Using old bricks has been tiresome with all the cleaning and sorting, they do have a slight frog to them but should be ok. Once the dome is complete, I hope to use a 25mm layer of body soluble blanket for insulation and that will also to allow for some movement, before thermalite blocks are cut and laid to the shape of the dome. Then final render coats are applied. I am a very slow at typing so please do not expect quick fire answers, but I will do my best to answer any questions that may be asked. To add I do have building trade experience and my brick work is fair with some talent in associated trades, some would call me a jobbing builder. I like to think I am something of an artisan trying to preserve a variety traditional skills. 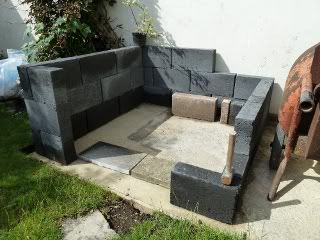 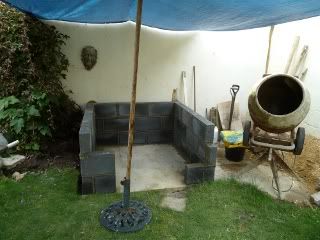 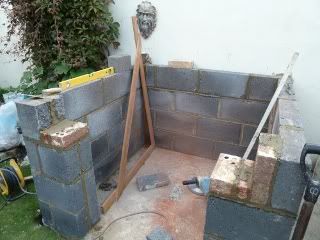 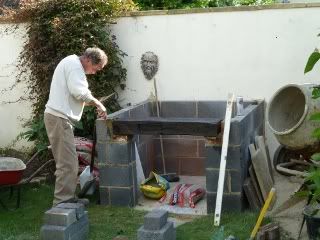 Blocks pre cut ready for laying and tarpaulin put up more to keep the sun off, than rain. 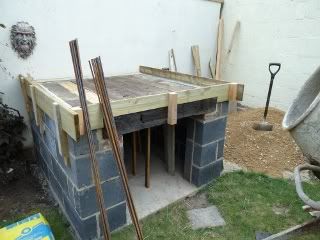 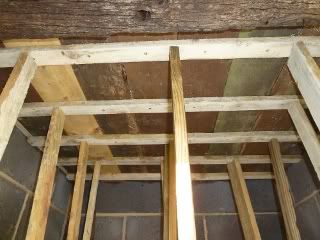 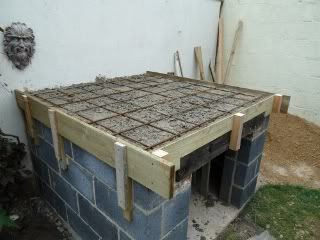 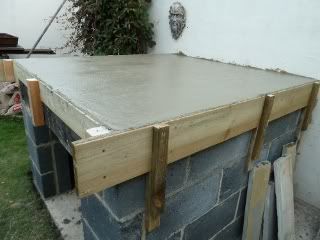 Shuttering in place with 10mm rebar cut to length half filled with concrete then rebar at 6” centres, then more concrete to finish with plenty of tapping on the shuttering to settle the concrete 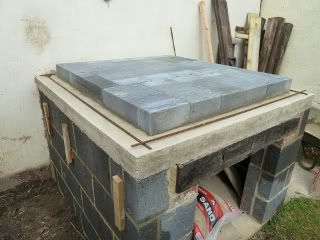 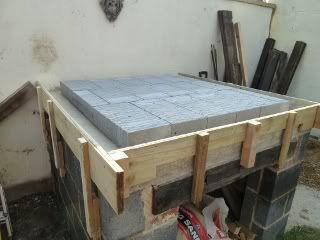 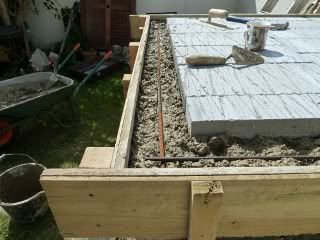 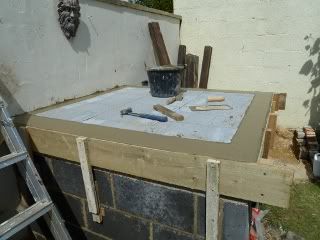 Thermalite blocks laid for insulation with a rebar and concrete ring Next episode soon. Vic |
|
|
|
Post by victor on Feb 13, 2012 6:22:20 GMT
Hi Turkey
Yes all the base will be rendered with rounded corners and no sharp angles. I will knock off the corners to achieve this. I will be leaving the beam exposed and adding some rustic doors for the wood store.
The green Man on the wall has always been there as he represents fire amongst other things so I thought it best to leave him there for the time being.
Vic
Turkey
The good wife says why do I always take the difficult option, but that is just me always looking for a challenge,
the oven certainly has been taxing especially trying to do it on the cheapish.
Terry
As you say I hope to cover over the insulation using light weight blocks cut into quarters and hopefully not crushing the blanket in the process,
I may need some sort of spacers but I am hoping that wont be necessary
Hi Tapir
Yes it is going to be a good size wood store, it was an important part of the build to have the storage
for logs. I was going to have vents on the sides to aid air circulation but it was going to be too much faffing about to cut the blocks
and I was unsure how it would fit in with the design. I probably still will have vents but use a core drill for ease, but we will see.
|
|
|
|
Post by victor on Feb 13, 2012 6:32:01 GMT
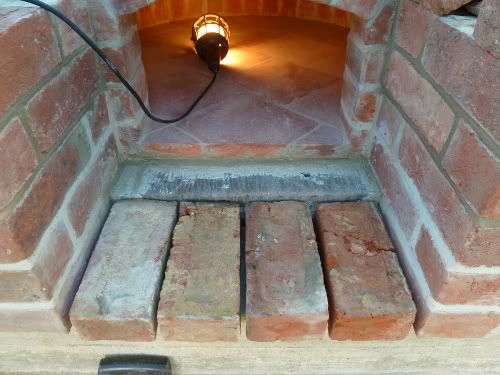
It is going to take some posts to get you up to stage I am at the moment but here is my second stage of the build. The old red floor tiles I have used for the oven base marked out for cutting, these will sit on top of a layer of bricks to give thermal mass it is the only part of the build that I have some concerns with in that the mortar layer between the two will hinder heat flow. 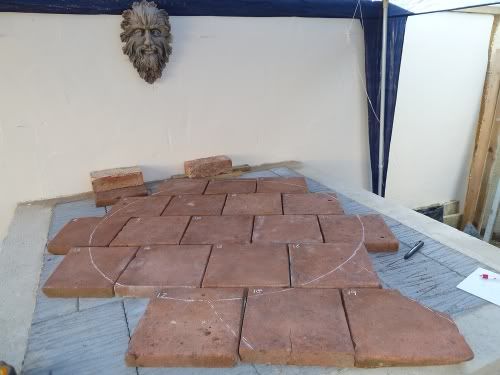 Tiles marked out, it was to give me some idea how the lay out would work 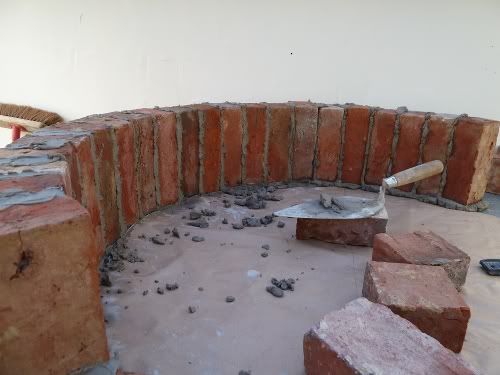 Soldier course started I used a thick brown paper cut in a circle for template 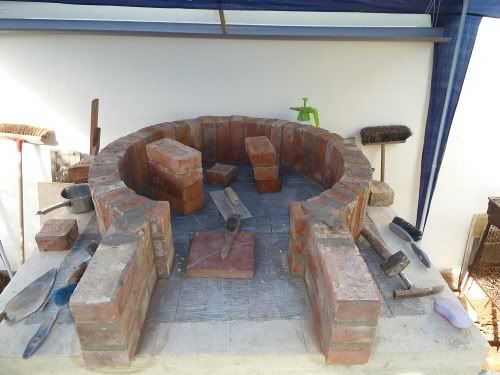 First course complete with landing entrance, If I did another build I would leave the landing brick work to later, it gets in the way for working on the dome  Hearth bricks laid ready for tiles 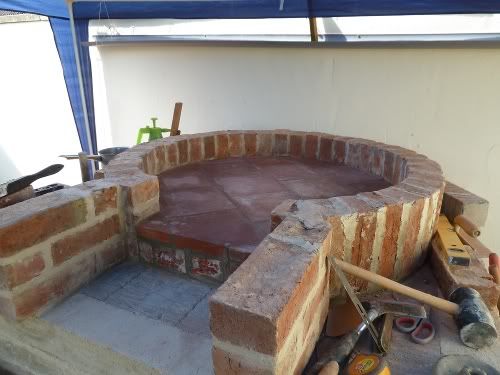 Tiles laid with a thinnest bed I could get, not that easy with the old bricks, all tiles round the edge were cut using templates. Vic |
|
|
|
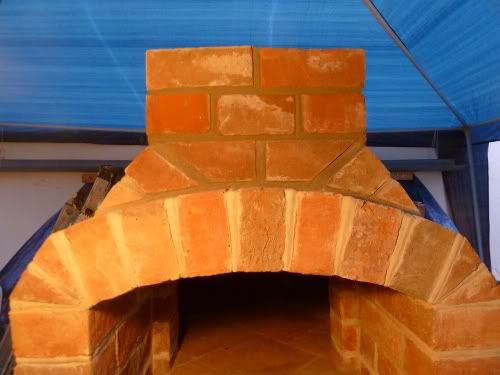
Post by victor on Feb 13, 2012 6:58:10 GMT
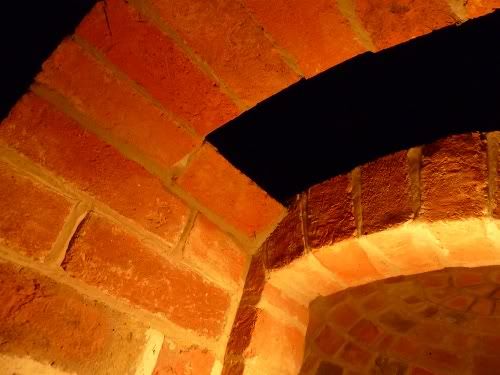
With the soldier course complete I start on my first course proper. Made myself the indispensable tool, but to be honest most of the time I just used it as a guide just to make sure I wasn't too far off with each course. I needed to adjust it progressively with every other course or so by 0 .25” to get my required dome hight of 16.5” for the 36” diameter oven. On my second course I did need to think about my entrance arch, aiming for a reasonably shallow arc. 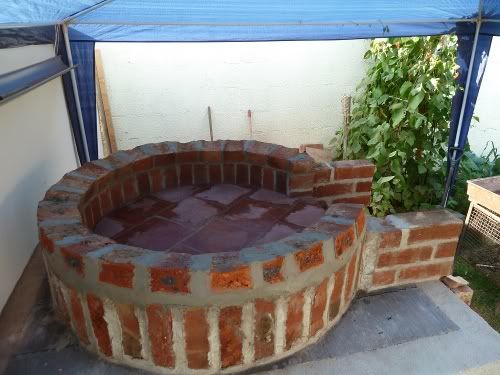 First brick course 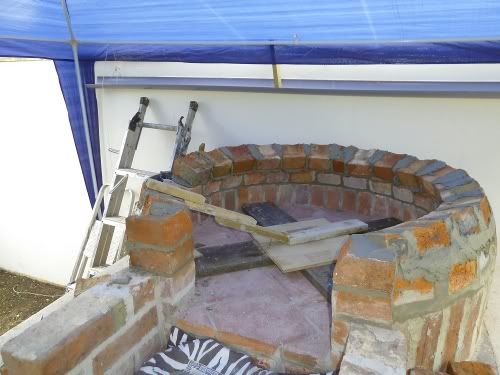 Third course nearly complete 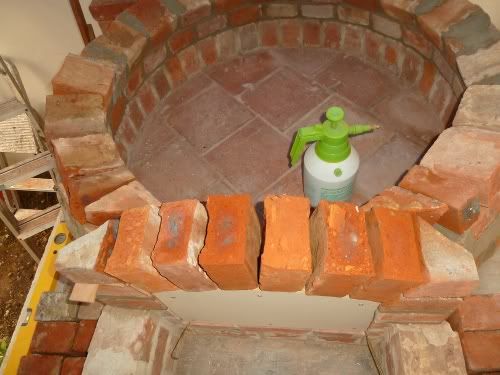 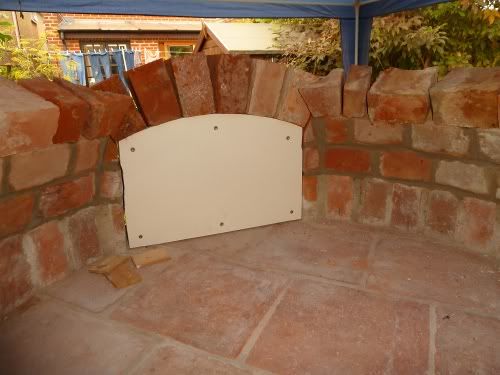 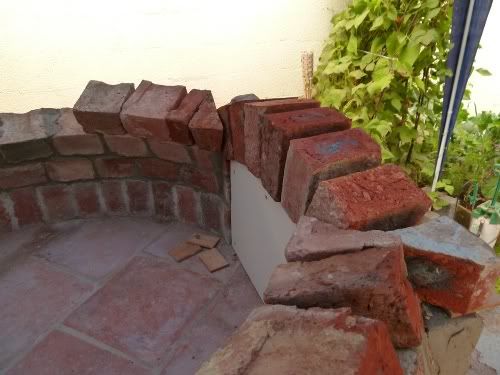 Here are some photos of the arch mock up, at the highest point it is 10.5” 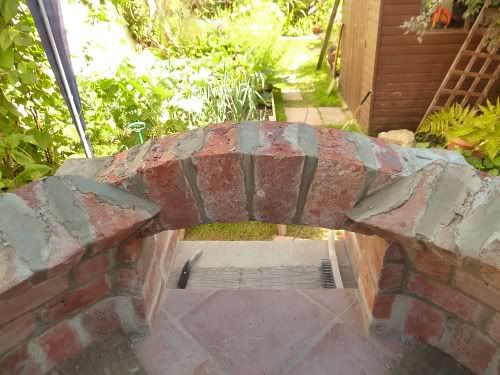 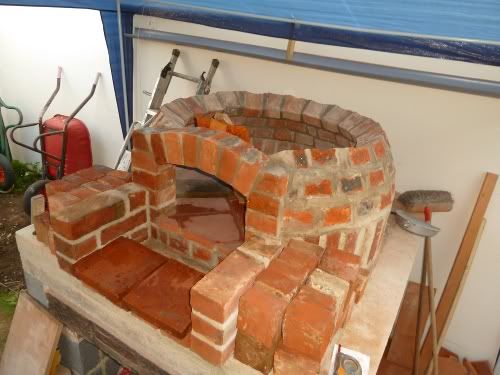 Third course complete with arch. More to follow. Vic |
|
|
|
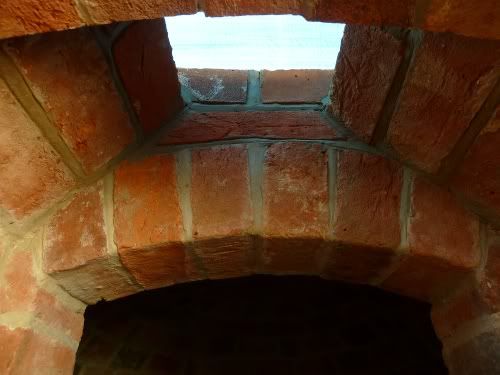
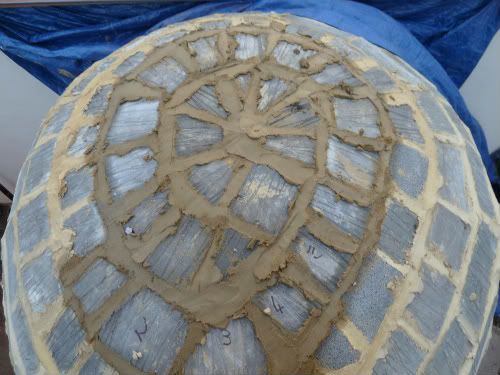
Post by victor on Feb 13, 2012 7:12:26 GMT
It was at this point the dome took on a mind of it's own with regards to shape, a lot of this was due to the transition from dome to arch and the way I went about it. I have already said that I only used the indispensable tool for rough brick alignment, you can see from the photo my three cut bricks I used for the transition, the centre one is cut like a key stone so it can not fall out. 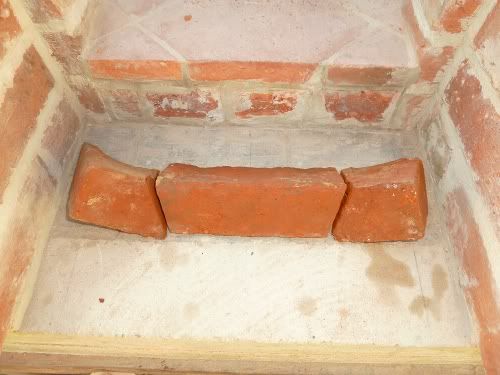 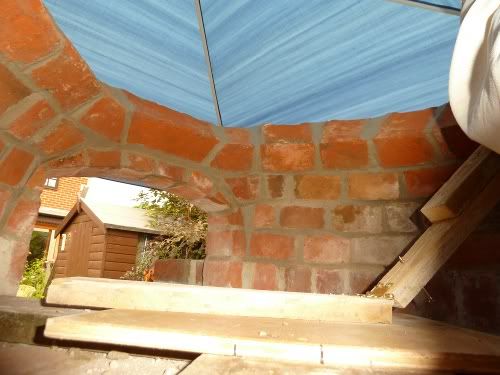 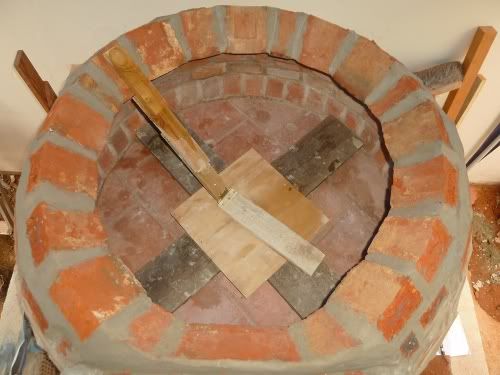 From this top view you can see that I am getting something of an egg shape, not the end of the world as I was originally was going to build a Quebec oven that has that type of shape. Or you could call it a beaver tail of sorts. 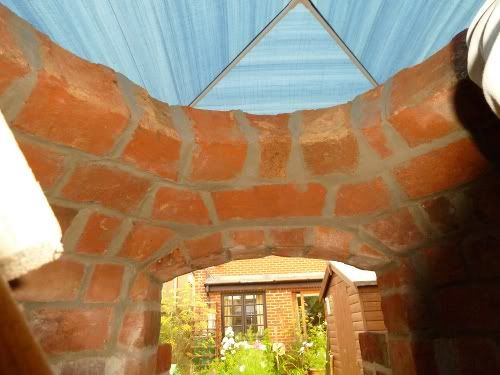  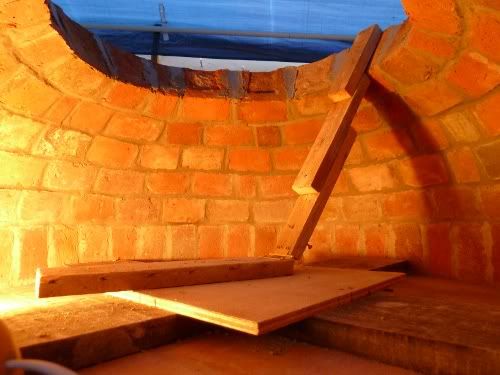 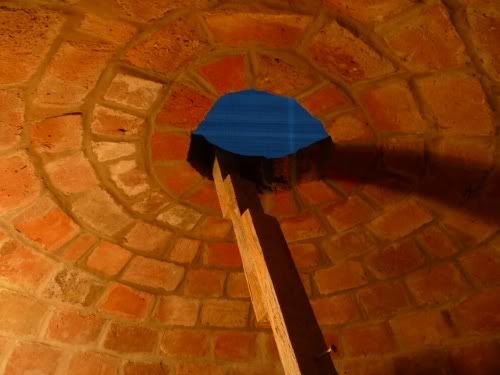 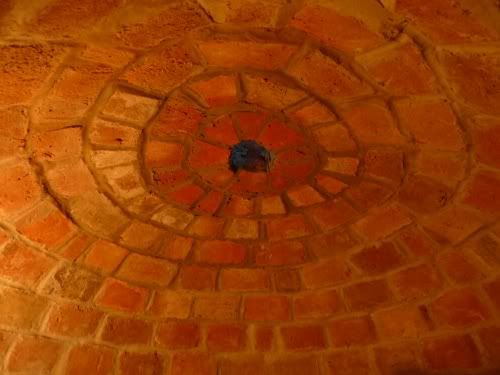 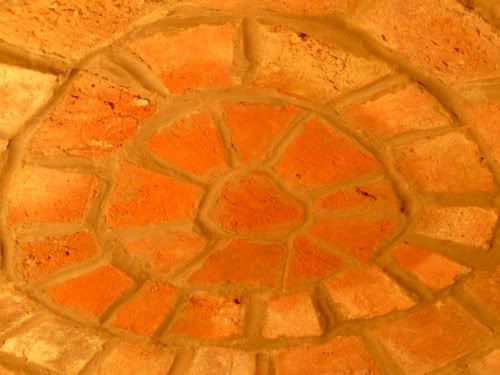 Next post I hope to get you all up to date. Vic |
|
|
|
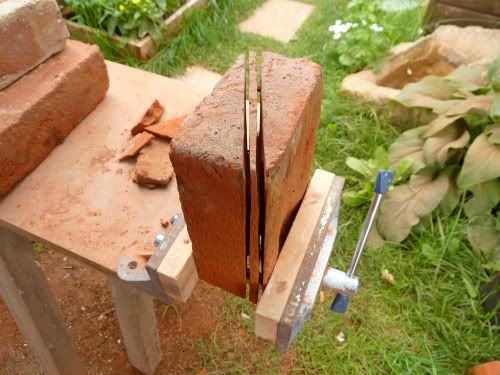
Post by victor on Feb 13, 2012 7:24:35 GMT
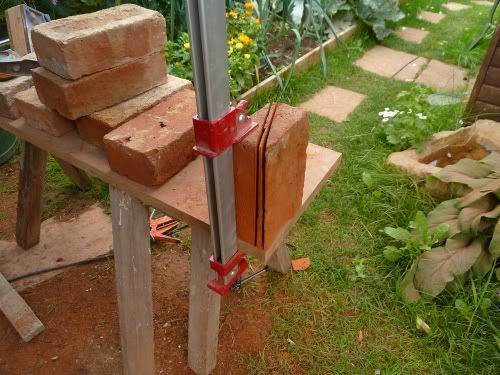
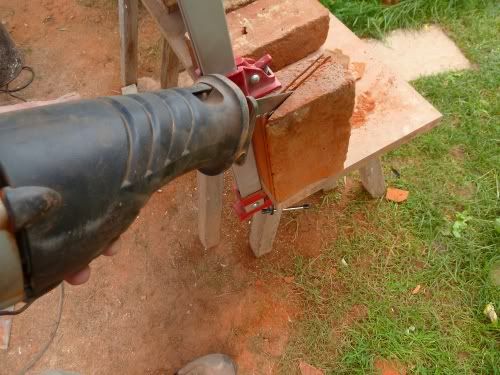
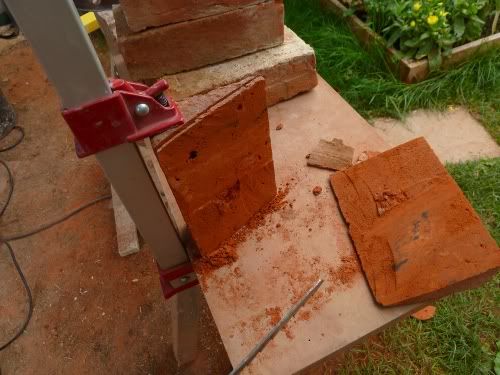
The bricks I am using are hand made, they are not the later wire cut type which are also fine for an oven build, both are considerably denser and heaver than modern bricks. But there are a fare amount voids in the bricks I am using, hopefully they are up to the job. But I only paid 35 pence each as opposed to 60 pence from a reclamation yard. If I was buying bricks again I would split one and see how the inside looked. Here is a photo of a cut brick, you will see what I mean, they are made up of all sorts. 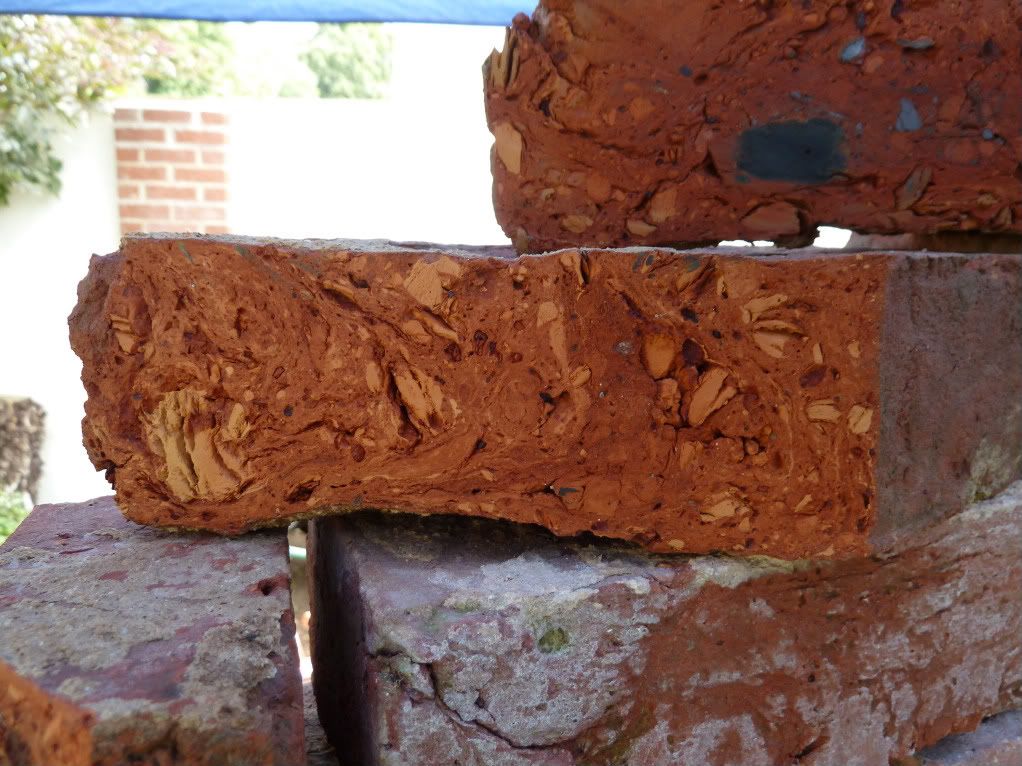 |
|
|
|
Post by victor on Feb 13, 2012 7:35:57 GMT
|
|
|
|
Post by victor on Feb 13, 2012 7:40:50 GMT
|
|
|
|
Post by didwri on Feb 13, 2012 12:04:19 GMT
Something like this would be great for us.. thanks you for sharing the details.. lovely work
|
|
|
|
Post by victor on Feb 13, 2012 20:13:11 GMT
Something like this would be great for us.. thanks you for sharing the details.. lovely work It has been some time in the making, but I am pleased overall with how it has turned out. There is still some way to go with a fair amount of work in redesigning the whole garden. |
|
|
|
Post by victor on Feb 13, 2012 20:18:14 GMT
|
|
|
|
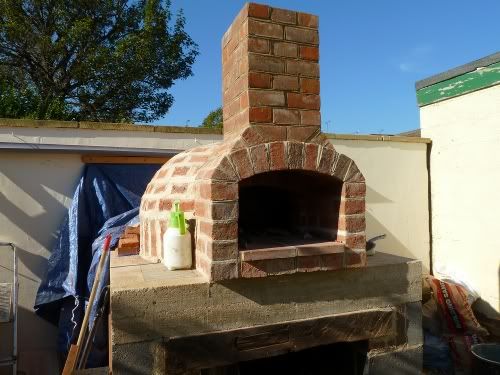
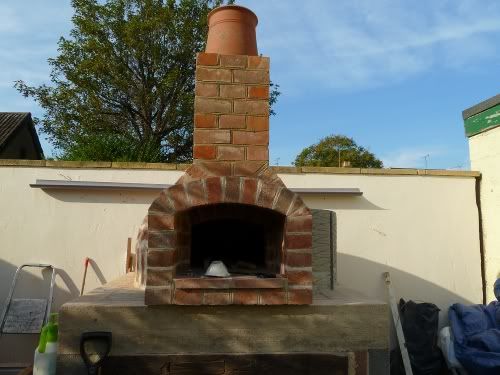
Post by victor on Feb 13, 2012 20:28:39 GMT
Work has slowed somewhat on the oven due to the weather and being in two minds about how to keep the oven dry. It would be nice to have a roof over the whole lot and have a bit of shelter from the elements for the cook. I have considered a pitch roof made of cedar shingles, flat clay tiles or slate whilst trying to keep the whole thing from looking top heavy. The other options I have thought of is to use Mira tanking membrane, it is a latex coating that has a temperature resistance of -20c to + 120c and either apply this directly to the insulation blocks and then render and leave as is, or render then apply membrane and with a mosaic design finish. I know you can tile over the membrane but I don't know if it will take render. I have heard that you can dust with sand when still tacky and this will give more of a key for the render, but I have yet to find somebody that has tried this. But oh joy, I have fired the oven and I have been blown away by it's performance and a huge relief that the old bricks and terracotta tiles stood up to the intense heat under full firing and I am so glad I spent the time on designing and building the chimney, it works flawlessly. I am one very happy bunny Very Happy  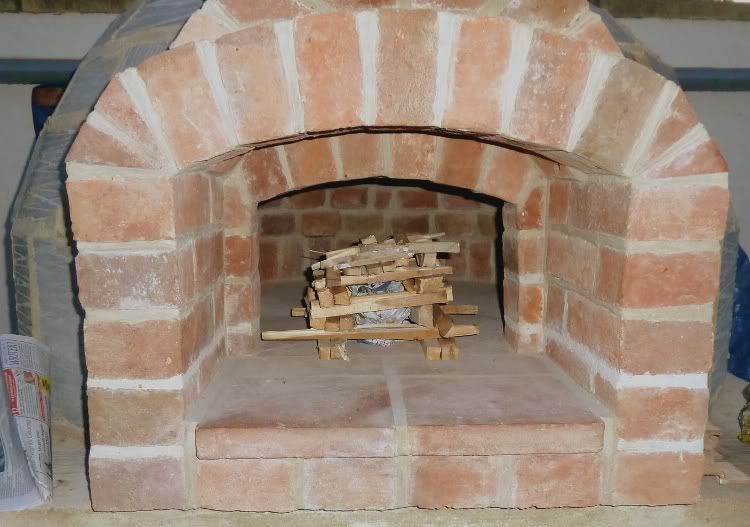 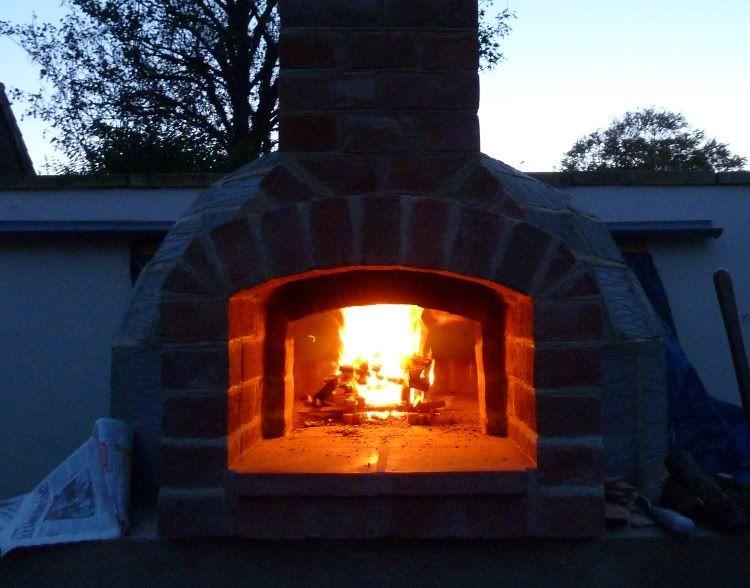 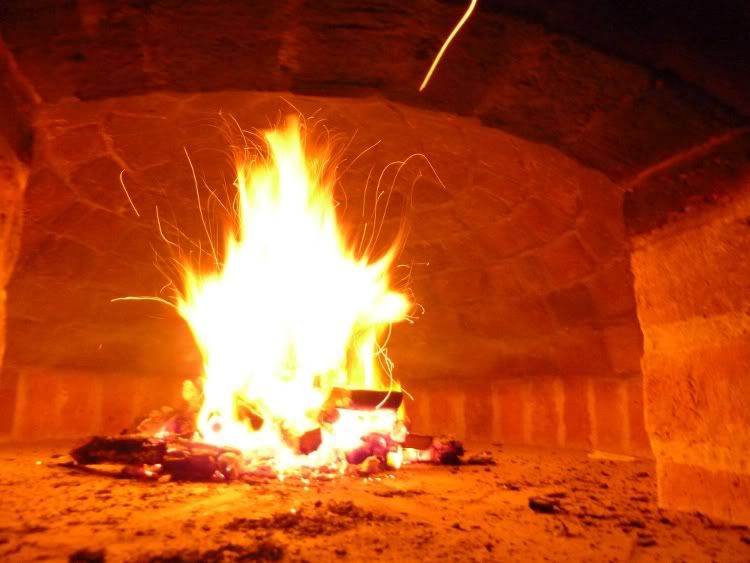  And here is the very first pizza, burnt on the under side but I didn’t care 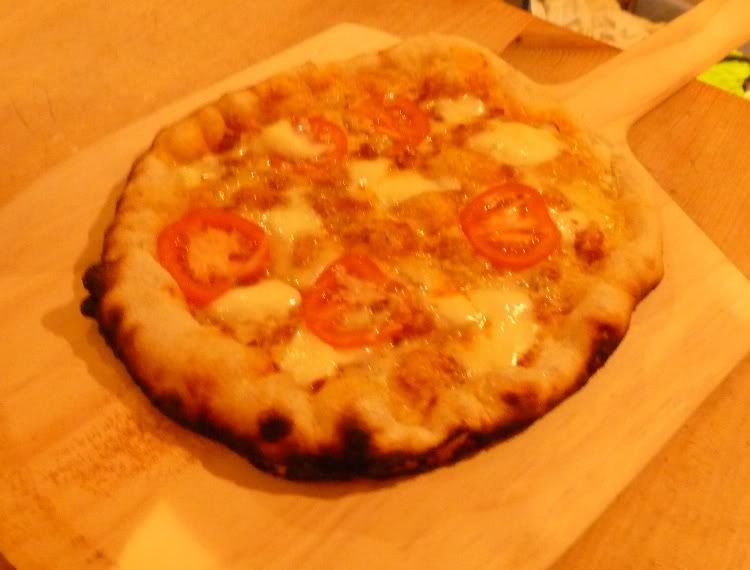 Vic |
|
|
|
Post by victor on Feb 13, 2012 20:51:49 GMT
Thank you for your kind comments. I will be firing up Wednesday this week and will try baking some bread and then refire that evening for pizzas. Can anybody point me in the direction of some bread recipes that uses same flour that I use for the pizzas, it is Italian White Flour - Type "00" from Shipton mill or any easy bread recipes? Victor Thanks for the advice on flour, I used Allinsons strong white bread flour in the end. Fired the oven up at 2pm on wednesday from cold, it took about 2½ hours to get up to pizza temperature. I had readings of just under 500c on the top part of the dome and about 470c on the lower part of the dome and about 440c on the floor. 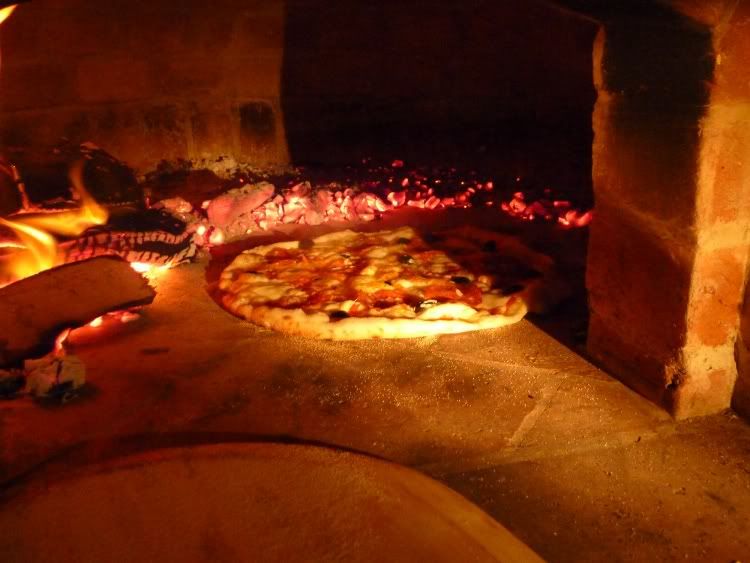 The bread went in 1½ hours after cooking the last pizza just a bit too soon for the bread (oven too hot) my timing was out on the dough rising and getting it into the oven at the right time. It had more than doubled in size and it collapsed on the way to the oven. After only ten minutes of cooking it looked like this. 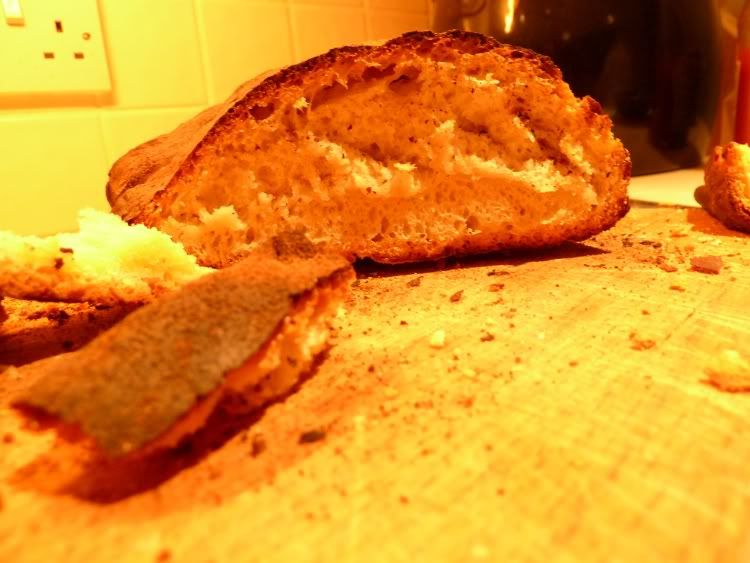 After 3 hours of the oven cooling down I tried a small loaf made from the left over pizza dough, to my surprise it turned out quite well something like ciabatta I believe. 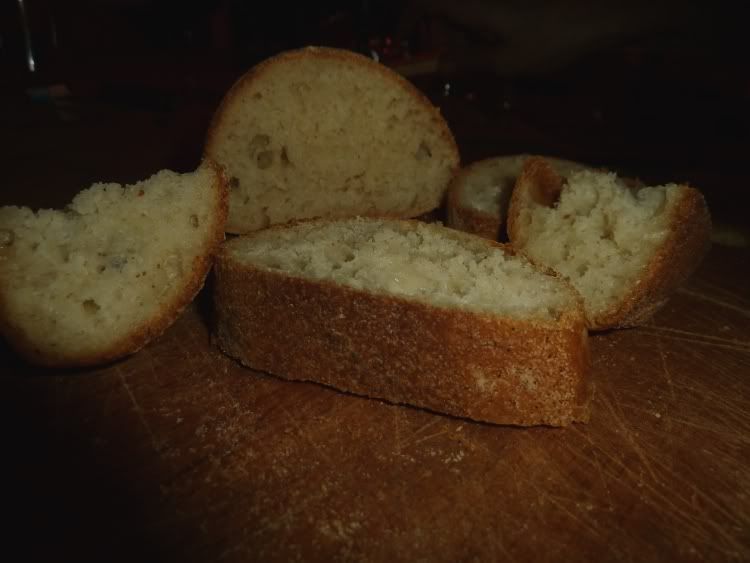 Vic |
|
|
|
Post by rivergirl on Feb 13, 2012 20:54:14 GMT
such a brilliant build and I know you have to but what a shame to cover up all that beautiful brickwork !! I bet that pizza went down a treat 1
|
|
|
|
Post by victor on Feb 13, 2012 21:04:01 GMT
Mods, not sure if I put this thread is in the right place it's half archive half ongoing?
Vic
|
|


 ? in leccy and gas ovens it's 30 - 40 minutes at 220 deg C but WFO I've no experience.
