mm289
valid member

Posts: 26
|
Post by mm289 on Jul 4, 2019 20:26:09 GMT
Hi, as per my intro we are building a pizza oven and BBQ to go on our new patio. Decided to go with the Milano 750 from Pizza Oven Supplies having read truckcab79 and webbm00 threads on here  . This is the area where we are going to build the oven and BBQ

I have dug a couple of trench foundations and filled with concrete about 150-200mm deep.
And a pic of the patio itself
I am building my own base out of blockwork which will be rendered to match the house. Started by mocking up the blockwork to get the heights right.
Floor of the oven should be about 1150mm or thereabouts based on the measurements I have taken so started knocking up the blockwork. End of day 1 (ish) and blockwork in place.
At this point I took the plunge and ordered the oven kit, just shy of £900 incl delivery, VAT and a few extras. 
More to follow.......
Cheers,
MM
|
|
|
|
Post by webbm00 on Jul 4, 2019 20:49:38 GMT
Don't finish it too quick or you'll be the second Milano 750 to start after me and finish before me
Good luck and enjoy the journey. I'll watch with interest
BTW whats the round brick and flint structure for? It's a nice bit of work
|
|
|
|
Post by truckcab79 on Jul 4, 2019 21:15:25 GMT
Very nice. Look forward to following your build. Just packed mine up tonight as it happens, after knocking out a quick 9 pizzas. I’m sure you’ll be very impressed with the Milano. I can’t fault mine.
|
|
mm289
valid member
Posts: 26
|
Post by mm289 on Jul 6, 2019 21:36:06 GMT
webbm00 we have a rainwater well that used to be the domestic water for the farmhouse many moons ago. As part of the renovations we have re-instated the supply from the roof run off and sorted a land drain for the oevrflow as it is brill for watering the garden etc. The last bit was to build a wall around the opening and we had saved some flint so it could be done to match the brick and flint wall on the back of the patio. truckcab79 - looking forward to getting cooking, been waiting for this for a year now! Cheers, MM
|
|
mm289
valid member
Posts: 26
|
Post by mm289 on Jul 6, 2019 21:48:22 GMT
Pizza Oven kit arrived on pallet as promised week ago Friday, had planned a weekend build and had my lad back for the week to help with heavy lifting. Unfortunately the pallet had been bashed in transit and one side of the dome was broken  The wooden slat was shoved back in so either caught on a corner when being moved or clouted with a forklift when passing. So that put a bit of a spanner in the works, but to be fair to the supplier I rang them at 1:00 on the Friday it arrived and a replacement was delivered Monday morning! So over the weekend we got on with the base. Followed the basic approach outlined in the build instructions with 200mm lintels as beams across the blockwork (which conveniently has been laid 1200mm wide ) On the back wall I laid some additional bricks to raise to the level of the lintels. These then have some 400mm slabs laid on them left over from the patio. Would have been easier to use 600mm but I already had these so just cut to size.    The slabs don't go the full width as there will be a serving area infront/around the oven and the blockwork will need raising to this level, but I will do that once the final levels are confirmed having learnt the lesson from Truckcab's great post  Next up was laying the oven floor. Allthough the oven parts are cast in a heat insulating mix of cement, refractory materials and "stuff" which is quite soft it weighs a ton!
Dry laid the floor first and mocked up where the door and oven bricks will go. Then laid on a bed of mortar mixed dry'ish so it doesn't all squidge out with the weight and then levelled.
Had to wait for that to go off so the next day did the "big lift" and got the rear half of the dome on. Circa 70kg lift and awkward because of shape and weight distribution.
With this in place and one of the side sections on could then lay out the fire bricks which now come pre cut from the supplier which is great   Laid these on a very wet mortar mix and tapped down to make them level leaving a consistent gap around the outside. Then all left to dry out whilst we go for beer Cheers, MM
|
|
sean
valid member
Posts: 63
|
Post by sean on Jul 22, 2019 21:11:57 GMT
Looks great so far.
I have ordered the same kit and will be delivered Friday.
Can't wait
But then go away with work for 2 weeks
|
|
mm289
valid member
Posts: 26
|
Post by mm289 on Sept 4, 2019 19:16:58 GMT
So, about time I updated this - it has gone from one of the quickest builds to one of the slowest due to holidays, other building projects and rubbish weather  Still - the last time we were here I had put down the firebricks so the next step was to trial fit the dome. This is quite heavy and the downside of the 4 piece construction is the chimney section rests inbetween the two sides so it can't all just lean on each other so easily as a 3 piece. So, took advantage of my son still being around and made up some supports to help hold it all in place whilst we fiddled   The chimney has rebate that slots in-between the two sides and is then supported by the thicker flange that sits on top of the side
The fit wasn't too bad and after a bit of fettling we got the edges like this  The challenge is, you then have to pull it all apart to seal up the mating edges  . The kit comes supplied with a tube of hi temp sealant which we used on the mating surfaces. It was quite "dry" though so once we re-assembled didn't really seem to be filling the gaps really well so popped down to Screwfix and bought another tube of Mapei 1200 deg high temp grout. this seemed to flow a lot better and I used it to seal up the cracks fully. On the final fit we weren't quite as successful as on my dry fit and I ended up with a larger gap on the inside faces than the outside which is probably the wrong way around, but by this stage we were a bit bored of twisting and turning the puzzle pieces . Next stage was to cover all the joints in a strip of render to hold it all together/give another level of seal. Not really sure how successful this was as you will see on the next post.
  Finally, the kit comes with some fire cement and "grog" which is mixed and used to fill the gap between the fire brinks and the dome. I also used some of this to fill the larger gaps onm the inside of the sides of the dome. there is a risk this will ""blow" but I had it there so thought i would give it a try.
So that was the dome and base built 
Cheers,
MM
|
|
|
|
Post by truckcab79 on Sept 4, 2019 19:24:00 GMT
Looks good.
I had similar misgivings about the supplied sealant but to be honest once you’ve applied it and pushed together it can’t really not work. It’s just to create a seal, not to stick them together as such.
For gap-filling which was really only for aesthetics and peace of mind I used some fire cement from screwfix. Cheap, ready-mixed in a tub and applies easily and you can smooth with a wet sponge. I also used it on a couple of bits inside particularly where the dome pieces meet. I fully expected it to drop out but many many fires later it’s still in place. It’s good stuff so if yours falls out and it bothers you then replace with some of that.
|
|
mm289
valid member
Posts: 26
|
Post by mm289 on Sept 4, 2019 19:38:23 GMT
Having left the render and cement to go off we then lit a small warming fire just to check for leaks and see what happened. We got a small crack all the way round the vertical rendered joints just from the expansion of the dome I reckon. At this stage we got kinda busy so the dome was covered and left for a few weeks. I wanted to get on with the insulation layer so a couple of weeks later started on that. Having read stuff on here about the dome absorbing moisture and that being a problem as steam tries to escape through the insulation layer i decided to dry the dome out by lighting a more robust fire in the oven. This went up to about 330deg in the roof areas, 250deg on the sides and 150 on the base according to my IR thermometer. You could visibly watch the dome changing colour as it dried out. This stronger heat also exposed some of the cracks a bit more and you could see steams coming out of some of them.
Once it had all cooled down I raked out the render where it was cracked. As suspected the original "silicon" sealant had not seemed to do much at all so I filled the gaps with fire cement instead. To be fair when I say it had cracked it still wasn't loosing masses of heat through the cracks and the dome didn't get much above 40-50deg even when the fire was at its hottest so I am thinking the dome must be doing a pretty good job of insulating. Next up was to start on the insulation layer. The instructions talk about an optional foil layer first and again I know from reading on there are differing views on how useful this is. Particular concern is what happens if steam tries to escape through this layer and that is why i made sure the dome was fully dried before applying. The foil was wrapped around and taped in place using aluminum ducting tape and we suddenly had a small space station in the back patio ![:o]() After this the insulation layer itself is laid on by cutting the blanket into wedges and squares. Its kinda fiddly but I found it helped to get the squares on around the base first and then hold these in place with a ratchet strap before trying to fit the wedges over the dome. I also ended up cutting the wedges a little sharper that the diagram (narrower at the top) to make them fit - maybe a slight change because of the 4 piece design dome? Next on is the vapour barrier. This comes as a square sheet which doesn't fit the dome in one piece so it was laid over the top first.
I then cut off the surplus and used this to cover the lower part taping the seams together with aluminium tape

The final piece of the jigsaw, because I am going to render over all this, is to cover it in chicken wire. This is quite fiddly, but again I found using ratchet straps to hold it all in place really helped.
And that was the dome wrapped up like a turkey for Christmas - which might be when it is finished by 
Cheers,
MM
|
|
mm289
valid member
Posts: 26
|
Post by mm289 on Sept 4, 2019 19:40:08 GMT
Looks good. I had similar misgivings about the supplied sealant but to be honest once you’ve applied it and pushed together it can’t really not work. It’s just to create a seal, not to stick them together as such. For gap-filling which was really only for aesthetics and peace of mind I used some fire cement from screwfix. Cheap, ready-mixed in a tub and applies easily and you can smooth with a wet sponge. I also used it on a couple of bits inside particularly where the dome pieces meet. I fully expected it to drop out but many many fires later it’s still in place. It’s good stuff so if yours falls out and it bothers you then replace with some of that. Exactly what I did, good to know it is holding fast as I think I will use some of that as my "final" finish on the inside surfaces where I didn't get the "grog" into before I ran out.
Cheers,
MM
|
|
|
|
Post by truckcab79 on Sept 4, 2019 19:41:39 GMT
Yep. Just seen your continued thread. Really nice neat work.
|
|
mm289
valid member
Posts: 26
|
Post by mm289 on Sept 4, 2019 19:58:22 GMT
So with the dome ready for rendering I wanted to get the brick finished sorted before I started applying render to the dome. That way I can blend the render into the brick and also I am going to render the blockwork so can do all the rendering at once. I have slightly varied the design by deciding I wanted the floor brick level to be the same height all the way around the dome so I create one flat surface rather than the oven floor height being above the height of the surround. To accommodate this I needed to build up the walls of the surround with a bit more blockwork. At the same time I constructed a support for the door arch and cut half bricks to size. The brick finishes are being made from the same bricks we have reclaimed from the site that we used for the flint wall and well so that they will match and hopefully make the pizza oven blend in to its surroundings. This is everything mocked up in place, as anyone who has done this will know, cutting all these slips is a very time consuming process!  Once I was happy with the fit I then laid the blockwork and arch. The arch is tied into the chicken wire on the sides with a 10mm gap to the dome. this will get filled with cement/fire cement later and rendered over. It will be interesting to see if this cracks, I expect it will but will just get filled or painted over once a year.
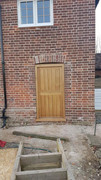
With the arch in place the next piece of brickwork was to create brick pillars facing off the front of the blockwork to surround the opening to the storage area. This will also have an arch over and I will make up a couple of wooden doors to close it off, then when I have rendered the blockwork and painted white we will have what looks like an original brick structure rendered over which is very close to the finish on parts of the C18 farmhouse All this brickwork was done in lime mortar to match the house/well/wall. the door arch was built in cement to aid with adhesion of the bricks and then pointed up in lime to match. Again, all rather time consuming but really pleased with the results. The arch over the storage area is just mocked up at this stage, when completed it will be done in alternating whole and half bricks to match the arches in the rest of the house like the one below.
Cheers, MM
|
|
sean
valid member
Posts: 63
|
Post by sean on Sept 5, 2019 18:25:02 GMT
Hi Mate, Oven is looking great and you are now a few steps ahead of me but you have cleared up a few questions I had about the insulation layer. I also had the same issue with that 4th part of the jigsaw and got board and filled any gas with the same stuff from screwfix. I have cooked a few pizzas already and there was no visible leaks. So what are yo rendering with??? Cheers |
|
mm289
valid member
Posts: 26
|
Post by mm289 on Sept 5, 2019 19:23:34 GMT
Hi Sean, I am just going to cement render it. It seems there are many opinions on render composotion so my plan is scratch coat will be 4:1 sand:cement with the sand being a 50:50 mix of sharp and plastering with plasticiser in. Top coat will be 5:1 (weaker) with the same sand mix but waterproofer added. I will then be painting the render white with Sandtex or similar to mimic a lime rendered wall.
TBH doing it in lime would be easier but it wouldn't be as waterproof as the lime is designed to breath IE let moisture in and out, which wouldn't really work in this application.
Cheers,
MM
|
|
|
|
Post by downunderdave on Sept 5, 2019 20:34:54 GMT
Firing an uninsulated dome is likely to result in cracking as you have found. The reason is that the temperature difference between the inner surface and outer surfaces creates uneven thermal expansion. Too late now so you’ll have to move on. Because the dome is a self supporting structure it won’t fall down so it doesn’t matter that much. Also when eliminating the water, if you see visible steam then you are going at it too hard, you should back off. Regarding foil, my opinion, based on experience, is that it traps moisture, so I no longer use it. I was concerned that it might create a problem, so I perforated the foil in two places to allow steam to pass. Now, after periods of heavy rain, on drying the oven out, the outer shell gets really hot right above where those two places of perforated foil are., indicating steam passing through at those particular points. I suggest you hammer a few nails into a piece of wood and slap the thing silly with it before rendering the outer shell over the top. Some kind of vent in the outer shell is also useful to allow moisture to find its way out. I have incorporated this around the flue in my design, but many builders put one in the apex of the dome.
|
|

 .
.


 . The kit comes supplied with a tube of hi temp sealant which we used on the mating surfaces. It was quite "dry" though so once we re-assembled didn't really seem to be filling the gaps really well so popped down to Screwfix and bought another tube of Mapei 1200 deg high temp grout. this seemed to flow a lot better and I used it to seal up the cracks fully.