barney
WFO Team Player

Posts: 119
|
Post by barney on May 18, 2013 21:33:10 GMT
As promised here are some more pics of the (almost) finished build: From every angle:    Close up details: My embelishment  Firing door  Storm collar 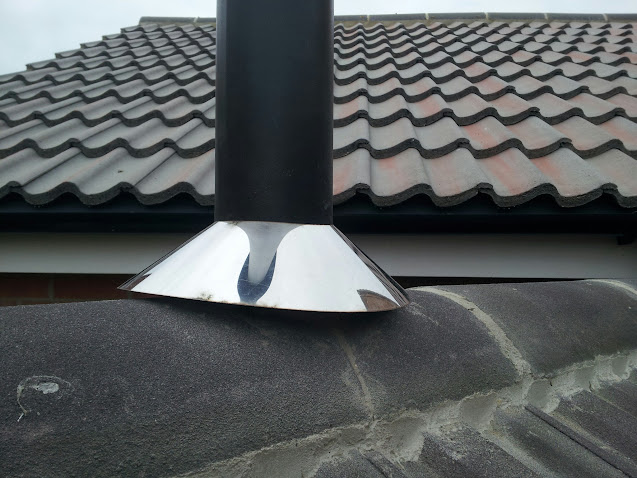 So all I have left is to cover the roof ends, sort out an insulating door and then build the decking that this is all supposed to sit in (not to mention clearing out the wood store!) |
|
barney
WFO Team Player
Posts: 119
|
Post by barney on May 18, 2013 22:04:25 GMT
Firing Day! There was a point when I thought this day would never come, but today was firing day and time to find out if I could really cook a pizza in this thing I had constructed. First I made some simple pizza dough  Just 200g of dough per pizza, working on a 50%-ish mix, so for these three it was: 400g Strong White Flour 210g Water 1/2 tsp salt 10g fresh yeast 3 tbsp olive oil Knead it and divide in to balls, leaving to rise for about 3 hours.  Then I got a seriously good fire going  Peaked out at about 620C according to my antique device (time to start worrying about that aluminium firing door, melting point 660C)  A bit of surprisingly easy dough handling later and: The first pizza from my oven!  Keeping it simple with a margherita to really get an idea of how I'm doing. Too much tomato sauce, a bit too crisp on the edges and not well done on top, but for the first attempt... By the third one I was getting the hang of it, though the temperature was dropping off sharply due to poor refuelling (almost done cooking anyway). I'm afraid this was all that was left by the time I remembered to take a photo.  Cleared all the embers and stuck in a simple wholemeal loaf, but I could have done a month's supply as there is plenty of stored heat with the gauge still showing 220C at 10pm.  Came out beautifully crisp and golden with excellent oven rise and an even bake. Overall very pleased with the first run. A few points to brush up on, mostly around managing the fire, but it has just been great to finally benefit from all the labours and to feel that real sense of achievement as I listened to my Italian wife singing my praises to the in-laws via Skype! Can't wait to fire it up again and start getting some industrial-scale baking going on! We'll see what's left in the morning though, perhaps I can even get Sunday lunch out of it. |
|
|
|
Post by cannyfradock on May 19, 2013 11:18:34 GMT
Barney
Brilliant post....and also love the previous post with pics of your finished oven.
Not only do you get better with each pizza, but the oven will also perform better the more you use it. It may take 4 or 5 firing to drive every last drop of dampness out of the oven but, by that time, you will have gained enough knowledge/oven management to know exactly where best to leave the flickering fire (left side/right side/rear) and perfect the "perfect pizza".
Terry
n.b...When I know my oven hearth is good to go I set a timer to 50 secs ...as soon as the pizza goes in. This is the longest I leave it before turning. 40secs to 1 minute later the pizza is done. If I go a bit overboard with the toppings I simple lift the pizza up to the top of the oven for about 4 seconds to melt any stubborn bits of cheeze.
|
|
|
|
Post by rockrocky on May 19, 2013 14:24:05 GMT
Not only am i impressed with your build but also the website Barney.
Thanks.
|
|
|
|
Post by cannyfradock on May 19, 2013 14:52:10 GMT
...thanks Rockrocky.....until you mentioned it, I haven't really had a good look around Barneys website....wow....I should really pay more attention to members own links in their profile. Barney....what a brilliant site!... www.b4baking.com/ ....spent a good while surfing your site and the video you posted on the "Pizza" section is fascinating. I love the technique of the use a piece of greaseproof paper to ease your pizza into a domestic oven (I'd love to post that video in our video technique's section of the forum....if I may) Many thanks for sharing your talents...... Terry |
|
barney
WFO Team Player
Posts: 119
|
Post by barney on May 19, 2013 17:03:24 GMT
Thanks for the kind comments and the helpful hints, I'm looking forward to practising lots and lots! The results are never anything less than edible. Thanks for the comments on the website too, it could do with some updating, but has always been intended to be a useful resource for bakers and I hope that it encourages people to give something a go. I think I beat you to it with the video Terry, I'm hoping to do a WFO version in the near future to update it. So glad the build has now finished and I can start adding to the baking sections of this site! Look out for some of my favourite recipes getting the WFO treatment soon. |
|
barney
WFO Team Player
Posts: 119
|
Post by barney on Jun 2, 2013 12:59:57 GMT
It's been a busy week putting the finishing touches to my build. A small photo diary of my activities will probably speak a thousand words:    Then yesterday I had my first pizza party (for the neighbours to keep them sweet regarding smoke!). No photos because I was far too busy! But I really hit the sweet spot with the oven and was churning out pizzas of a quality I have not eaten or produced in a long time. Still buzzing from the experience, for all of you still building: it is all going to be worth it! Looking forward to next weekend when my long-suffering colleagues will be coming over for a try, and hoping for lots more good weather this summer. |
|
|
|
Post by cannyfradock on Jun 2, 2013 13:15:10 GMT
Barney
Your post is sweet music to my ears....I love it when a plan comes together. It always gives me a great buzz when I see members finally reaping the benefits of all their hard work.....AND...a great looking oven to boot!!
Thanks for sharing..
Terry
|
|
|
|
Post by rivergirl on Jun 2, 2013 13:51:12 GMT
Stunning!!! I just love it congratulations
|
|
|
|
Post by minesamojito on Jun 2, 2013 16:18:49 GMT
Fantastic, beautiful oven and stunning pizza, makes it all the worthwhile
Cheers
Marcus
|
|
barney
WFO Team Player
Posts: 119
|
Post by barney on Jun 4, 2013 8:14:04 GMT
Thanks for the lovely comments, I'm really grateful to everyone on this forum for their support and information. I have a lot of projects which are either half finished or bodged together, so I really felt a sense of achievement in bringing this one to such a perfect completion (though I am starting to think that WFOs are one of those things which are never fully completed - some shelves in here, some better tools there, if I just had somewhere to hang my pizza peel...).
Now the fun of trying out all my recipes begins, so in a way this really is just the start.
|
|
|
|
Post by DuncanM on Jun 4, 2013 13:32:03 GMT
Barney,
That setup looks amazing! Excellent work.
Did you build the table and benches yourself from decking timber?
Also, I've love to know more about how you made that bread logo, it looks great.
|
|
barney
WFO Team Player
Posts: 119
|
Post by barney on Jun 5, 2013 8:56:01 GMT
Hi Duncan, Thanks for the comments. I was planning to make the bench and table frames out of concrete moulds a la concretebenchmolds.com, but I had so much decking left over I thought it would be quicker and easier to go with that. The frame of the table is made entirely from offcuts of the main deck, but I had got a few extra boards to have full lengths for the tops. I think it turned out to look better and be more cost effective than the original idea. My carpentry skills are not usually that great, but I think I must have had the original carpenter smiling down on me for this one! The bread logo was just cut out of a sheet of ply using a jigsaw and a painted sheet then stuck over the back to give it the yellow background. I didn't want to have a bare gable end and thought this was a simple way of giving it a little personal twist. Good luck with the work on your concrete, having done something similar I regret not having made more of an effort to put in something fancy. That said I used the surfaces to work dough for the first time last week and was mightily impressed with polished concrete as a work surface, even better than the one in the house. |
|
nixie
WFO Team Player
Posts: 144
|
Post by nixie on Jun 5, 2013 10:54:03 GMT
Did you follow a plan for the table/benches or make it up as you went along? Any chance of some closeups/bigger pics of these please as they look great.
|
|
|
|
Post by reburner on Jun 5, 2013 19:12:12 GMT
Really nice build. As you have noticed already it is amazing how you get to know your oven and improve with each firing.
|
|


