kipper
WFO Team Player

Posts: 125
|
Post by kipper on Nov 16, 2013 23:32:42 GMT
side view to show gap between arches  20131023_145558 20131023_145558 by dave-2, on Flickr as well as having little fires to cure/dry the dome I also put my portable gas bbq(can be seen in pic) in for a while to help because ive found out that since growing up ive became pretty crap at making fires ha ha. 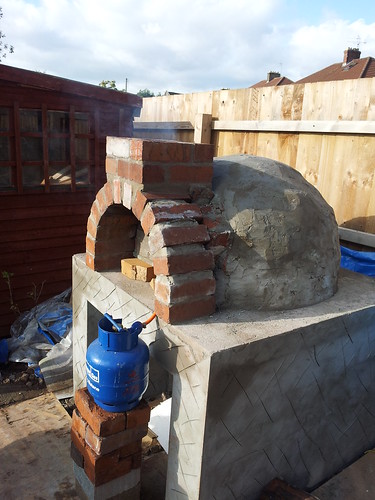 20131023_145535 20131023_145535 by dave-2, on Flickr |
|
kipper
WFO Team Player
Posts: 125
|
Post by kipper on Nov 16, 2013 23:46:31 GMT
as recommended in previous posts I donned a white suit and dust mask for putting the ceramic blanket on and after seeing the ceramic particles blowing around in the wind when cutting it id say its a very wise decision. putting the chicken wire on that I had in the shed was a bit fiddly.and getting the pliers and twisting here and there to make it tight makes life easier when putting the vermicrete on later. 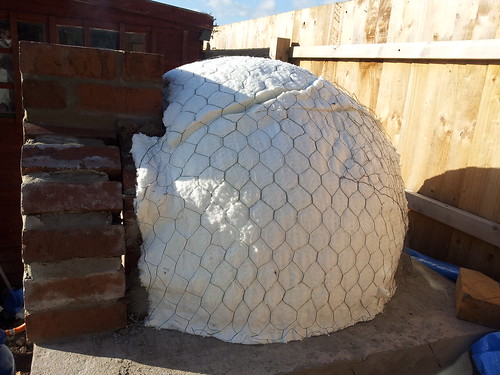 20131023_152533 20131023_152533 by dave-2, on Flickr |
|
kipper
WFO Team Player
Posts: 125
|
Post by kipper on Nov 17, 2013 0:07:30 GMT
next step was the devils porridge and quite difficult to apply around the bottom but gets much easier half way up and on top. the vermiculite doesn't like to hold water too well so I found opening the bag it comes in and giving it a good soak with water for a few hours in the bag helped a lot before adding the cement and mixing in a wheel barrow. 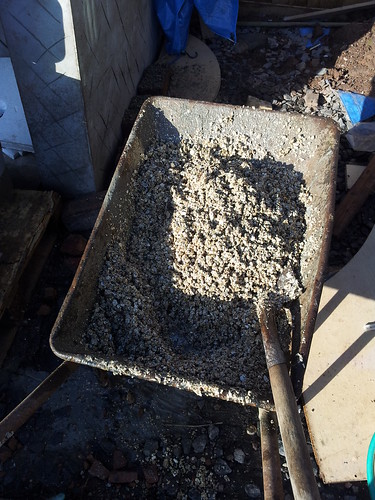 20131023_163029 20131023_163029 by dave-2, on Flickr I used a plastering trowel to apply it.and simply put the same thickness on each trowel and put it on the ceramic blanket. in hindsight I think smearing the blanket with a cement mix may help the vermicrete to adhere to it but it wasn't too bad to do. 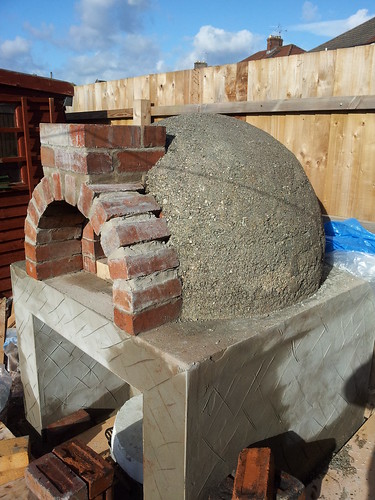 20131029_112302 20131029_112302 by dave-2, on Flickr I also made a jig to check that the shape was maintained but it was a bit fiddly and went by eye in the end. |
|
kipper
WFO Team Player
Posts: 125
|
Post by kipper on Nov 17, 2013 0:11:12 GMT
|
|
kipper
WFO Team Player
Posts: 125
|
Post by kipper on Nov 17, 2013 0:14:58 GMT
ive gone with another idea by danno (thanx danno) in having black limestone for erm what do you call these bits around the dome and on top of the chimney? and for the bit that meets the hearth of the dome. 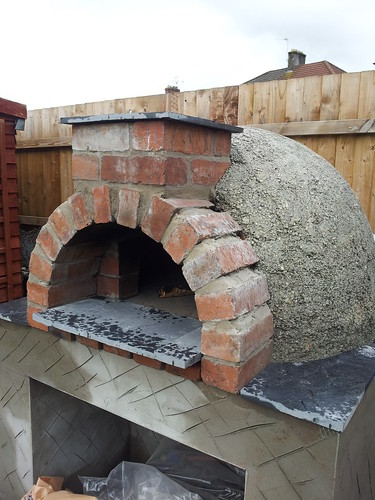 20131107_114242 20131107_114242 by dave-2, on Flickr |
|
kipper
WFO Team Player
Posts: 125
|
Post by kipper on Nov 17, 2013 0:25:53 GMT
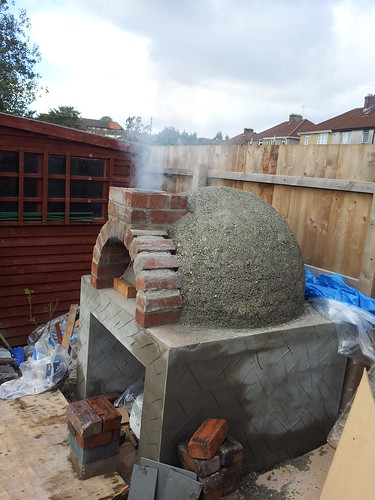
almost there now, ive put a waterproof scratch render on the dome and a waterproof render on the base with the render dyed grey. it looked black for a while which I wasn't happy with until it started to dry out.phew I thought I was going to have to take it all back off. I got a flue of fleebay for a tenner so quite happy with that just need to source a cap for it now. 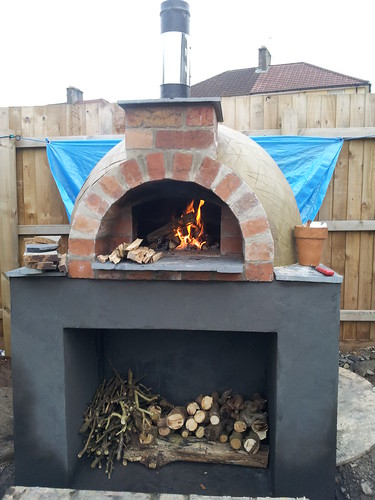 20131115_153718 20131115_153718 by dave-2, on Flickr fires are getting bigger but not sure if its the time of year to dry it. im thinking of leaving the final render of the dome till next year when the weathers better or do you think it needs to be done asap? |
|
|
|
Post by bookemdanno on Nov 17, 2013 16:47:39 GMT
Way hey! Look at that! Another Danno-dome!  Only kidding Kipps! As Kevin Keegan once said over and over again...i love it! The Black "wink" base looks really good, as it limits the colour palette. I'd probably leave the final render coat myself. Have some fun with the oven! If you get any cracks in the scratch coat, patch it up so no more winter weather gets under the render. Then in the spring, and after a few more good fires, scrub down the scratch coat and finish er orf! But thats just me! Top work there Kipper! |
|
kipper
WFO Team Player
Posts: 125
|
Post by kipper on Nov 17, 2013 18:24:05 GMT
danno-dome. ha-ha glad you don't mind me stealing your ideas speaking of which I will leave the final rend till next year then. thanks for the advise. will give it a go with some cooking midweek hopefully. cant wait |
|
kipper
WFO Team Player
Posts: 125
|
Post by kipper on Nov 19, 2013 11:12:17 GMT
I'm thinking of putting a winter jacket on it.just a simple bit of frame and roughcut board just enough to keep the rain off so I can use it through the winter.would just like your views on it pros and cons please.
|
|
|
|
Post by foodiesheaven on Nov 19, 2013 11:53:59 GMT
I am thinking of a cover for the outdoor cooking area so i can carry on all winter
|
|
|
|
Post by bookemdanno on Nov 19, 2013 13:35:45 GMT
Just make sure that it'll handle any Winter winds, rain and snowfall.
Snow is the worst really, as its heavy and completely soaks into wood.
|
|
|
|
Post by cannyfradock on Nov 19, 2013 18:37:51 GMT
Kipper
Your oven has taken on a remarkable transformation since I was last at "chez vous".
Good advice from the guys in leaving the final render coat till next year as long as (as Danno said)....it's keeps the weather out.
As regards your oven......you have done a fine job Sir......I touch my forelocks to you. As long as your curing fires have done their job, I would give it a "full gothem city" firing and start partying........or a bit of trial and error with pizza's or flatbread baking or Naans or...or...or..........or simply chuck a fire into the oven and sit and watch the flames, chewing the fat and sipping on a good claret........ or in my case slugging from a can of bow.
No constructive criticism, ....but a concern! Your chimney looks to be single sleeve. If your final render coat touches this .......it will crack, so you have to put a fireproof barrier between render and chimney. This can be a 10mm gap filled with anything refrfactory (cement or fire-proof mastic) ....or if your render buts up the brick chimney, you should try to create a heat stop (5mm fire-board, sliver of thermolite block etc......) ......unless you stop the final render touching direct heat from the chimney, you will always have chance of the final render coat cracking at this point. Prevention or always better than cure.
All the best with your first Pizza bash...
Terry
|
|
kipper
WFO Team Player
Posts: 125
|
Post by kipper on Nov 19, 2013 19:34:35 GMT
thanks Terry, the final render will but up to the chimney brick so I will put a piece of thermolite block there as a barrier as you've advised.thanks for that little gem it's something I would not of thought of.I've had the temps up to 220c but I've got to cut grass tomorrow so while I'm out there I'll give the oven some welly.by the way,there was someone giving away free oak two days ago from a felled tree.it was the main trunk only so you would need a chainsaw.if you were interested I can pass on a contract number.oh its in risca.
|
|
|
|
Post by foodiesheaven on Nov 19, 2013 19:52:51 GMT
free local wood is always good lol
|
|
|
|
Post by cannyfradock on Nov 20, 2013 14:22:22 GMT
....Yes please Kipper. You can e-mail...or PM me the number.
Free Oak.....if there's any left I wouldn't mind jumping on that bandwagon.
Terry
|
|