|
|
Post by dougclay on May 19, 2012 18:07:46 GMT
What started as a bit of an patch repair facelift has turned into a major face-off reconstructive surgery... 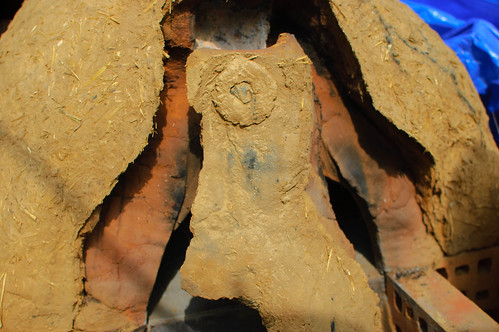 I've decided to put a brick arch and chimney in... Though while taking the Clay arch and chimney out, I was surprised how solid it actually was... When I made the base, I used builders sand and bricks and while this made a super level floor I think it may have affected heat retention so I decided to refit the floor on a bed of something more insulating... 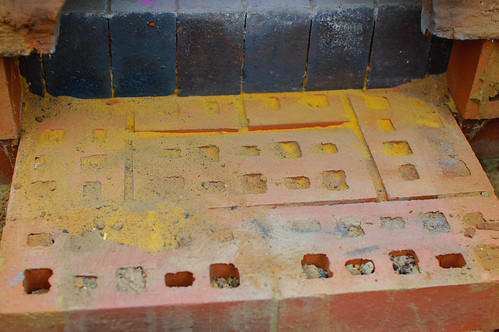 I marked up the floor bricks and started removing them and the sand... Now I have a nice clean space about 7cm to fill with an insulator... If I can find somewhere to get the right kind of vermiculite locally I'll give that a go...  I'll build a brick arch using the bricks removed from under the floor and see how things go from there... 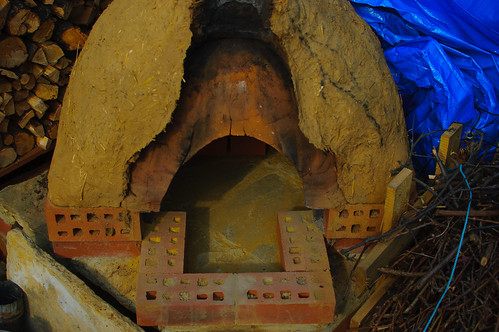 It was interesting to see the insulation layer of clay and sawdust revealed by removing the chimney, it is now a very dark, soft sponge like layer, good insulation I think :-) Of course its raining now so the tarp is back on so I'd best get on with sourcing the insulation for the floor... |
|
|
|
Post by turkey on May 19, 2012 18:43:21 GMT
Travis Perkins should have some vermiculite, near me they have it at a store more geared for garden stuff, but the local store new they had it and gave me their number. I must say it's very interesting seeing the oven splayed open like that, it could A Damien Hirst exhibit  |
|
|
|
Post by dougclay on May 19, 2012 20:04:13 GMT
Travis Perkins should have some vermiculite, near me they have it at a store more geared for garden stuff, but the local store new they had it and gave me their number. I must say it's very interesting seeing the oven splayed open like that, it could A Damien Hirst exhibit  I've never seen Travis Perkins open... They open after I leave for work and close before I get home. I seem to only think about these things on afternoon by which time all the builders merchants are closed up... ;D Hmm, chopped open in a perspex case, at least that'd keep the rain off :-) |
|
|
|
Post by dougclay on May 20, 2012 22:52:27 GMT
Drilled a hole into the roof of my inner dome through the exposed bit at front and fitted one of the giant high temp thermocouples from hongkong. Laid another 2 wire only thermocouples one high temp one to come up through the floor and another that came free with the meter for under the floor, just because I'm curious...
Took the saw and a rough file to tidy up around the oven opening ready for an arch brickwork, but I don't want to start that until I've put in the under floor insulation and put the floor back in... I just hope I can get the floor as level as it was before when it was on dry builders sand... I'm a bit apprehensive of what the "vermicrete" foundation will be like to lay bricks on and whether it will compress....
|
|
|
|
Post by rivergirl on May 21, 2012 7:18:45 GMT
Very good! Mines just getting a nose job!! There is a place in sittingbourne that fixes machines and Agassi etc and they sell vermiculite. Maybe you have something like that near you?
|
|
|
|
Post by dougclay on May 21, 2012 15:06:18 GMT
Got some of the weird material so I'll get started tomorrow after work... It's like a cross between jumbo porridge oats and popped corn, but with a glittery gold color... so it looks little gold nuggets with dandruff :-) 100L should do for now...  |
|
|
|
Post by dougclay on May 26, 2012 22:39:39 GMT
Completed the under floor insulation and put the floor back in, not quite as level as before but not too bad considering the limited access and I didn't use dry sand like before...
Now have 4 Thermocouples fitted, mat add another to the chimney from the excess I snipped off the other wires...
I decided to fill in the useless "wood store" in the base and extend out a shelf... got the hang of bricklaying now, after never laying a brick before I started the base, this was a doddle... :-)
As well as creating a shelf, it also provides a support for the wider entrance way on which I could build the new brick arch. laying the arch with clay rather than mortar as I think this will cope better with the heat expansion... Using recycled clay from the removed chimney and clay mouth, broken down into small chunks and then left to soak in water...
If there is enough left after arch and chimney, will hopefully do a thin coat on top of the exposed straw of the outer insulation....
Also filled lots of little gaps, slits and cracks.
Hopefully finished tomorrow and ready for use on the long weekend... and this time I know the skin on my fingers will grow back to normal eventually ;-)
|
|
|
|
Post by dougclay on Jun 3, 2012 20:47:06 GMT
Managed to get the arch and chimney finished last week, leaving a little drying time before firing it up yesterday. The arch went up easier than I expected... Worked out an angle that would give me an arch about 4cm larger than the existing opening as that seemed it would be the most comfortable opening to work with.  I made a couple of wooden wedge shapes, added water to the clay until it was a manageable consistency and put down the clay just thicker than the wedge and squeezed the next brick down. pushed more clay into the gap and left to set and did the same on the opposite side. Once the clay was firm to the touch, removed the wedge and filled the gap and moved up a layer, repeating the same... 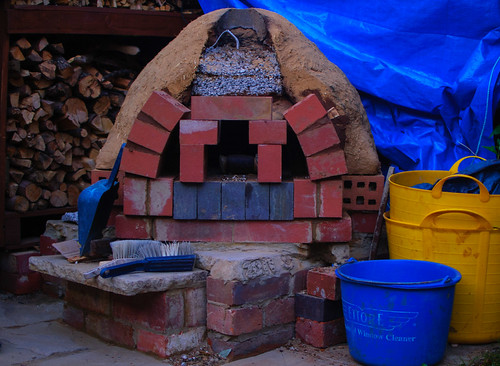 Didn't get around to making a proper form so just used bricks as support... For the last layer I used some clay wedge between batons to provide enough support.  Didn't quite master bashing bricks with a bolster, despite all the fine tips on this forum and ended up tap-tap-chip-chipping the keystone from the wonky bolster bash to something more presentable :-)  Added a clay cavity liner, I wanted a smaller one as the chimney, but ended up with this larger one as the outside of the chimney and used some dual wall steel piping inside. Filled the pipe cavity and the inside of the clay liner with vermiculite. 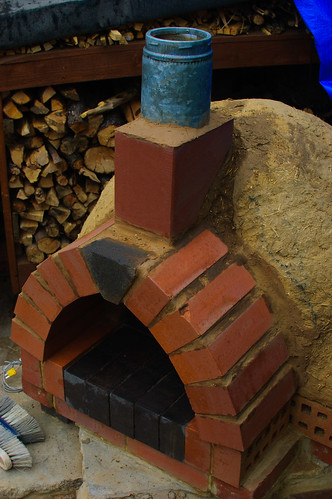 The twin walled ducting came with a ready made extention with angle sections to get that smoke up and out of the garden.  Probably should have left more time to dry, and done some smaller fires first, but really wanted to make the most of the BH weekend sun yesterday :-) Good test for the new insulated floor and the thermocouples... 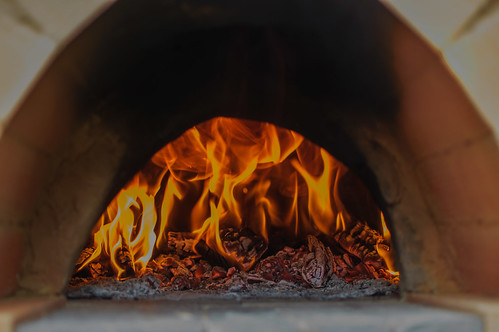 The TC in the dome went as high as 590C, while the floor slowly got up to 480 at its top surface and 290C at the bottom of the brick. During cooking, the under surface of the floor bricks stayed constant while the top surface of the floor dropped to 260C before going back up to 280C!! Seemed that the temp of the floor bricks evened out. The TC under the subfloor insulation got to a high of 67C. The insulation seems to be doing its job. This was the first firing since the winter and refit so I expect performance will improve. Pulled some lovely juicy slow cooked pork and beef from oven this morning. The floor was still at 70C and the dome was 60C after 18 hours. I noticed some high heatloss through the top of the door, that will need some fixing... Hoping to get a few more firings this long weekend, hopefully today's washout was just a blip ;-) Not too sure about the new look, it will take some getting used to .. but I still have some changes in mind... |
|
|
|
Post by surfingspider on Jun 3, 2012 22:10:49 GMT
Good work looks great.
|
|
|
|
Post by dougclay on Jun 3, 2012 23:01:53 GMT
Thanks..
A roof will be next on the list I think... just trying to decide on permanent or removable..
|
|
|
|
Post by turkey on Jun 4, 2012 21:14:37 GMT
well if you need to do re fits perhaps recoverable is the way to go.
looks amazing btw, and really impressive numbers from the thermo couples. I do wish I had found a cost effective data logger solution but should I do a refit it might be on the cards.
|
|
|
|
Post by dougclay on Jun 5, 2012 19:00:02 GMT
Thanks Turkey.
re TC datalogging, there are plenty of ready component parts out there. I'm looking at making a 4-channel logger and think I can probably do it for a reasonable cost... I'll let you know how the experiments go...
|
|
|
|
Post by turkey on Jun 5, 2012 19:48:35 GMT
what chip where you considering using for the amps and what as the main brains?
I was hoping the .net micro kits would do it as visual studio should make it easy, sd card logging so there is no need for a laptop. Would be nice to have a display but logging is more critical.
|
|
|
|
Post by dougclay on Jun 5, 2012 22:00:42 GMT
There are a few chips but the MAX31855 looks like the best bet at the moment because there's a lot of support for it. I have an Arduino and there are a number of add-on boards that build on the MAX31855 or the older more expensive MAX6675. Some of the .net micro boards are compatible with the arduino shields too so there will no doubt be .net support. I'm comfortable enough with java used with the arduino...  |
|
|
|
Post by turkey on Jun 6, 2012 9:10:46 GMT
that would be a spi interface used? I thought most chips only have a single spi interface so would be a single channel logger?
this is where my research broke down as I don't know enough about the development boards to really see what hardware would hook up together.
I thought to get multi channel logging you might need to get analog input thermo couple amps which no doubt require more (possibly marginal) work, but allow many more into a single chip?
|
|