alun
valid member

Posts: 55
|
Post by alun on May 15, 2013 20:26:57 GMT
Hi everyone. I've only recently joined but rather than post in the intros forum I thought here might make more sense as I have a build under way. I'm following the FB pdf instructions fairly closely for a 1m internal oven. After many days of thoughtful planning I decided to go ahead and build a wood fired pizza oven in my garden. I've never attempted anything remotely like this before and while it is turning out to be a lot of work I'm actually quite enjoying it. Here are a few photos of the build so far: 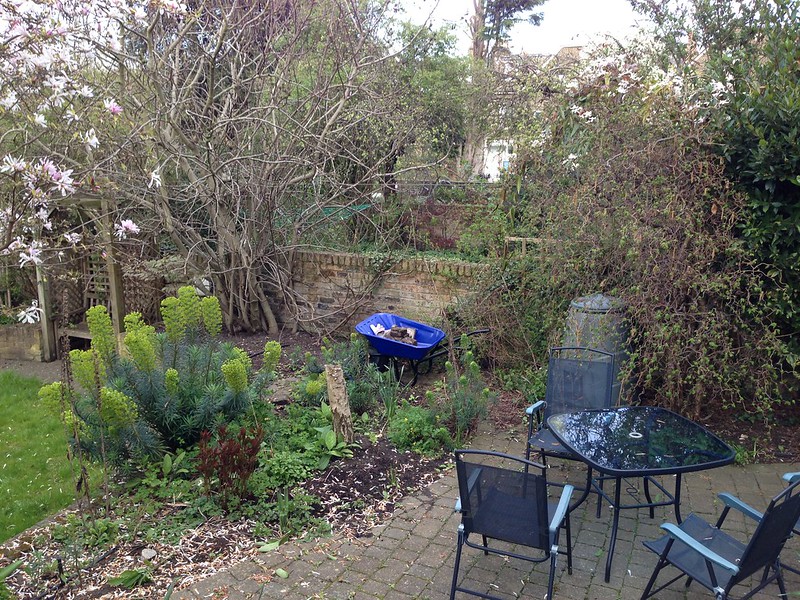 This site seemed ideal but there were quite a few pavers laid into a path (that went nowhere) that needed to be ripped up (and the concrete foundations removed). Also a very stubborn stump. 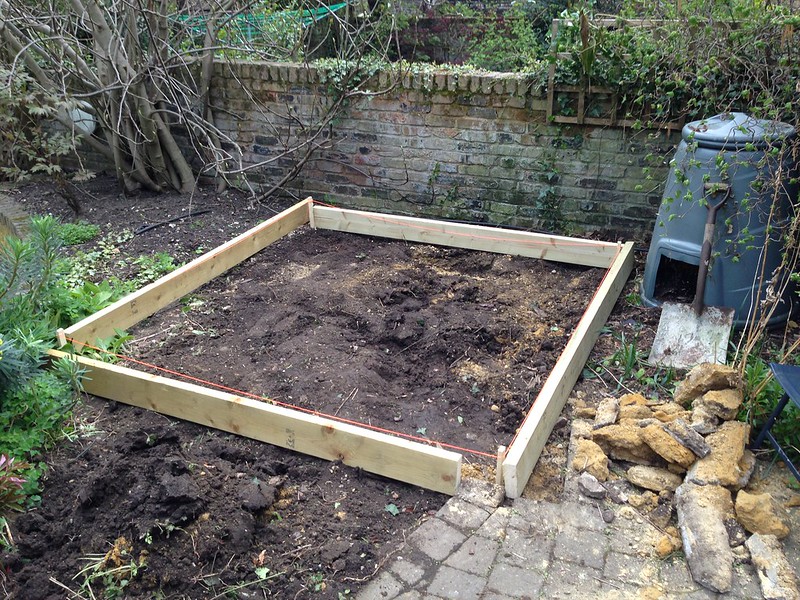 Formwork loosely laid out. I lost count how many times I measured to be sure I had the correct length. 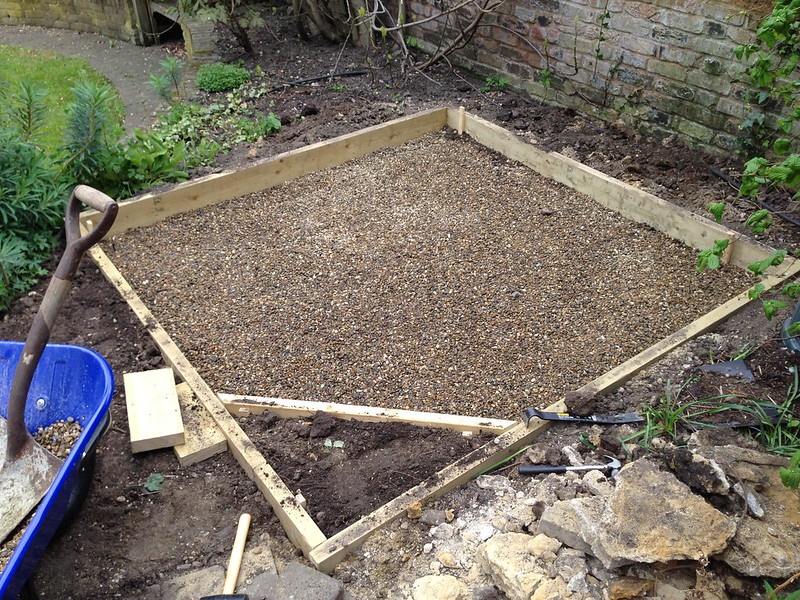 Slab is 2m x 2m (though going for a corner build as this suits the space a little better). 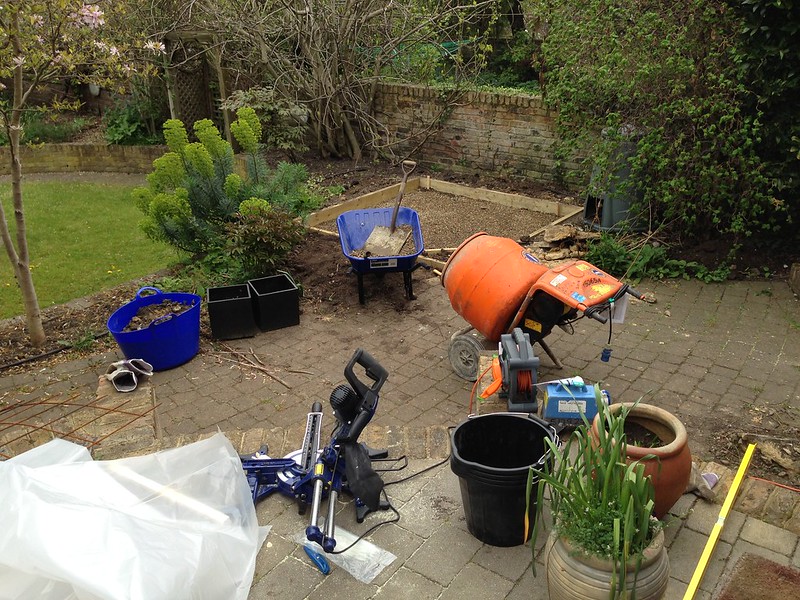 Corner installed, Gravel down. Getting close!  Plastic sheeting (from toolstation I think), mesh and rebar. 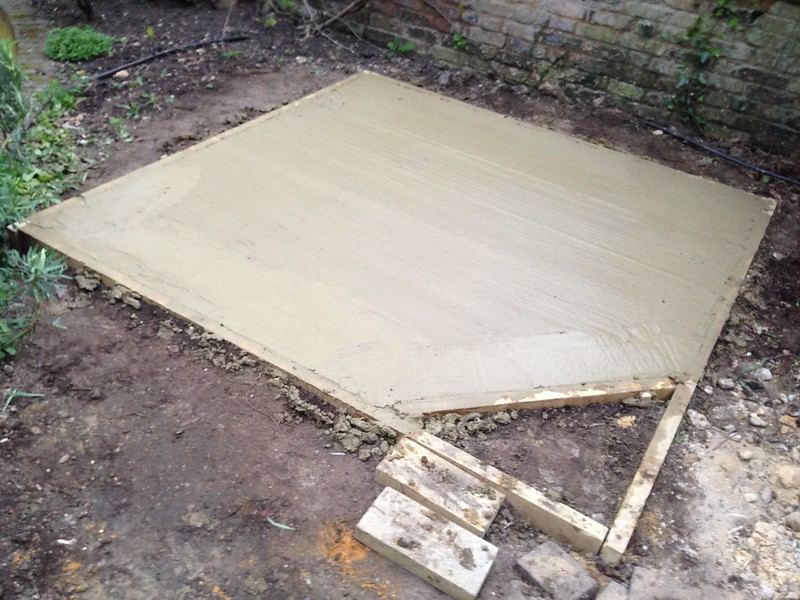 The end result. Not bad for a first slab I think. |
|
|
|
Post by cannyfradock on May 16, 2013 8:11:13 GMT
Alun
Never mind a first attempt...that's one solid base you have poured.....always nice to see a DPM and re-bar/mesh being used at this stage.
Great job...
Terry
|
|
|
|
Post by turkey on May 16, 2013 15:39:08 GMT
looking very good, best be on your guard a slab that big is begging for some feline paw prints  |
|
alun
valid member
Posts: 55
|
Post by alun on May 16, 2013 22:27:26 GMT
Thanks cannyfradock, turkey. Turkey, we did have a neighbour's cat run across the slab but it was already beginning to cure so no harm done (to the slab at least). First course of blocks down: 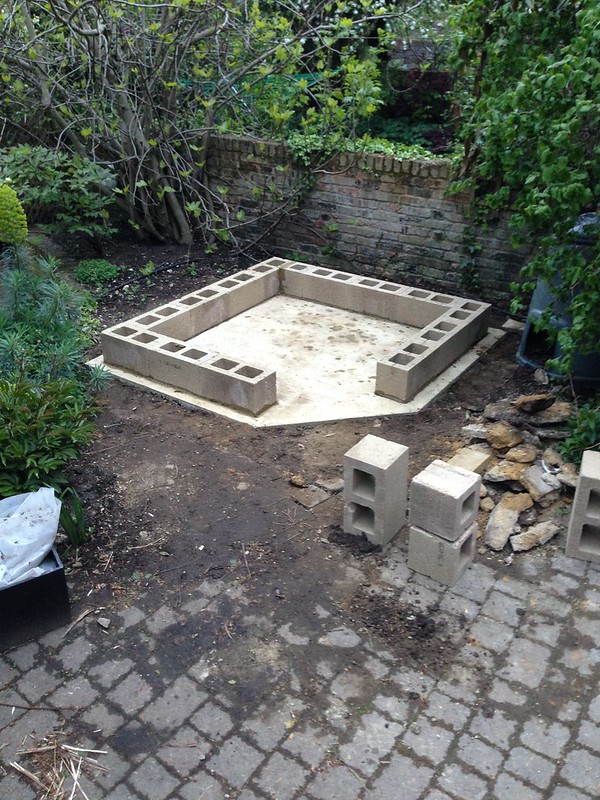 I put down 5mm of mortar, damp proof course (DPC) and then a thicker layer of mortar first. All four courses complete - I only dry stacked after the DPC was down. 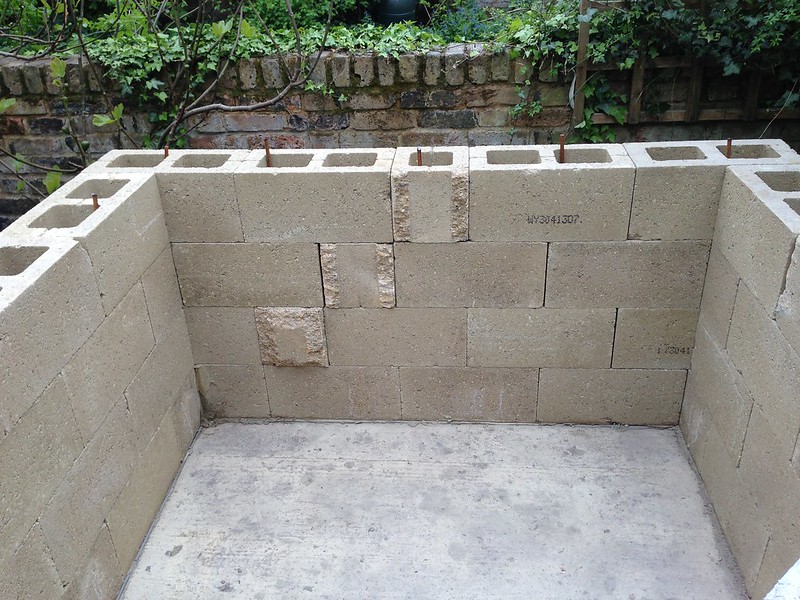 Got a little confused about how best to handle the half bricks but cutting these ones and putting them in sideways seemed to work best. Some of the blocks have double inner walls which mean they split fairly nicely (I only realised this after trying to split a normal one). I've not seen anyone mention this before (the double walls). Lintel in place: 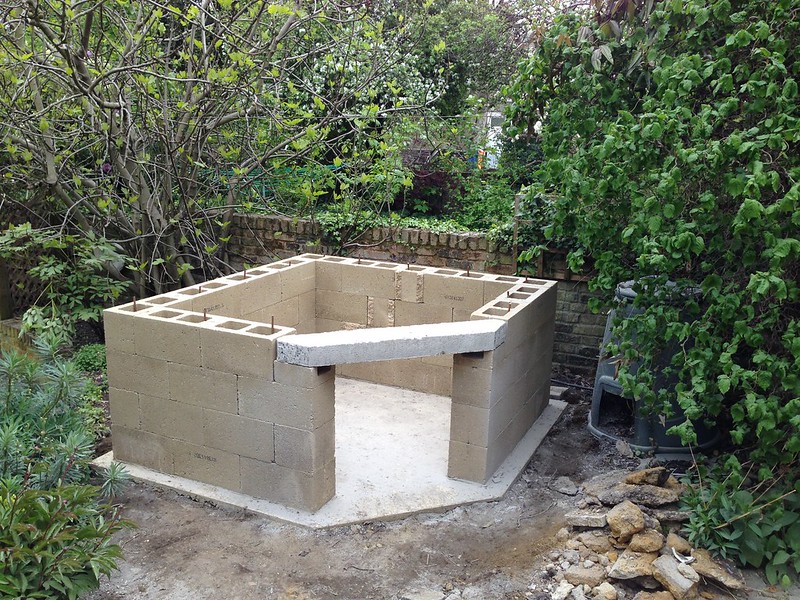 I opted for a precast concrete lintel rather than casting my own as others have done or putting in angle iron and shaving blocks. This presented some challenges though, especially with the corner build. 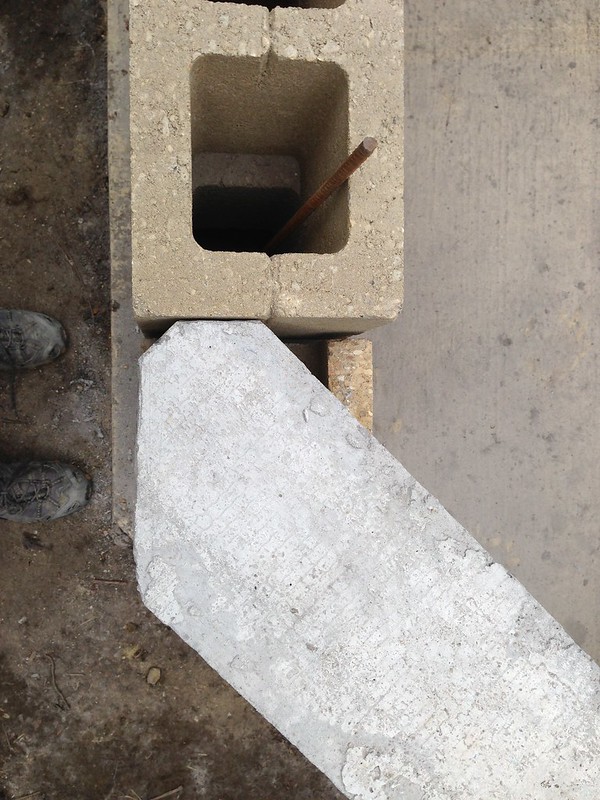 LOTS of angle grinding to get it cut down. And I had to split some blocks lengthways (and in half) to support it. You can see the quarter block here: 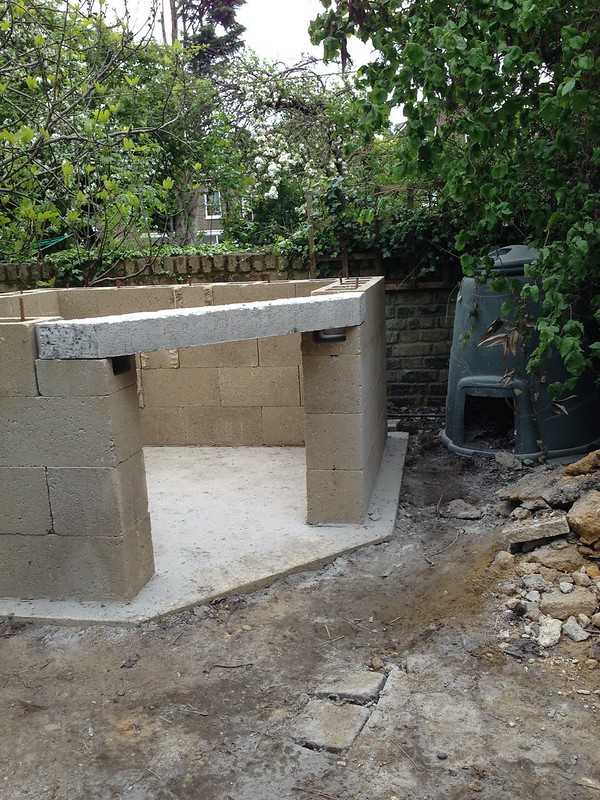 In the end the height was good though. And here we go, all done for the day: 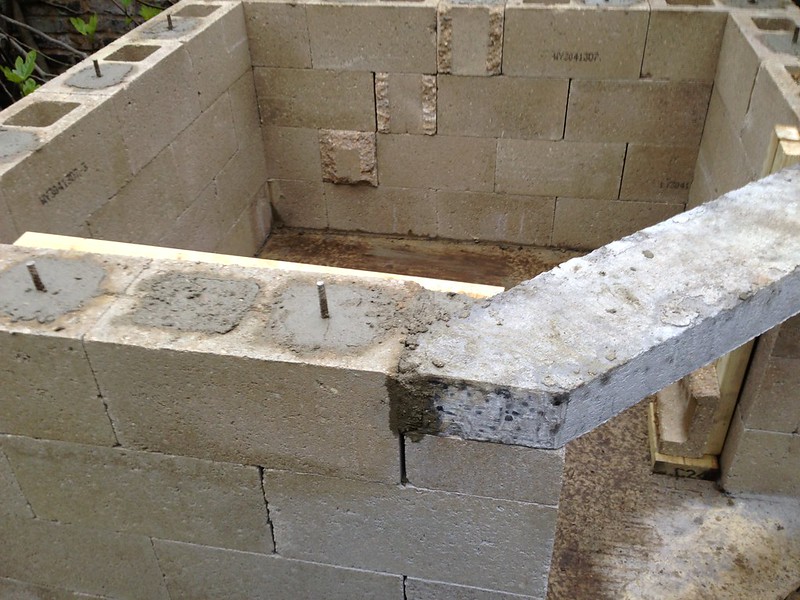 The extra concrete around the lintel is really only cosmetic or to stop concrete running everywhere once the hearth is poured. Rebar every second column, filling the rest with rubble (and left over concrete). Hoping to lay the hearth slab this weekend! |
|
|
|
Post by cannyfradock on May 17, 2013 9:17:30 GMT
Alun
Nice sturdy base!!. ....you could build a block of flats on top of those walls.....
I can't see from the pictures if you have filled the void in the quarter blocks that support your lintel. This needs doing as the wall of those hollow blocks are not very strong on their own.
Terry
|
|
alun
valid member
Posts: 55
|
Post by alun on May 17, 2013 10:48:11 GMT
hmm, not filled completely, just a few inches in the ends. Mainly done for cosmetic reasons. Hadn't really thought about the cut walls collapsing under the weight of the oven...
|
|
|
|
Post by turkey on May 17, 2013 14:53:07 GMT
I am impressed with the pace, the hearth will take some care and a good slow cure as you have quite the gap to bridge there. Make sure any support work you do use has thin shims in there to easy removal.
if you do not have enough rubble or want to lighten the load folks also stuff the empty block holes with empty plastic sand bags to make stoppers and then fill the top few inches with concrete.
This means when the lay the hearth it does not all flow down into the wall.
|
|
|
|
Post by mattyb on May 17, 2013 19:50:31 GMT
Great pics Alun, I've just started my dig and you've given me a couple of good tips here!!! Cheers!
|
|
alun
valid member
Posts: 55
|
Post by alun on May 18, 2013 18:57:35 GMT
Thanks for the advice turkey. I've certainly got loads of rubble to get rid of. Glad to be of assistance mattyb, good luck with your build. Bit slower than hoped today. Got the formwork doen though. Nice and level. About 90mm 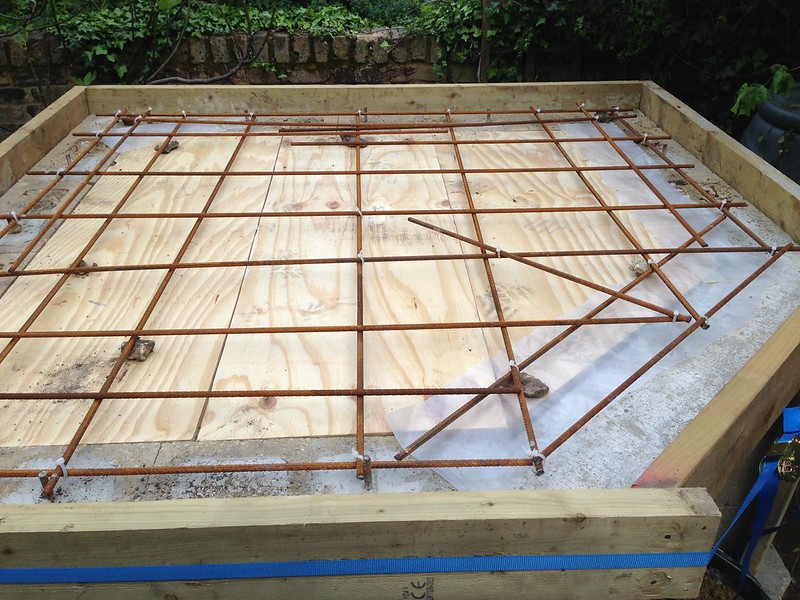 and a few supports inside: 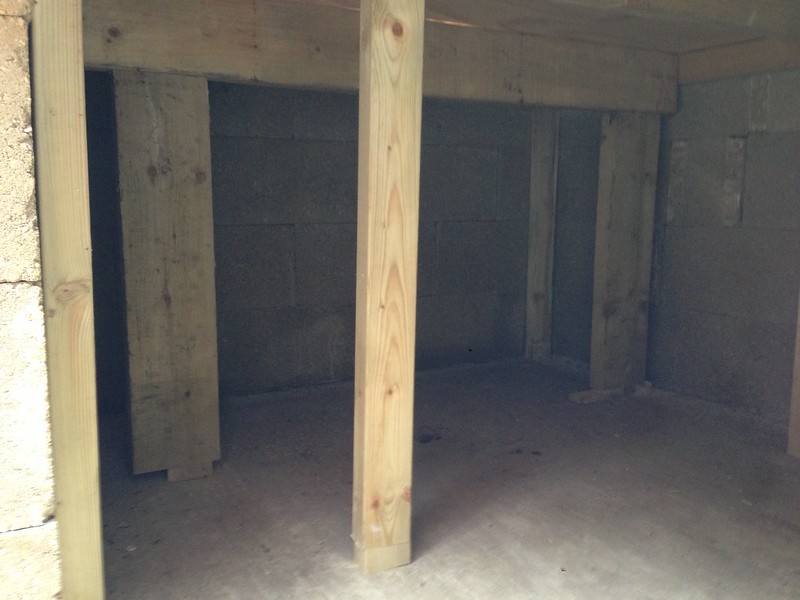 I added a few holes for potential thermocouples too (black drinking straws in the centre): 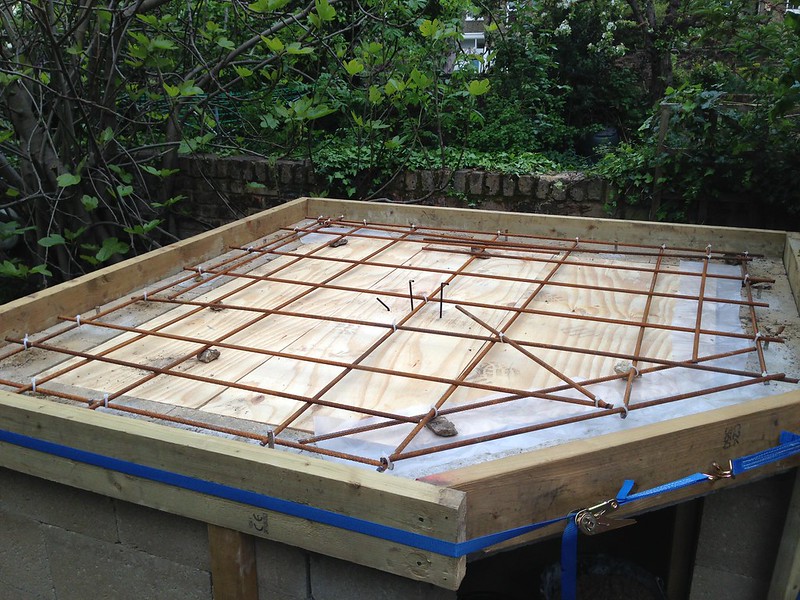 I figure it's easier to get them in now and not use them than to try and add them in later. Also do you think I used enough rebar?  I cut the ply into more pieces (3) than I wanted but I was conscious that I needed to get them out through the stand opening. Hoping to pour the slab tomorrow. |
|
|
|
Post by faz on May 18, 2013 19:01:49 GMT
Looks very good excellent progress |
|
|
|
Post by spinal on May 18, 2013 19:19:12 GMT
Cutting the ply is a good thing... in my case I had to crawl under the slab with a jigsaw and cut it into pieces to drag it out! Looks good, plenty rebar Should double as a bunker should you need it  M. |
|
|
|
Post by h12rpo on May 18, 2013 20:07:40 GMT
Actually is there any need to get the ply out....I dont see the harm in leaving it there. Or am I missing something ?
|
|
|
|
Post by turkey on May 18, 2013 20:44:43 GMT
no real need to remove it, some folks I have seen have used cement tile backer board and left it in, easier as you can have it overlapping the walls.
I ended up with 4 separate bits of ply for my base (which was a lot smaller than yours) and it was no issue, the only thing I will say is I cannot see exactly how its supported but make sure you add the first few buckets of cement gently to the centre of each of the ply boards so they do not twist and collapse. You look like you have made it nice and easy to remove, good forward thinking.
Also do not forget to vibrate the cement well to make sure there are no air pockets left in the slab
|
|
|
|
Post by cannyfradock on May 19, 2013 12:06:02 GMT
Alun
If I would've seen this post earlier I would have suggested putting an extra 2 lengths of re-bar in where you have the 2 long oblong sections. (leaving a minimum of 100mm centres) ...if you've already poured the slab don't worry.....it will work fine. We tend to go overboard with advice on re-bar and damp proof issues. As it is, you have a continuous "ring beam" of steel running through your walls into your slab.....nice job.
Looking forward to the rest of your build...
Terry
|
|
alun
valid member
Posts: 55
|
Post by alun on May 19, 2013 16:04:22 GMT
Terry, Only saw your response after the slab was down 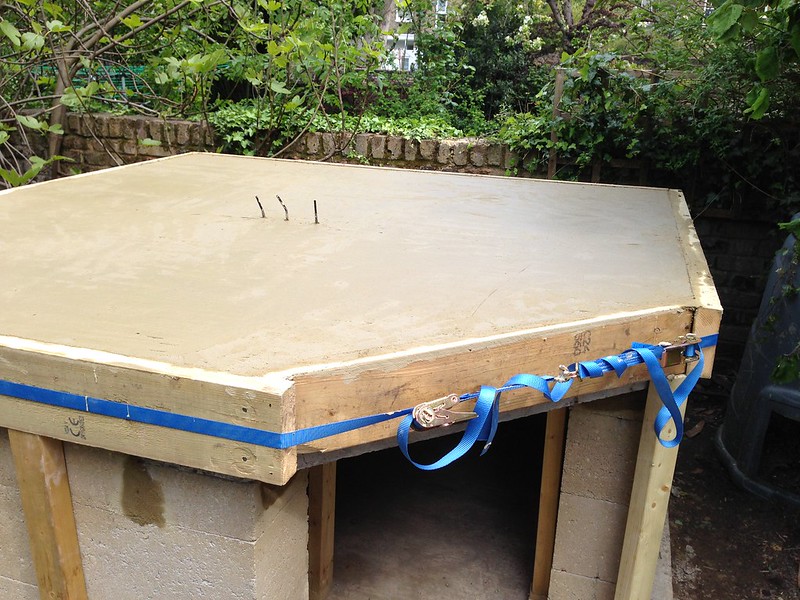 To be honest, I though I had way too much rebar in there already (there is 60m between the base and the hearth). Anyway, all done for the day. The slab isn't perfectly flat around the thermocouple snorkels but hopefully it is close enough: 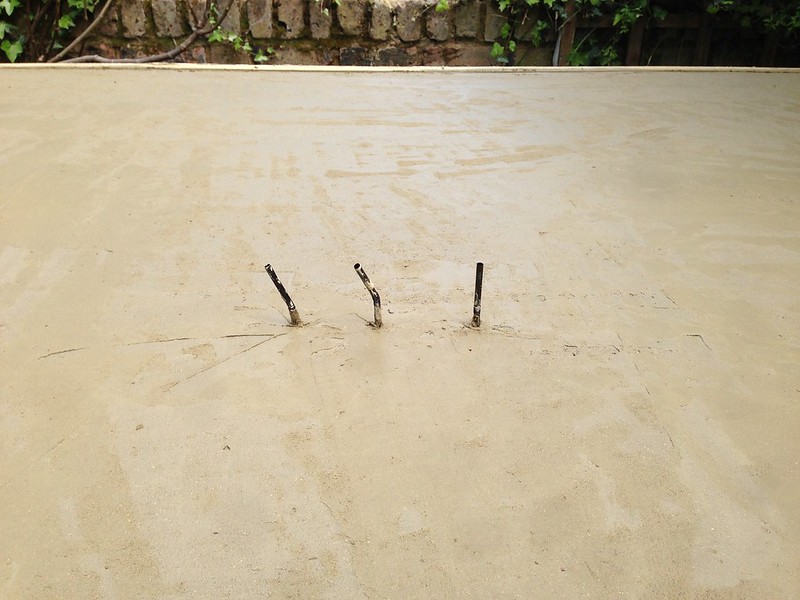 I've got a bunch of thermalite blocks that I plan to use for insulation layer, before the firebricks go down. Now I need to order some bricks for the floor and dome. Kilnlinings seems like the best/default choice. I'm a little worried about going over the 1000kg shipping option though. Shipping is already expensive. I think I'll need 200 odd bricks and some fireclay. How much of this do people normally use on a 1m dome build?. |
|


