ringo
valid member

Posts: 75 
|
Post by ringo on May 29, 2013 18:07:30 GMT
I'm not sure if this is going to be as good as some of the other build threads I've looked at but hopefully it may give a little courage to other building novices (or fellow office workers with nice soft hands) out there: Footings 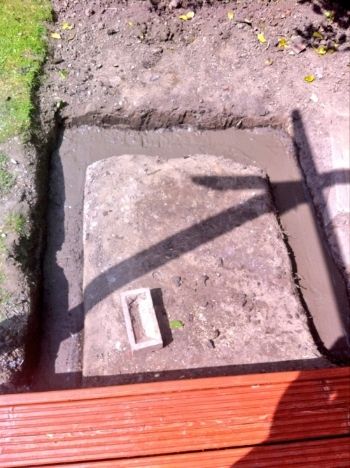 Test lay 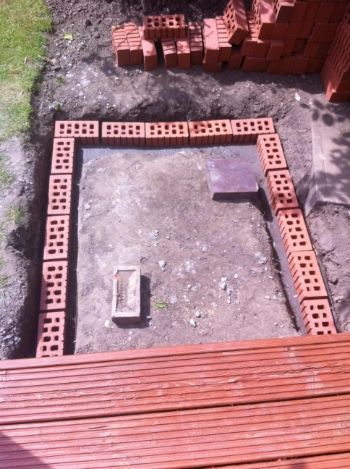 Too many bricks- cheaper to buy 400 than 250 at Wickes!! 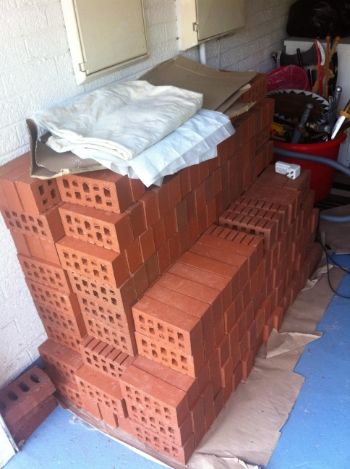 Rain stopped play 6 courses up 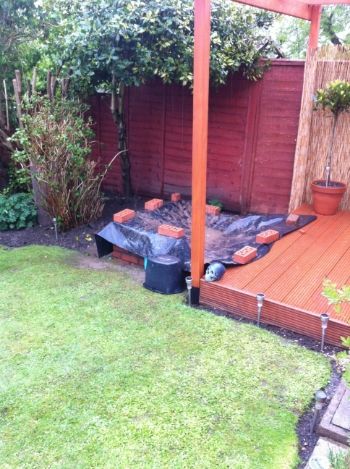 Not as glam as some but it's a start |
|
|
|
Post by bookemdanno on May 29, 2013 20:48:41 GMT
Welcome! And good on you for starting a thread.
|
|
|
|
Post by h12rpo on May 29, 2013 20:51:29 GMT
Go on !
My hands are (were?) As soft as a baby's rear mate ( office worker all my life) but hey its not rocket science .
|
|
ringo
valid member
Posts: 75
|
Post by ringo on May 29, 2013 23:19:38 GMT
Thanks for the welcome and encouragement guys - gotta say a big thanks to my dad for the main donkey work so far, I'm pretty good at passing tools, carry stuff, mixing cement & opening my wallet......
Next phase, and questions no doubt, pick up my pre cast dome tomorrow, so base specifications and outer shell insulation.....
More to come
|
|
|
|
Post by cannyfradock on May 30, 2013 12:50:35 GMT
Ringo Try to get as much info as you can from whoever is selling you the Modular oven. Some pre-made ovens have built in insulation...other's haven't. Some are pre-cured....other's not etc. They should also tell you the dimentions of the support walls....get as much info as you can! When calculating base, always try to work backwards....ie...work out your finished hearth height (usually elbow height) then calculate the thermal layer (even if it's modular it may still need a thermal layer below the hearth....then the concrete slab....then you can work out the height of your walls. Many members who use face bricks, build an internal wall for the slab to sit on so as you only see face bricks from the outside. Even though it's a pre-built oven, still have a good look at other peoples projects.....every bit of info helps. Also have a look at this post... ukwoodfiredovenforum.proboards.com/index.cgi?board=infopack Terry |
|
ringo
valid member
Posts: 75
|
Post by ringo on May 30, 2013 14:17:36 GMT
Cheers Terry, thanks for the advice Got the cast dome today, 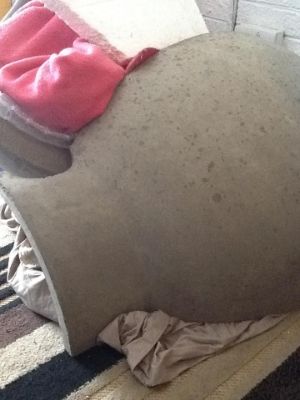 Think I've got the base figured (I think), 50mil concrete form with layer of 50mil depth ex storage heater bricks (don't know the technical name). However, I'm not sure if I need a layer of ceramic fibre in between (25 mil), if so some boarding would do it. Any thoughts? Going to lay firebricks on top for the oven floor |
|
nixie
WFO Team Player
Posts: 144
|
Post by nixie on May 30, 2013 14:59:56 GMT
If the storage heater bricks are for thermal mass then yes these need to be insulated from the concrete.
|
|
|
|
Post by bookemdanno on May 30, 2013 17:52:30 GMT
you always need under oven insulation to avoid having a massive heat sink, and possible failure of base due to heat issues.
|
|
ringo
valid member
Posts: 75
|
Post by ringo on May 30, 2013 19:29:33 GMT
Cheers both
So, taking those points on board, it's gonna be
50 mil concrete on bottom, 25 mil ceramic boarding in the middle, 50 mil storage heater blocks on top for the base.
Firebricks on top for the cooking surface.
Don't think I've got enough storage bricks to cover the whole surface so will lay these in the middle of the block (I.e. under where the oven will sit) and then fill in the surrounding space with concrete (outside the outer diameter of he dome base).
Nixie, like the idea of the paper template, gonna try that for placement - cheers
Hopefully, no rain for the next couple of days.....
|
|
ringo
valid member
Posts: 75
|
Post by ringo on May 31, 2013 21:00:45 GMT
Couple more pics just to keep the build diary up to date seeing as we had a days worth of sun today Base form 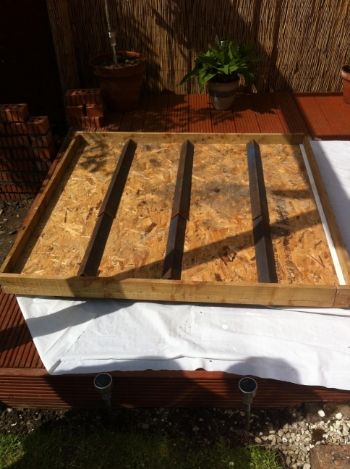 Completed concrete base layer 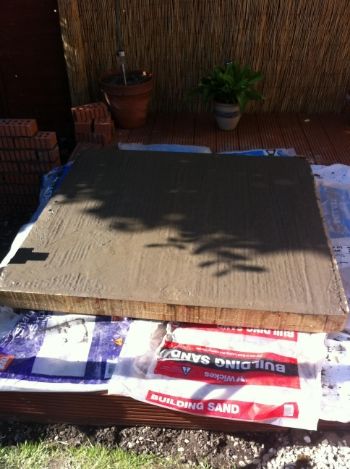 Inevitable cat paw prints in wet concrete...... 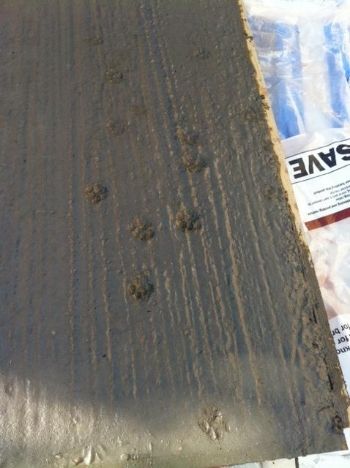 Been to Wickes so many times over the last few days, I'm sure they were going to give me a staff discount..... |
|
ringo
valid member
Posts: 75
|
Post by ringo on Jun 1, 2013 14:36:26 GMT
Things wot I have learned......... #1 - Cast your base in situe to avoid this... 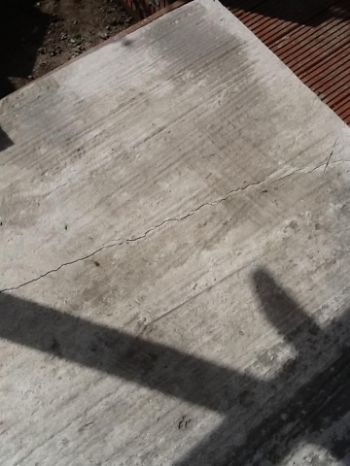 Looks like the San Andreas fault line right across the base which is now in two parts  Probably a blessing in disguise that it broke a couple of inches from the floor instead of mid lift. Should be easier to lift now  Oh well, these things are sent to try us! |
|
|
|
Post by cannyfradock on Jun 1, 2013 17:20:31 GMT
Ringo
Shame about the setback...don't let this put you off. It's a learning curve and we're all still learning. Looks like the slab was still "green" when you tried to move it and perhaps you didn't put any re-bar within the concrete. If you cast a new slab "in situe" don't forget to add some re-bar.
Terry
|
|
ringo
valid member
Posts: 75
|
Post by ringo on Jun 2, 2013 9:45:09 GMT
Ok, so instead of spending the last day of my week off in be (well, having a lie in), my dad called early as he's been fretting that the single wall won't hold the weight....
Now getting my office hands dirty again building another internal wall all round
Better to be safe than sorry I guess
|
|
|
|
Post by rivergirl on Jun 2, 2013 10:09:18 GMT
It's great fun isn't it!! Mine was a first time build as well.... The next one will be virtually the same with just a few little additions , good luck with your build , looking forward to seeing the finished article
|
|
|
|
Post by cannyfradock on Jun 2, 2013 14:36:33 GMT
Ringo
May people build a internal "extra" supporting wall to spread the stress from the concrete slab. It reduces the space under the slab for wood storage, but not many people venture to the back of the storage space anyway. Other members simply shutter the whole area (me included) and because the span is not so great, as long as you put decent re-bare in the slab, there is no need for a supporting wall.
Terry
p.s......always listen to your fathers advice.
|
|


