ringo
valid member

Posts: 75 
|
Post by ringo on Jun 15, 2013 20:37:05 GMT
Cheers again Danno
This place is great to bounce ideas around
Anyway, went to a great reclamation yard today and found some nice stuff. They have some great tiles that I'm going back for and at a pound a pop, they'll make a great cooking surface, not too thin not too thick, just right. I'm lucky to live in an area that has a long history of brick making (there were some nice bricks there - never thought I'd say that!)
Came back home, got the template out again, laid the blocks I have out and worked out what I need, got excited again. Studied your flooring and have the next phase all worked out thanks to you!
Back in the game!
|
|
ringo
valid member
Posts: 75
|
Post by ringo on Jun 28, 2013 19:01:00 GMT
It's been a while but got my first base layer cut and set today - tomorrow the oven floor with thermacouples 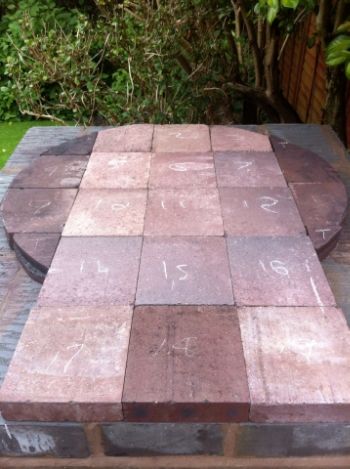 |
|
|
|
Post by nickynoo on Jun 29, 2013 6:59:25 GMT
Hi Ringo
Nice neat work so far! I'm guessing if you are going to the trouble of installing thermocouples you are probably keen to do some baking in addition to pizzas so holding heat in the oven is important.
One thing you may want to do is create a thermal break in your storage heater bricks at roughly the point where the door will sit. I'd whip 2 - 3" off the end of bricks 14->16 (assuming that's the door line) and fill that gap with either vermicrete or strips of the thermolites. That way you're not trying to heat bricks 17->19
Good luck!
|
|
ringo
valid member
Posts: 75
|
Post by ringo on Jun 29, 2013 8:39:35 GMT
Cheers Nickynoo
Yes, I'd love to do a bit of baking aswell after being inspired by all of the other builds on here (and end cooking results!)
Point taken about the break and it's something I did think of (I.e. heat 'travelling' through the bricks) however, I've got another layer of 1" quarry tiles to lay today so hoping this'll be ok. The door is about on the edge of the top of the last row.
Do you reckon this'll be ok?
|
|
|
|
Post by moonhead on Jun 29, 2013 22:16:55 GMT
Hi Ringo
looks like your oven is starting to take shape nicely. Like the idea of installing thermocouples in the the base too. looking forward to more updates.
|
|
ringo
valid member
Posts: 75
|
Post by ringo on Jun 30, 2013 17:57:56 GMT
Finished the cooking surface today and pleased to report it is flat! Huzzah! 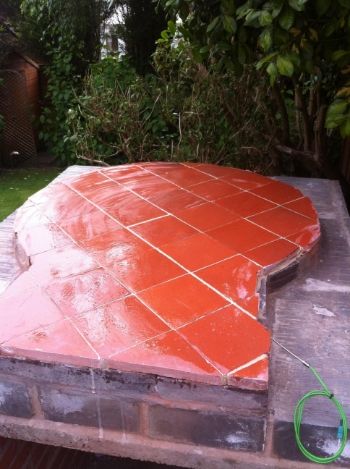 Slight thickness through the middle joins is the thermocouple rod where it couldn't bend a full 90 degrees (the end of it comes out to the right of the oven so I can plug in the reader) Some of the edges are a bit rough and not aligned but they'll be lost in time  Dome on on Wednesday! |
|
ringo
valid member
Posts: 75
|
Post by ringo on Jul 3, 2013 22:01:47 GMT
It's Wednesday, so it's dome day! 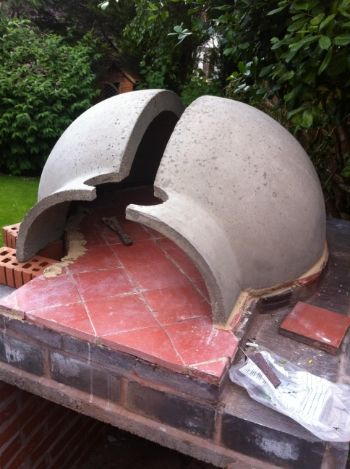 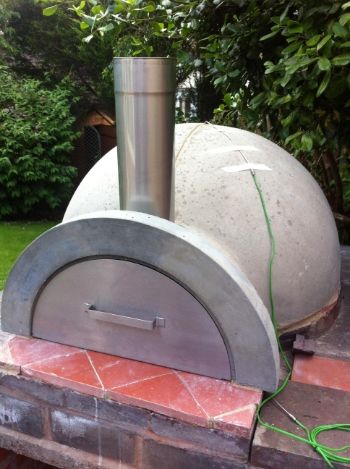 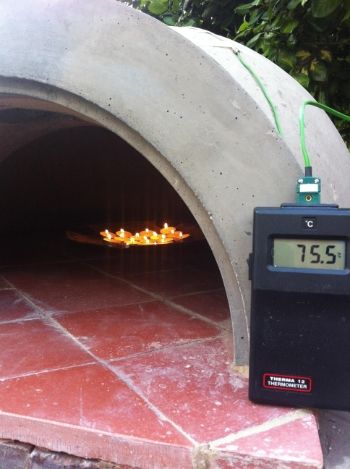 Oh and whilst we're at it, here's my new light 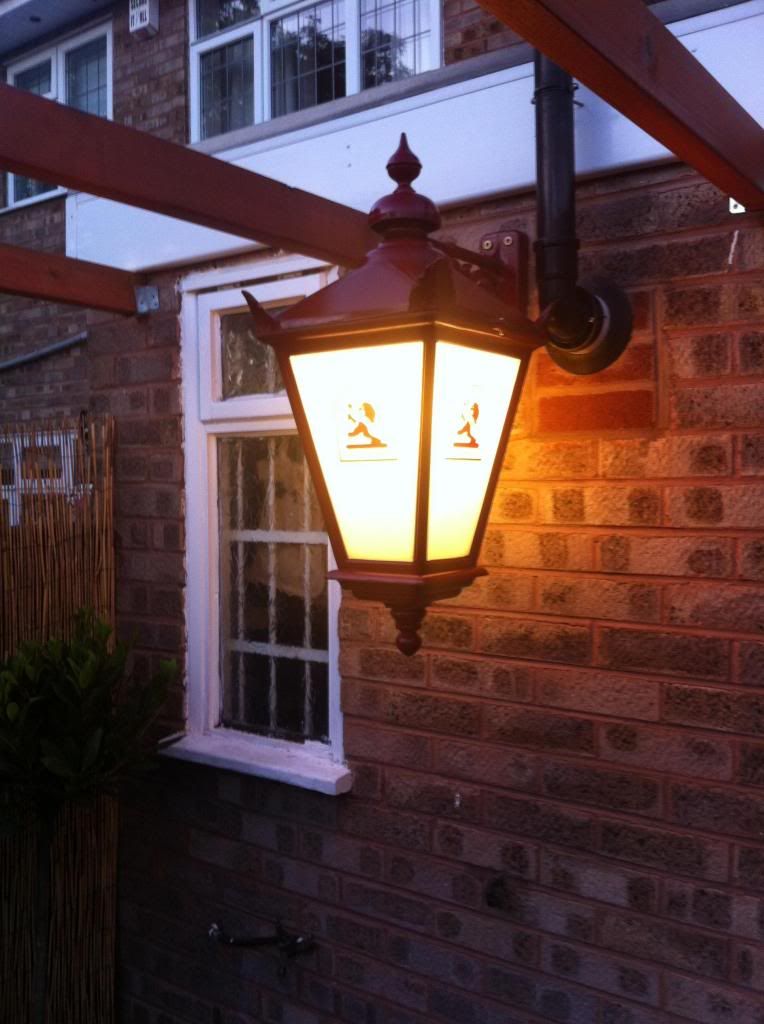 Looking forward to the next few days...... |
|
|
|
Post by bookemdanno on Jul 4, 2013 13:04:20 GMT
wowzers! thats one quick dome build!!  Looks a nice oven, with a contemporary style. Who made it? |
|
ringo
valid member
Posts: 75
|
Post by ringo on Jul 4, 2013 18:34:00 GMT
Haha yes it went like a dream to be honest although it was damn heavy, took three of us to lift and position
Must confess the chimney is staged though and not cemented in yet!
Yes I'm pleased with the neatness of it and the whole thing suited both my skill level (I.e. none) and pocket (shallow). Bought it from a guy on eBay who made (makes) them. Found out after he posted on here a few times!!! I know what some may think about not buying from a named company but with quality of it and the way it went together, I'm convinced it'll be good. He is going to launch a web site soon can only guess he's cast more- he also does a really good cast base. I'll give him a mention once I've fired up a few times.
So, some finishing touches to do. Finish curing over the next few days, insulate and render dome (may try K-Rend), tile the top of the oven base, fit a nice wooden surround, clean/hide brickwork, fit a waterproof box for the thermocouples, fix chimney in, fire up, crack open beer, whack a pizza in - job done
Right, I've got some kindling to burn!
|
|
ringo
valid member
Posts: 75
|
Post by ringo on Jul 13, 2013 15:43:37 GMT
First couple of firings over the last few days, started with some tea lights then moving up to a small kindling one BUT have had few hairline cracks develop on the dome and it's made me a bit nervous. From reading a post on the FB site, it's supposed to be normal but something to keep an eye on. Not sure whether to brush over the cracks with a cement wash or fire clay (although they are no more than 1mm if that) I've also had the thermocouple reader changed as the last one only read up to 200 degrees which is no good to man nor beast The board seems to have been a bit quiet over the last week or so, hopefully this means that everyone's been hard at it outside so looking forward to more pics from everyone! Got a great recipe for a slow pulled pork joint from the hairy bikers site so can't wait to try this  |
|
|
|
Post by cannyfradock on Jul 14, 2013 9:40:35 GMT
Ringo
Cracks are par for the course when building your own oven from scratch. Often you get no cracking....this of course depends on your homebrew mix, how good the oven is built and how patient you are during the curing process. Other cracks range from minute to the larger cracks which have to addressed, but the larger cracks usually only appear on clay/cob builds.
You however have a Modular oven (kit form) so you must follow the manufacturers instructions to the letter. It is always best to contact the supplier of the oven for advice even if you see hairline cracks. Some of these modular ovens come pre-cured and other you have to go through the slow progress yourself. After seeing you start off with t-lights, then I can see you are doing this curing process correctly, but, still ask advice from your supplier.
Let us know how you get on.
Terry
|
|
ringo
valid member
Posts: 75
|
Post by ringo on Jul 14, 2013 20:45:25 GMT
Balls.... Not so bothered about the cracks now but took the temperature up to 350 and this has happened 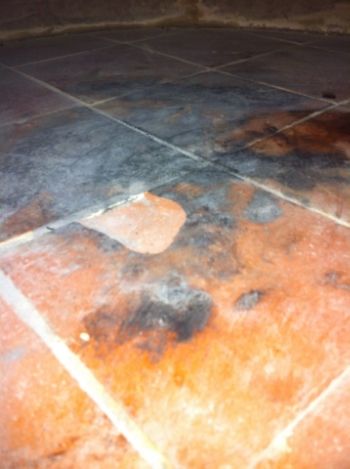 I'm not going to try and chop it out just yet, I'll wait til I've taken the temperature up a bit more. Also concerned about smoke and pissing off the neighbours..... Starting to think it was all a bad idea.......... |
|
|
|
Post by bookemdanno on Jul 15, 2013 12:33:47 GMT
Stay strong Ringo, i too went through this stage. Not the tiles though...sorry. One consolation is that they all haven't done it, so it was perhaps just a slightly dodgy one. Make sure that your wood is really good and dry, and well seasoned, ideally for two years. It should sound hollow and sort of have a ring when you bang it on the floor. Don't use too big a log yet either, i usually split mine down to around the size of my wrist for the largest logs. Look up the upside down fire technique too, it stops the fire choking and making more smoke. I find a blowtorch to start the fire gets it running hotter sooner and again minimises the smoke. A little paper, plenty of nice dry kindling and a few minutes under the torch...woof! Have a chat with the neighbours, they'll probably not even of noticed, and once you tell them what you've got, they'll either want you to make one or invite themselves round for tea! Either way, an agreement should be easily thrashed out! |
|
ringo
valid member
Posts: 75
|
Post by ringo on Jul 27, 2013 17:24:51 GMT
Moving on.... The worlds biggest Tunnocks tea cake 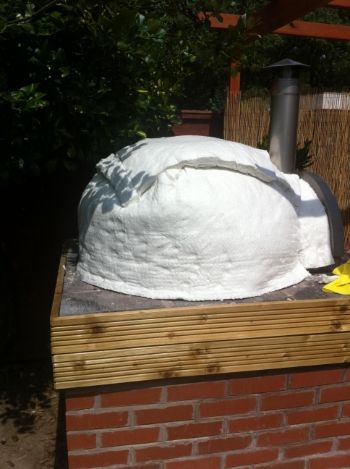 Netted down nice and tight, used some staples into the thermalite blocks, worked a treat 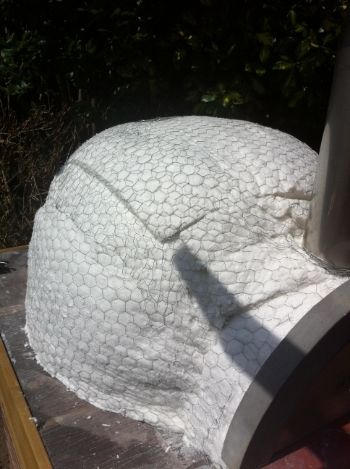 |
|
ringo
valid member
Posts: 75
|
Post by ringo on Jul 27, 2013 17:27:22 GMT
And finally the vermicrete, strangely therapeutic to put on. A few bits need touching up tomorrow but can almost smell the pizza flavoured finishing line.... 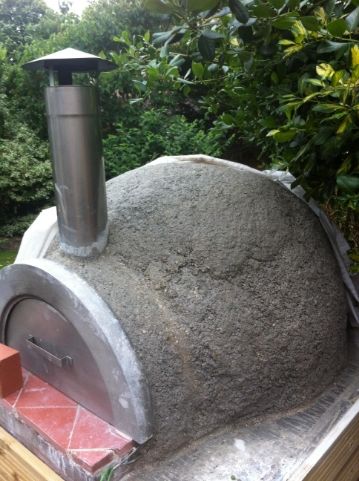 |
|


