|
|
Post by bighairyal on Jun 19, 2012 17:24:56 GMT
Fools! Fools! You're all fools! 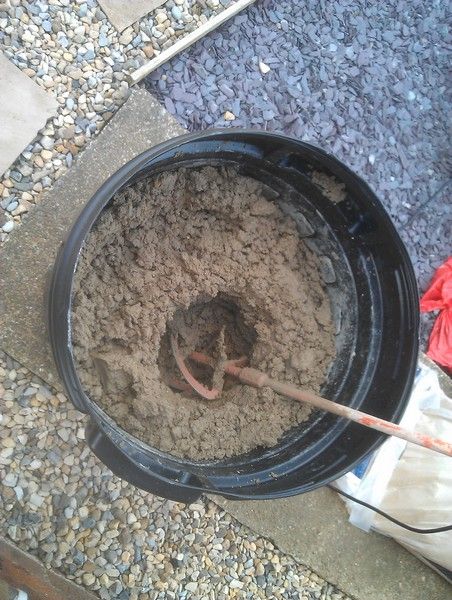 Or at least, you've not witnessed the benefits that a plaster mixer can bring to building a clay oven. Annoyed by how slow the 'puddling' process was going, I popped to my local hire centre and picked up a mixer for not much cash at all, threw all my sand/clay into a plastic bin and began to mix with wild and happy abandon. Not but half an hour later, I had splendidly homogenous building material ready for use. I think I ended up with a rough 3-1 sand/clay mix, but can't recall exactly. Anyroad, the mix passed the drop test, Holding it's form nicely after being dropped from an outstretched arm: 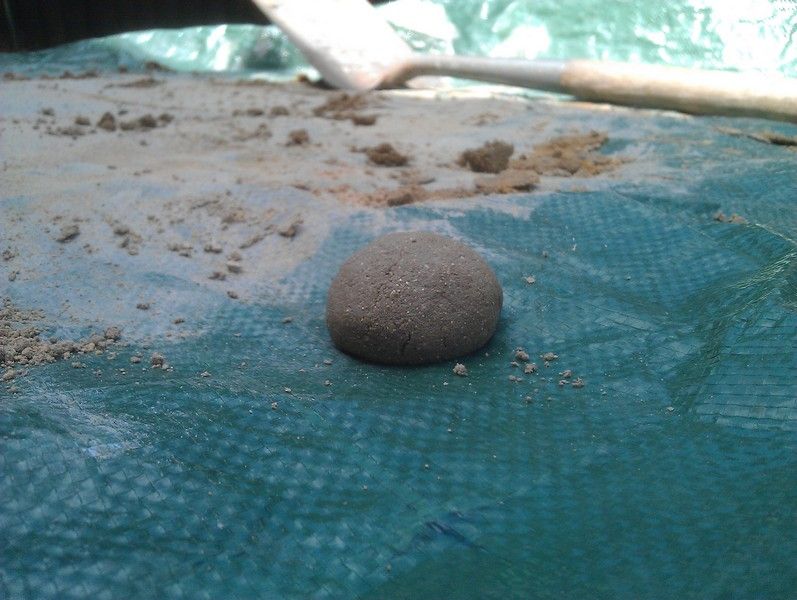 Then began the actual build. I was aiming for walls about 4" thick, and this worked well at first: 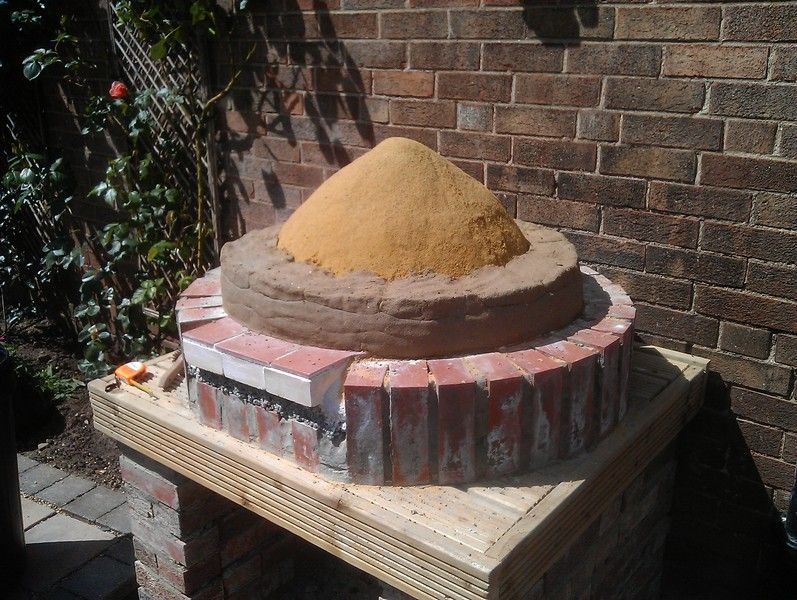 But fairly soon, the layer began to slump a little under it's own weight, so I elected to use some plastic garden bordering held in place with a ratchet strap to try and keep the slump at bay: 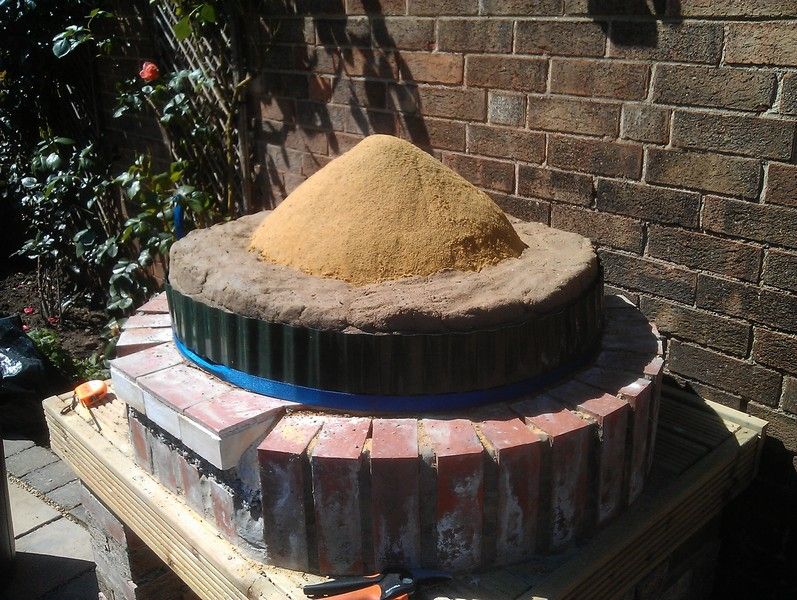 In order to further prevent slump, I slightly reduced the thickness of each successive layer - resulting in a slight wedding cake appearance. Not too bothered by this, as the oven is going to be hidden from view by a wooden box filled with vermiculite insulation. I then did a silly thing! Motivated by all this sudden progress, and hastened by the fact that the clay was drying out quickly in the sun, I thought it was high time to cut my door. This began well, butt then got a little untidy: 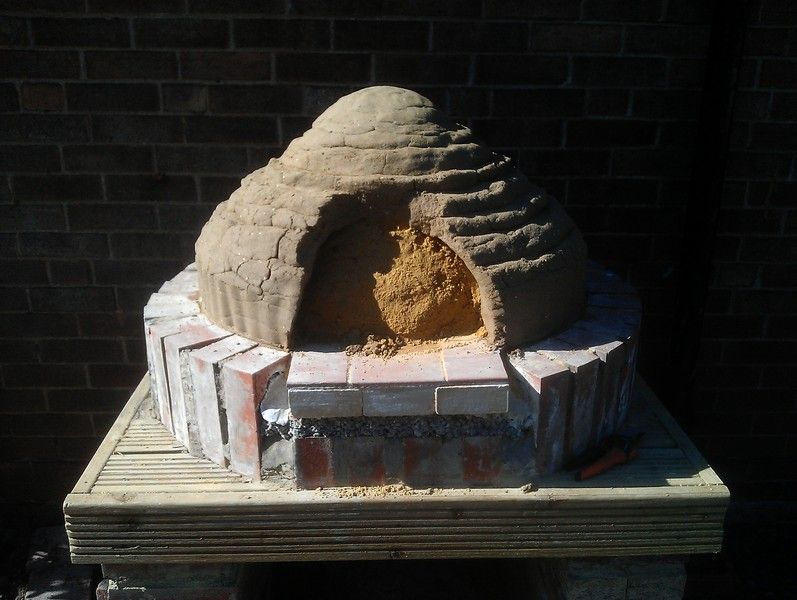 It would seem that things were not as dry as I had assessed. This will be getting sorted out tomorrow when I build the brick arch doorway and mate it up to the dome itself. Hopefully. I can't guarantee that further cockuppery won't occur ;D |
|
|
|
Post by turkey on Jun 20, 2012 8:14:24 GMT
I like the power tool idea, the modern day equivalent of inviting the local play group to play clay pies for you on a tarp for the morning inadvertently mixing the clay you ;-)
you can always make a slightly wetter clay "slip" and then smooth out the edges, this will make a more uniform thickness but will be will but undetectable in usage. Good idea on the retaining wall you made, very handy tip for folks there.
clay is an amazing building material and its easy to patch up later, I think you wet the area you wish to join and slap new material in hard. Most exposed clay ovens require running repairs after each winter, yours is just an early starter lol.
as you seem to be making such quick progress I think I need to repeat the mantra about slow drying and curing times, don't rush in with the firewood just yet. Very slowly slowly or you will end up with crazy paving cracks.
keep the build pic s coming, its looking great so far, and no build is without its little "personality traits" and that is what makes them so interesting to follow
|
|
|
|
Post by bighairyal on Jun 21, 2012 8:53:09 GMT
Well, my hand is forced by the impending return to work in Denmark - so the oven will now be getting left to dry out of it's own accord for a good 5 weeks. Far longer than the 5 minutes that I'd probably have waited to light a fire otherwise :-) So yesterday saw the sand form emptied out, with no hint of any collapse. Hurrah. Those cracks you can see to the left of the door are only surface breaking, caused mostly by the fact that when building the dome, the surface was drying out very quickly in the sun. There are a couple of small construction joints inside the dome, but I'm hopeful that a prolonged drying period of 5 weeks will mean these have minimal negative impact when I get round to firing. The final act before I leave (which was timely, as it is now cats & dogs) was to erect a wooden frame and chuck a tarp over it. The frame will be getting fleshed out with more decking boards or tongue & groove at a later date. 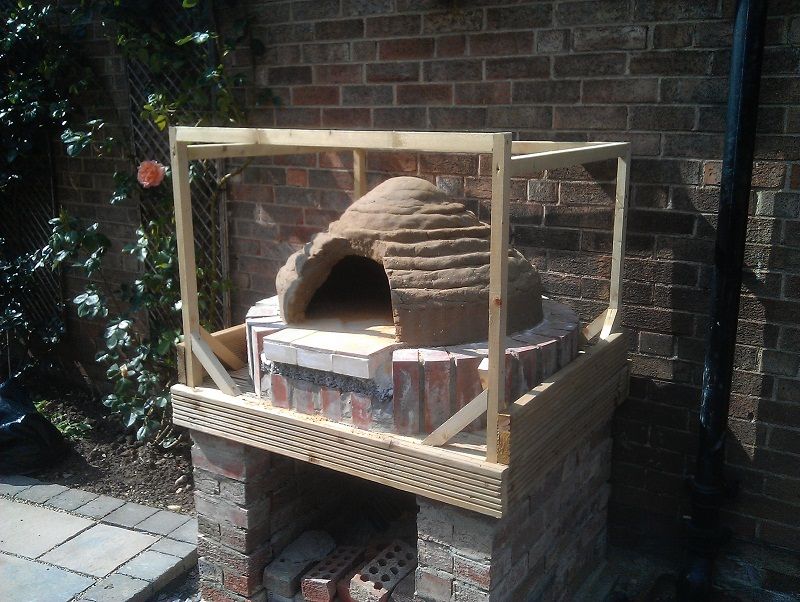 Slightly concerned by the idea that when building the brick archway, it'll be on a cold joint to the dome. Hmmm. I may investigate the possibility of using something like fire cement as an intermediary - it seems like very sticky stuff. Right, to Denmark. Skål! |
|
|
|
Post by cannyfradock on Jun 21, 2012 16:33:27 GMT
Al
I always love seeing these Clay oven builds (haven't done one myself)....don't understand the slump...If your sand form was slightly damp....and well packed....it should take anything you throw at it.
Now you have cut an opening, you have options.......leave it as it is.....as many clay oven builders do....or create a chimney and vent.
I think I would build an arch first.....then create the clay dome around it.....but these are only my thoughts......you are 1 stage ahead of me.......you have experience now in clay oven building....I haven't.
I lived in Hannover Germany for 6 or 7 years and visited Denmark on many occasions...loved those early morning fish markets...but I preferred my weekend visits to Enschede in holland.......
Terry
|
|
|
|
Post by bighairyal on Jun 21, 2012 19:34:02 GMT
Indeed Terry, in retrospect I should have built the arch first... I think I'll fire the dome a few times and see how she works before deciding whether or not to build one. I reckon I probably will, if only to increase my floor space a little - she's good enough for a 12" pizza I think, but a bit more wouldn't go amiss :-) The slump happened in an outwards fashion; as I built higher, each layer started to sink and bulge outwards a little. The sand form itself was very well compacted, and did it's job. I think p'raps my clay was a little too wet, but then given how quickly it began to dry in the sun, maybe not  My next build, when & wherever it may happen, will almost certainly be a brick barrel oven. I've enjoyed this clay build but the more precise nature of building with bricks appeals to me. I say barrel oven as a pompeii would be too precise for the likes of me, but we'll see. I shall have to squeeze in a quick brick laying course before then anyway - given the quality of my laying so far  Denmark isn't bad, but I'm nowhere interesting.... The teeny town of Grenaa is pretty enough, but is 60km from the nearest big city (Aarhus) and as we work a 7 day week we don't get to venture that far. Well, we did once, and it was like a film set. Wall to wall totty everywhere! The women were all stunning and the men all looked like Gucci models. So for the sake of my ageing ticker, best I stay away anyway :-) |
|
matt
valid member
 
Posts: 74
|
Post by matt on Jun 24, 2012 17:07:34 GMT
Just caught up with your build Al, looking really good. I had a bit of slump on my clay dome, which was a similar size and thickness.
The River Cottage build method adds the door arch and chimney hole afterwards, although as its on day 2 of the build i guess it wouldn't be considered a cold joint. Though I reckon your insulation layer will stop any cold joints expanding too much.
You're nearly there, there's nothing like the first time you cook in it - that 'it was all worth it' feeling is unforgettable ;D
|
|
|
|
Post by bighairyal on Jun 24, 2012 17:20:57 GMT
Cheers Matt! Well, I got a bit excitable today after 3 days of gentle drying with a fan heater..... Out came the kindling and I had myself a little fire. Just a little one mind; it was only burning for about 30 minutes. The fire appeared to burn nicely despite strong crosswinds, no cracks appeared (I imagine there are already sufficient construction joints for stress relief) and for a good half hour afterwards the top of the dome was warm to the touch and steaming gently. That's that for 4 weeks now though, so I'll see about a more vigorous firing whence I return. I have decided to name my oven 'Jabba' for reasons that should not be too difficult to fathom. 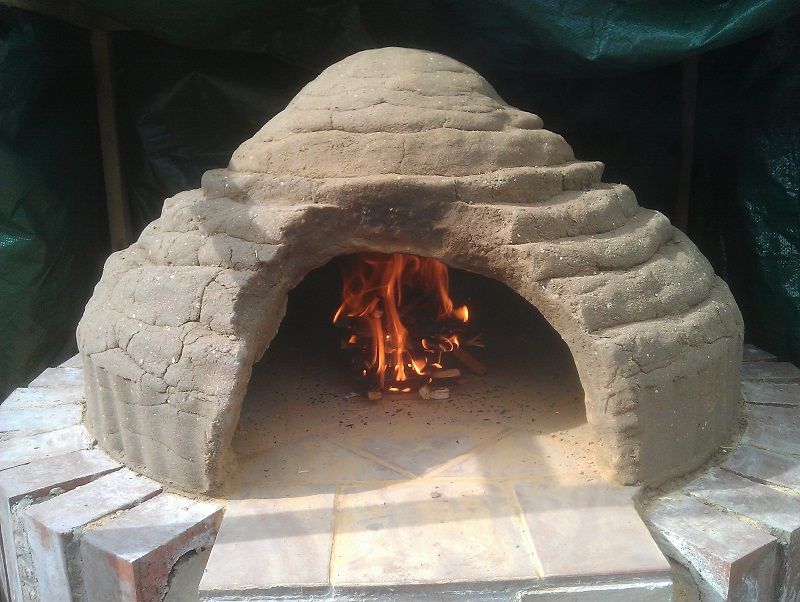 |
|
|
|
Post by cannyfradock on Jun 29, 2012 15:13:06 GMT
Al.......great photo. Please let us know how the first pizza party goes....
Terry
|
|
|
|
Post by bookemdanno on Jul 1, 2012 20:11:06 GMT
I hope its "Jabba the Hot" too!.
Nice work Fella, enjoy it!
|
|
|
|
Post by turkey on Jul 1, 2012 20:56:54 GMT
I hope its "Jabba the Hot" too!. Nice work Fella, enjoy it! brilliant :-) fire breathing pizza monster. |
|
|
|
Post by bighairyal on Aug 8, 2012 19:12:08 GMT
Long time no see, shipmates! Buoyed by the return from Denmark to delightful weather, I set about building the brick arch for my oven. My research included all sorts of fancy arch drawing guides on youtube and the like, but in the end I plumped for lining bricks up in an arch shape on top of a piece of wood, and then cutting the wood to this shape. This was more precise than you might imagine; I used a ruler and more than one pencil! Bought some nice bricks from my local builders yard, whilst the mortar was simply some of the clay I used for the dome that had been kept damp, mixed with a little portland and some sand. Slightly concerned that the cold joint between arch and dome will fracture etc. but that's what I get for a total lack of planning to date  All went well until time came for the keystone..... The gap is ever so slightly too large (a matter of millimetres) for the brick I was going to use, so I shall pop off around town tomorrow and select a wider brick/stone etc. to do the job. Voila! 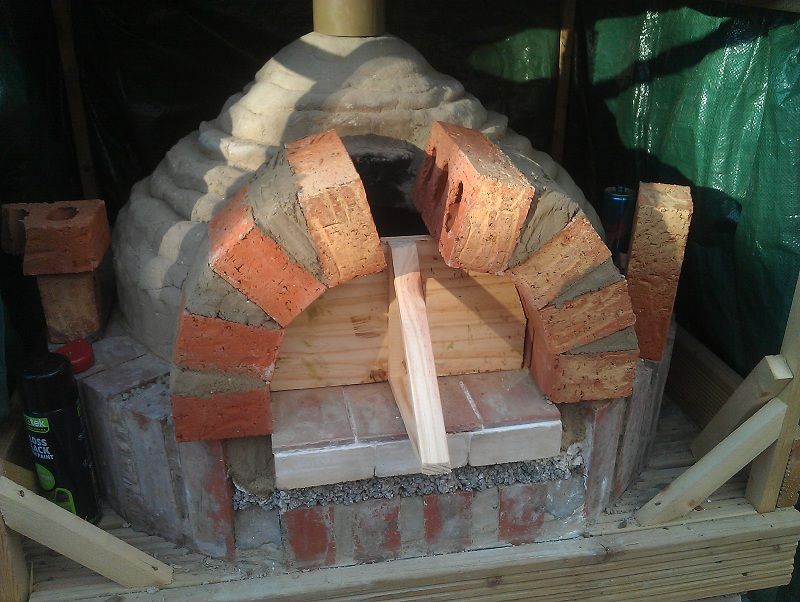 Also performed a quick test run before the arch began; fired the oven up (only for 45 mins and with softwood alone) then chucked a simple flour/water flatbread onto the tiles: 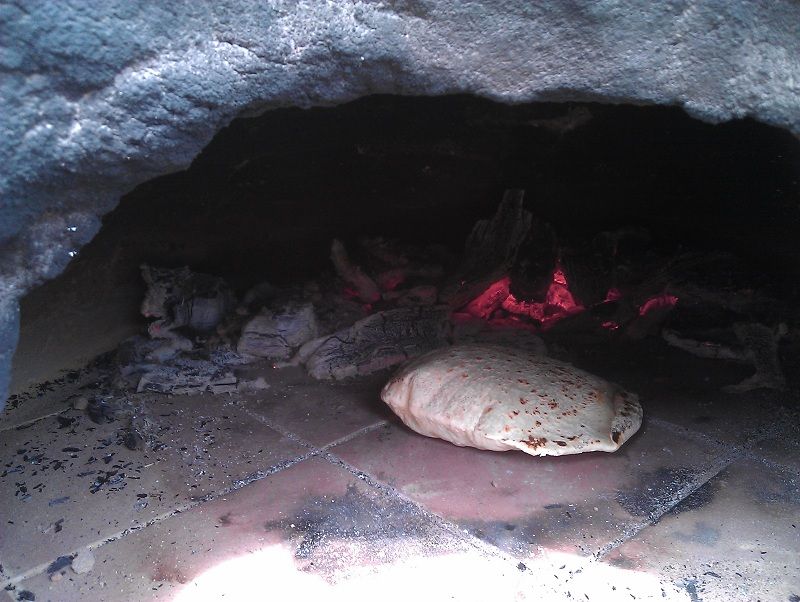 30 seconds each side and I had myself a nice little pitta. I'm hopeful that come pizza time, with a hardwood fire, more embers and a good hour plus firing, it'll perform even better. Till next time! |
|
Tom B
WFO Team Player
  
Posts: 148
|
Post by Tom B on Aug 9, 2012 7:29:12 GMT
Al, I'm looking forward to seeing the finished oven - great photos so far  |
|
|
|
Post by bighairyal on Aug 9, 2012 19:04:44 GMT
Throwing caution to the wind yet again, I poo pooed the idea of finding a bigger keystone and just padded it out with more mortar: 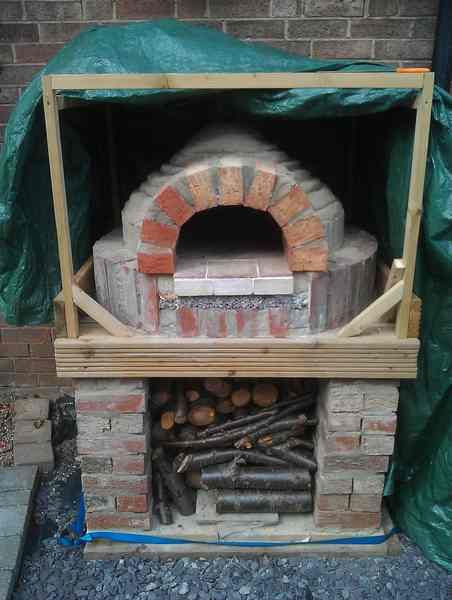 It has all held together and doesn't look too shabby, I think. The father-in-law brought round some wood (looks like birch to me) that appears mostly seasoned - but some is a bit rotten. I imagine if it is dry it will all burn the same though. Next step will be to whack the lime-vermiculiite insulating layer up and over the top. Shouldn't be too far off, what with this weather we're having  |
|
|
|
Post by bighairyal on Aug 10, 2012 18:52:24 GMT
A third days building on the trot, unheard of! Popped to Jewsons' and bought myself a bag of hydrated lime. It's the hydraulic stuff, rather than the non-hydraulic variety. I understand that this means it sets slowly by assimilating CO 2 from the atmosphere, rather than with water, so I may have a wait on my hands until it's anything like solid. That said, the other stuff (which I believe sets quicker) is faaaar more expensive. Anyway, mixed a load up with vermiculite (roughly 8 - 1 if memory serves - the vermiculite seemed well coated) and added enough oggin to make it lightly stick together when squeezed into a ball. No cement this time - I want the insulation to be fully breathable. Then, I set about getting it onto my dome by hand (using rubber gloves, lime is horrible nasty stuff) - which went better than I expected. I daresay the layer would fall apart soon as sneeze at it right now, but within a week or so, I'm hopeful of a set. Of course, there is always the chance that it doesn't set well at all for various reasons, most of which probably involve me and my inexperience - in which case I'll see about making a harder lime render to act as a barrier. It's not a particularly thick layer - but as I'll be using the oven primarily as a pizza oven, with maybe the odd loaf of bread now and then, I don''t see the need for insulation overkill. Hoping to finish the layer off tomorrow, but for now here we are: 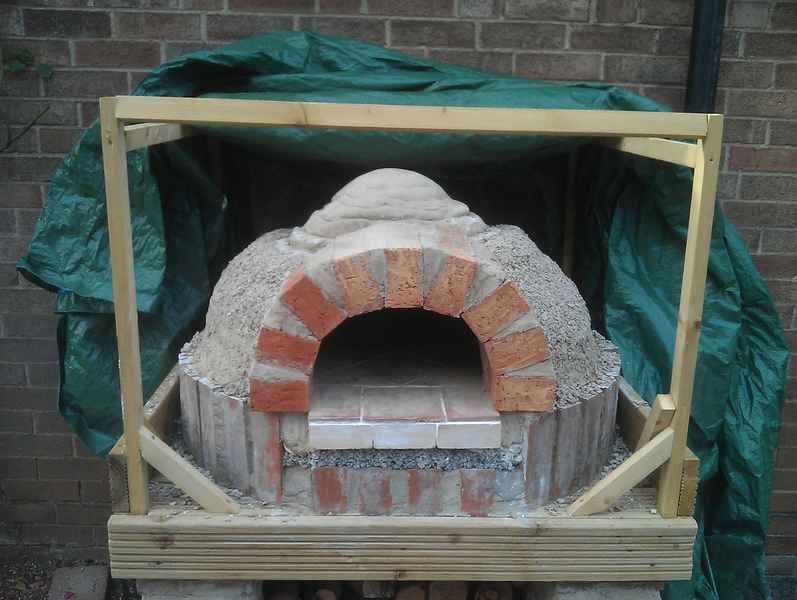 |
|
|
|
Post by turkey on Aug 10, 2012 20:26:39 GMT
I do like the arch and even with you mentioning the keystone I cannot see that it is too small. For modern bricks they look very rustic.
I think your rippled oven will help with the vermicilite, giving it something to grip to.I think given the current weather it might dry quite quickly.
|
|


