|
|
Post by bighairyal on Feb 28, 2012 15:38:08 GMT
Ahoy shipmates. I'll be using the rather splendid ukwoodfiredovenforum.proboards.com/index.cgi?board=ccovens&action=display&thread=59 as a rough guide to my clay oven build - although as mentioned in my Introduction thread, for various reasons it won't be anywhere near as sizeable, or well engineered. I began by using some 5-1 sand/cement to make what ended up only being a 3" - 4" plinth to start the frame off with. Not wanting to make a trip to my local builders yard for fear of diverting myself into the wondrous cafe it has upstairs (I'd already had lunch), I decided to chuck 4 x 450mm square concrete flags down to reinforce my anaemic concrete. Then, I made a discovery; I despise bricklaying with a passion hitherto reserved for bathroom tiling. You can see evidence of this in the avant garde brick frame in the picture below. Witness the variable joint sizes, overhangs and poor pointing. I can say however, now that it has 2 layers of decking board on top, it can take my weight (95kg) jumping up and down slightly in the centre. I'm confident therefore that once the clay dome is on (which will direct most of the weight down to the brick legs) the structure will remain solid. Please note that I do intend to point and render the bricks at a later date. For now though, I am impatient and wish to rush ahead with more interesting matters - beginning with using some wood and a pencil to sketch out the circle for my dome. 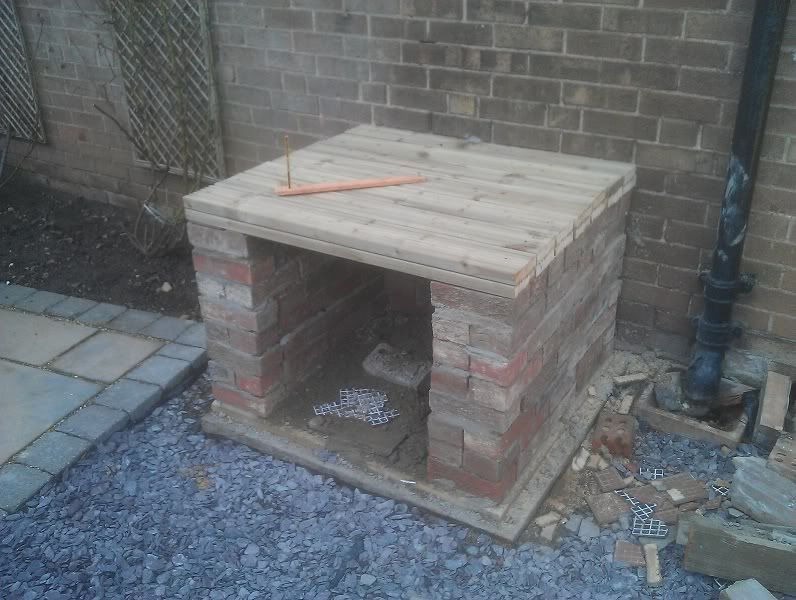 Your eyes do not deceive - I am using wood as a hearth base for a wood fired oven. I'd run out of concrete flags, but had several 38mm decking boards going spare. So, these have been doubled up and affixed to the bricks. Once my brick surround is complete, there will be plenty of insulation laid down to stop the wood getting too hot. I hope. 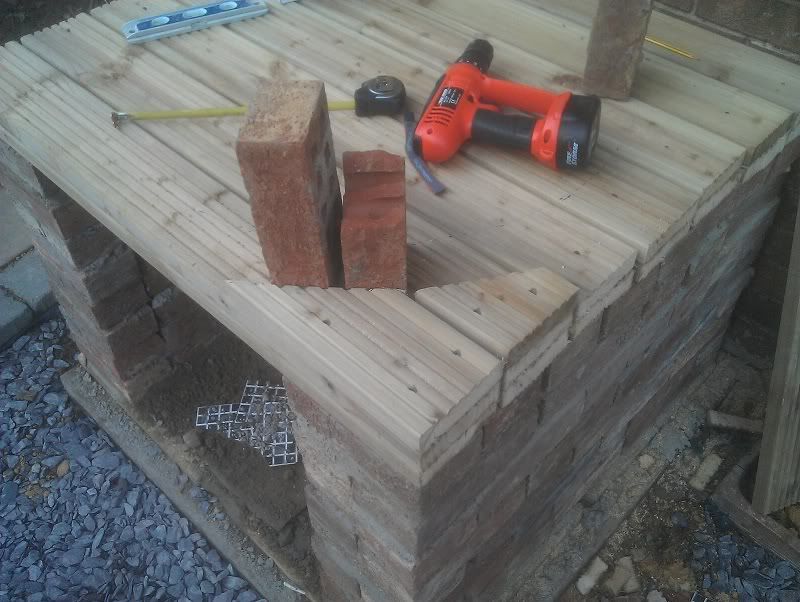 As a rough guide for the brick ring that will surround/support my clay done I've cut some more decking board to shape and screwed it down at the corners. You can see at this point by reference to my dinky 12v drill, that this is not going to be a huge oven. I'm estimating that the internal diameter on completion will be approximately 70cm - which is plenty for my needs at present. As long as I can get a 12" pizza or cast iron stew pot inside, I shall be happy. Might have to push all my embers right to the sides, but there you are. 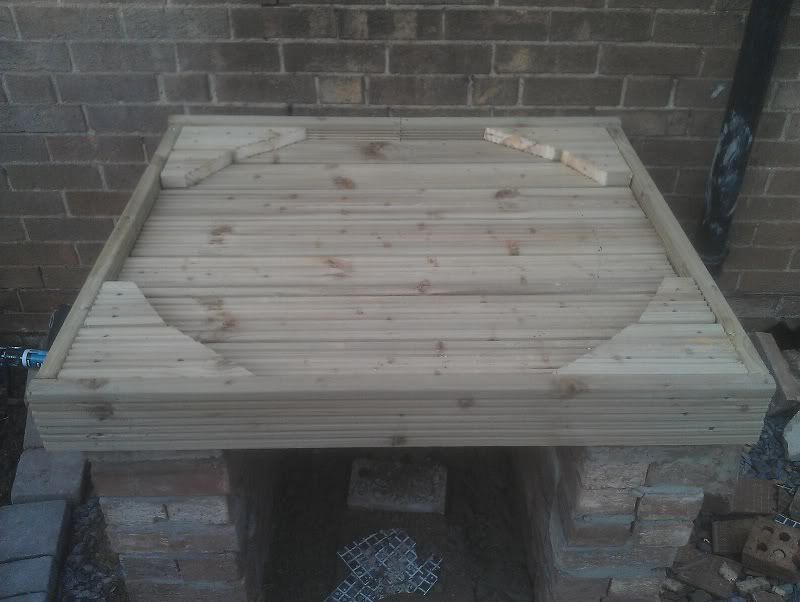 A quick bit of edging, and here I am for now. I've run out of pennies and have to pop back offshore for a few dips to earn some more for supplies. The clay should be free though - I recall cursing the soil in my garden for that very reason a couple of years ago whilst trying to get some raspberries to grow. Cheerio! |
|
|
|
Post by minesamojito on Feb 28, 2012 18:58:48 GMT
Hey Al,
Great start! I know what it's like trying to do stuff like this, as I work offshore too. Am on a rig in the CNS at the mo.
I take it you're a diver?
Nice one on finding the clay in the garden, will make it a lot easier.
Cheers
Marcus
|
|
matt
valid member
 
Posts: 74
|
Post by matt on Feb 28, 2012 19:49:55 GMT
Nice one Al - interesting to see how your wood base works out. I've seen them built on pallets before.
My cob oven is a modest 60 inches wide at the widest point (from above its the standard bottle shape) and that's fine for most things. I'm a bread baking obsessive and I can get 4x 800g loaves in per load, or a big and a medium sized roasting tray, or cook smaller pizzas across the front with the fire going at the back.
Matt
|
|
|
|
Post by bighairyal on Feb 28, 2012 21:14:14 GMT
Hi Marcus, I am a diver, yes. Not one of your Ferrari driving oil & gas types though - I currently slum it on these white elephant wind farms that appear to be all the rage these days. Say what you like about them, but they keep me in beans on toast! Have just done my rigging course too, see if I can't get me a bit busier.
Crikey Matt! That is a smart looking oven. Mine certainly won't be looking as good as that one. I'll be leaving my dome open, except for the wood roof over the top.
|
|
|
|
Post by bighairyal on Feb 29, 2012 16:12:58 GMT
Alarmed at the weather forecast for the week until I go back to work, I elected to throw caution to the wind and make a trip to Jewsons. Luckily, it's only a 5 minute drive away - and they were happy to accept the Forum account code, bringing down my bill drastically. £32 for 34 engineering bricks, 2 bags sand, 1 bag cement and a 100l bag of vermiculite. Cheers Terry! Disconcertingly though, the chap at the counter knew nought about firebricks. I'm hoping a loftier employee will be able to help at a later date. So, with today being the last day of good weather I arranged my bricks into a pleasing ring arrangement. You'll not they are not mortared in yet - I hate mortar, so have put down the vermiculite/wine bottle insulation first. When I return in a month or so, I'll see about sticking the bricks to each other. Grudgingly. I've found vermiculite to be a pleasant material to work with - at least for an insulating pad that is. I can imagine it being less so if I had to use it as an insulating layer for an oven roof. So, I made a 6-1 vermicrete mix, and threw it on top of some newspapers (to stop it falling through my decking gaps) into the brick circle. At half time, some wine bottles were added, and then topped off with more vermicrete. I ended up using perhaps 75% of a 100l bag, giving about a 5" - 6" layer of (lightly) compressed insulation. I'm hoping that this, plus the layer of builders sand I'll be using to bed the firebricks in, will offer sufficient protection to prevent my decking boards setting alight  If not, then maybe a sacrificial pizza oven is the way to go? A pizza oven that is itself actually on fire, could possibly speed up cooking times nicely ;D 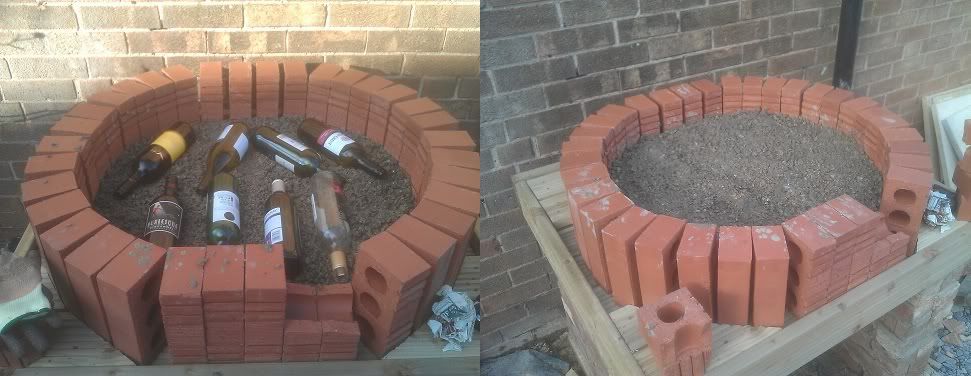 |
|
|
|
Post by cannyfradock on Feb 29, 2012 20:14:46 GMT
Al I would've suggested ceramic fibre-board on top of your decking....but 5/6 inches of vermiculite as well as being a sound insulator for your hearth will also act as a fire-stop. If you can get your hands on some powdered fire-clay, this is good for mixing with sand when laying your fire-brick hearth...wet with a knotched trowel or dry bed both works fine. You give your location as up North......we know of quite a few refractory suppliers up north .....the old forum has more info on here... woodovenukforum.forumup.co.uk/viewforum.php?f=4&mforum=woodovenukforum Best of luck and ......please keep us informed on your progress. Terry |
|
|
|
Post by bighairyal on Feb 29, 2012 20:39:58 GMT
Thanks Terry.
I plan to invest in one of those infrared pyrometer doohickies, which I will be pointing at the decking boards underneath the oven frequently and enthusiastically. If it all goes belly up and I end up with an expensive bonfire, then I get to build another one - winner all round!
However, I understand that although the water within my wood will begin to evaporate vigorously at 100c, it's not until 230c and above that the fireworks begin. I'm quietly confident that 10" of brick/sand/vermicrete will prevent the decking boards getting that hot.
I shall see about some powdered fireclay. What sort of sand/clay ratio do you recommend?
|
|
|
|
Post by DuncanM on Feb 29, 2012 21:43:48 GMT
The ratio is 50/50. I'd sieve both though to get rid of some of the larger particles. Then wet a little to aid smoothing and leveling should be straightforward.
If you are worried about the temp you could always stick a thermocouple in there - I haven't done it myself but I hear it's very straight forward
|
|
|
|
Post by bighairyal on Mar 4, 2012 12:38:39 GMT
I've been wondering; with plenty of vermiculite left over from my hearth insulation, would it be a sensible idea to make my oven dome insulation layer out of vermicrete instead of clay/sawdust (less digging for me), or will the vermicrete prevent the first clay/sand layer from being able to breathe properly?
|
|
|
|
Post by bookemdanno on Mar 5, 2012 13:29:30 GMT
if cement is used, i'd say yes. But why not try Clay and Vermiculite? Or NHL Lime to replace Cement?
No real experience of either i'm afraid...
|
|
|
|
Post by bighairyal on Mar 5, 2012 17:43:10 GMT
Cheers Danno. Hmmm, well I've four weeks to think about it now. That's rather ambitiously assuming that the weather will be suitable for WFO building when I get back..... So, here endeth my progress for now. The sun unexpectedly came out, so I ham fistedly mortared my brick ring together (the photo has been taken from a suitable distance to hide my worst actions) and have chucked a tarp on top of it. With a bit of luck, in a month I'll be able to build the firebrick hearth (may even quarry tile it) and get at least 1 clay layer up and over it before I'm due back at work again. Fingers crossed. 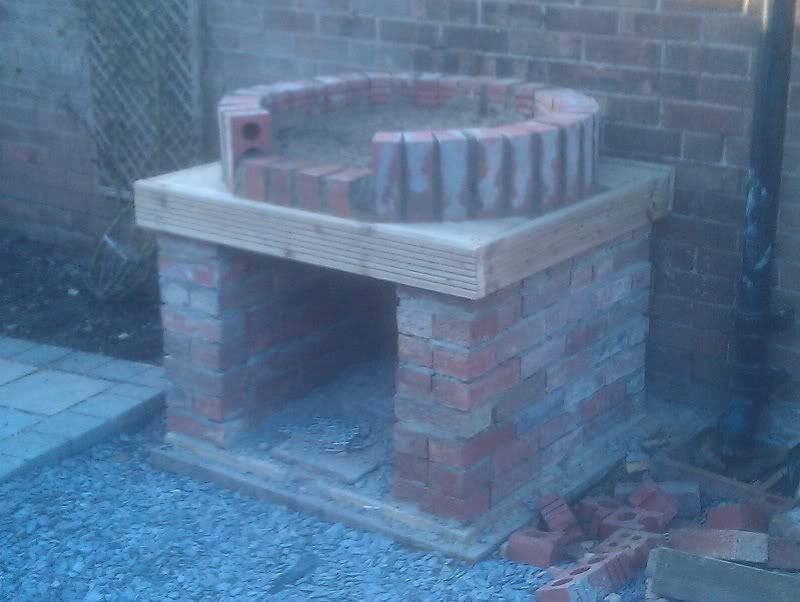 |
|
|
|
Post by cannyfradock on Mar 6, 2012 21:23:20 GMT
Al
Your Clay oven build is coming on fine.....On a true Clay Adobe build I believe the first layer is clay, then the next layer is Adobe...the reason behind this is that the straw in Adobe clay will create air pockets that will give a honeycomb effect for the insulating value's. The same is sometimes done with wood chippings...giving that the wood chippings will eventually burn out, leaving the same honeycomb effect....adding vermiculite to the second layer of clay is not upkeeping in 2000 year old tradition, but makes common sense in the 21st century......use it.....it will save the amount of wood you need to burn....and achieve the same results.
Terry
|
|
|
|
Post by turkey on Mar 6, 2012 22:33:56 GMT
Great build so far, very interesting take on things which is what we like here.
I like the idea of a wood base, given suitable insulation I cant see any reason to expect extra smokey pizzas, if worried you can always add a little more insulation on top, but 6" sounds plenty for under the hearth.
If possible I would try to add some as a render on the inside of the retaining bricks, as heat from the dome will most likly get to them via conduction and they are touching the wood directly. That way there will be a break from the dome to the supporting structure.
I would also use the vermiculite for the top insulation, unless you want to go fully pure then I would use any and every high tech performance enhancing option available within the budget.
|
|
|
|
Post by bighairyal on Mar 7, 2012 8:32:59 GMT
Cheers chaps!
What I'll probably be doing - as much to remove the need for accurate cutting of firebricks* to fill my circular oven floor as to insulate the retaining bricks, is to leave a gap round the edges of the firebricks and start my clay dome from below the level of the hearth.
I'll likely lose a few centimetres of hearth space, but still think the oven will be just big enough for my requirements :-)
I'll leave the decision on using adobe or vermicrete for my insulating layer until I get back and find out:
1. How much clay I have under my feet
2. How easy said clay is to extract
Would rather do things properly, but I'm not against making my life easier if I can ;D
* plus, I don't have one of them expensive brick blades for my chop saw - have you seen the price of them?!?
|
|
|
|
Post by cannyfradock on Mar 7, 2012 20:24:19 GMT
Al
Invest in a good 4" brick bolster. I also couldn't afford ...and perhaps didn't want to use a circular masonry saw....for my last build. A decent lump hammer (maaaarsh hammer..if you're Scottish) and a decent bolster will cut the fire-bricks good enough to make them fit INSIDE your dome....any spaces around the edges can be filled with grog or sand/lime/powdered fire clay....or cement.
Terry
|
|


