|
|
Post by samuraidave on Mar 16, 2012 15:38:09 GMT
Posted: Sat Sep 17, 2011 9:20 am Post subject: Hi, Noob here with a couple of questions. Hi there my name is Dave and I want to build my own wfo. I did have a BigK BBQ but after the really bad winter that we had last it has suffered some catastrophic cracking and I have had to take it down. I am gutted because it has been used all the time. Anyway as they say 'every cloud has a silver lining' and I now have an excuse to build something truly unique. So onto my questions: 1. Have any of you guys had any problems with the extreme cold that we experienced last winter? 2. When build the supporting structure I have seen solid and hollow block construction, some filled with concrete and some not and some laid dry and some with mortar. What would you recommend? 3. I really like the look of what Dave Beasly has done, (my unique project may not be totally unique lol) and notice that he has used paving slabs for the base but I have read about concrete degrading after exposure to extreme heat. Thoughts please because this idea really appeals and looks like a really good idea. These may be silly questions but I have no experience with building or construction. Thanks for your time and congratulations on a fantastic forum. Dave The original thread on the old forum can be found here woodovenukforum.forumup.co.uk/viewtopic.php?t=1067&postdays=0&postorder=asc&start=0&mforum=woodovenukforum |
|
|
|
Post by samuraidave on Mar 16, 2012 15:39:30 GMT
Ok so have been busy. I used the forum code at Jewsons which has been great thanks. Cement mixer for a week was just £18. Bargain. Oh and when you pop in make sure you dont go into Jacksons and start trying to barter a discount with a code from a different store. Doh! Anyway on with the pics.   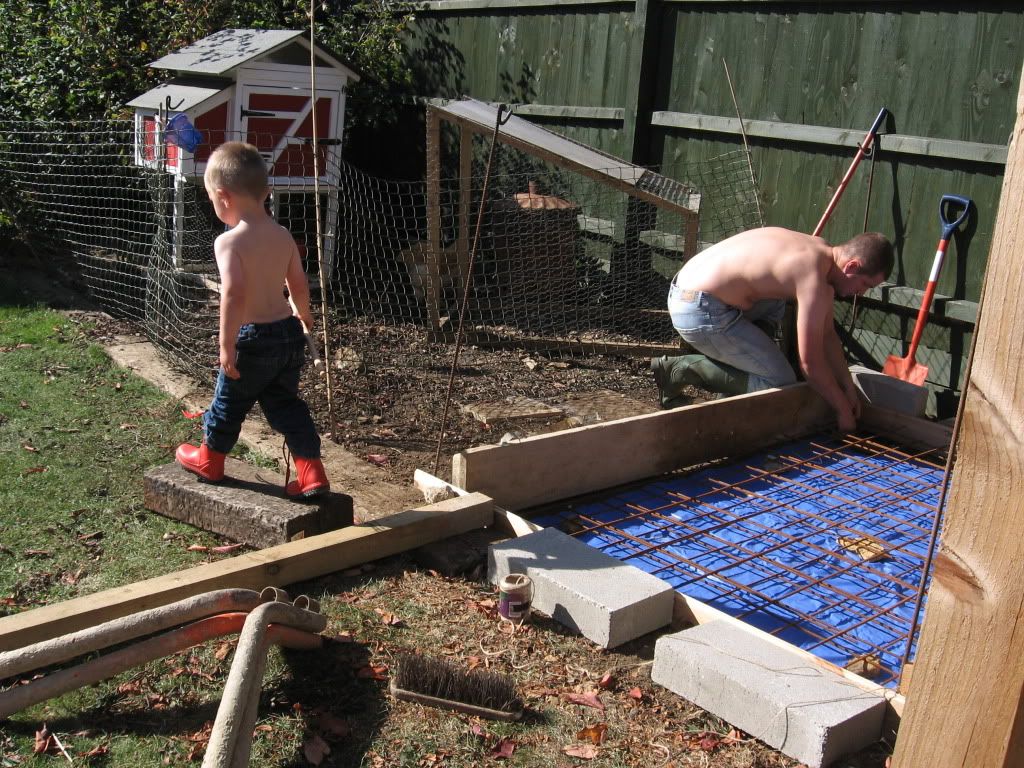 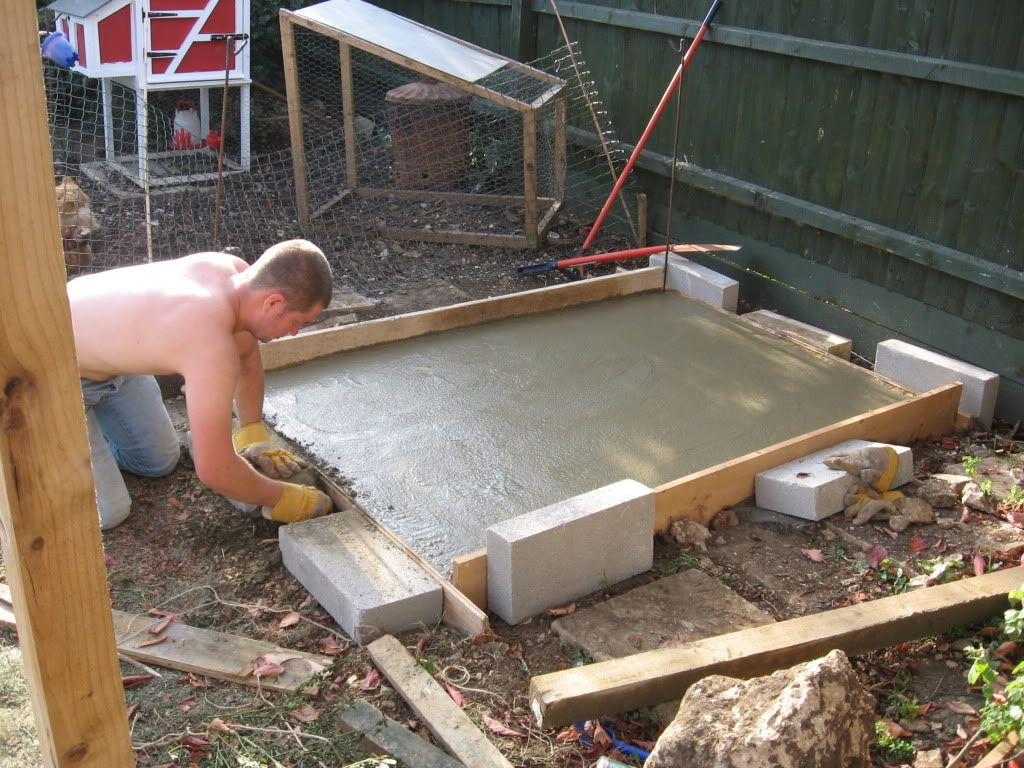  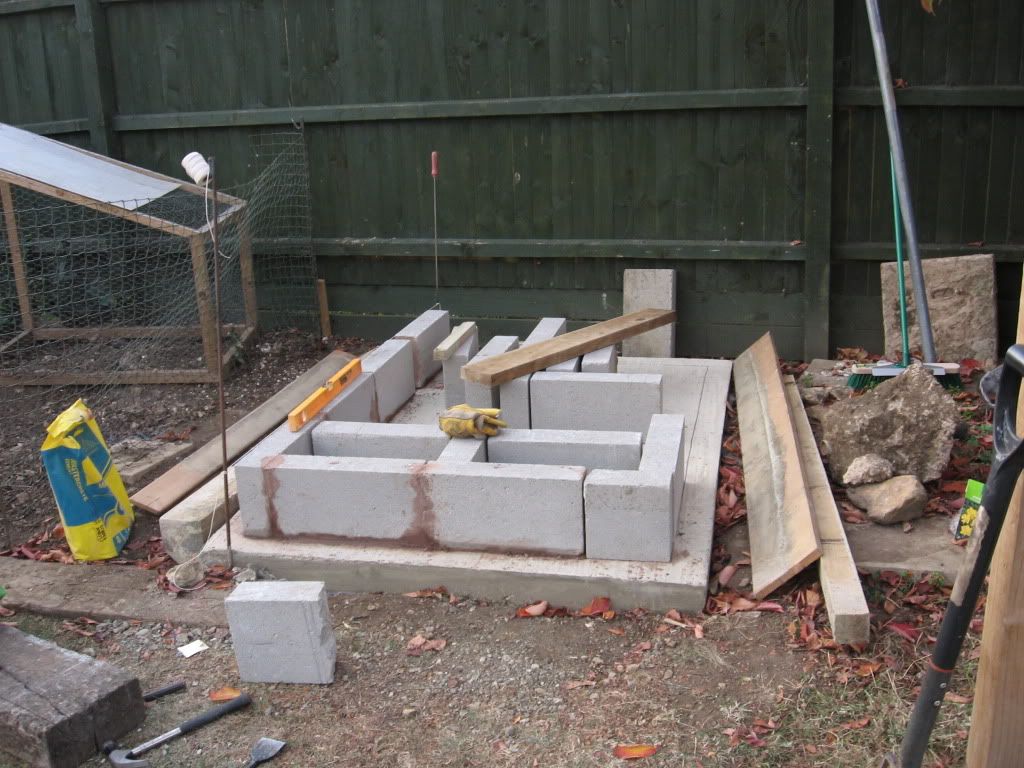 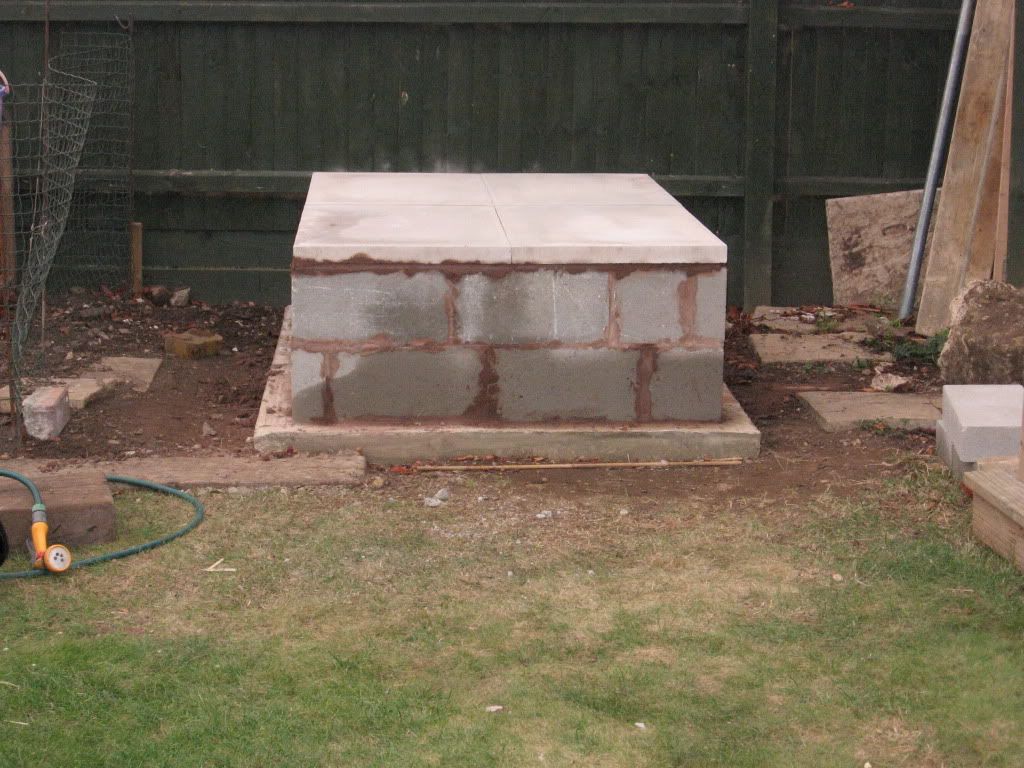 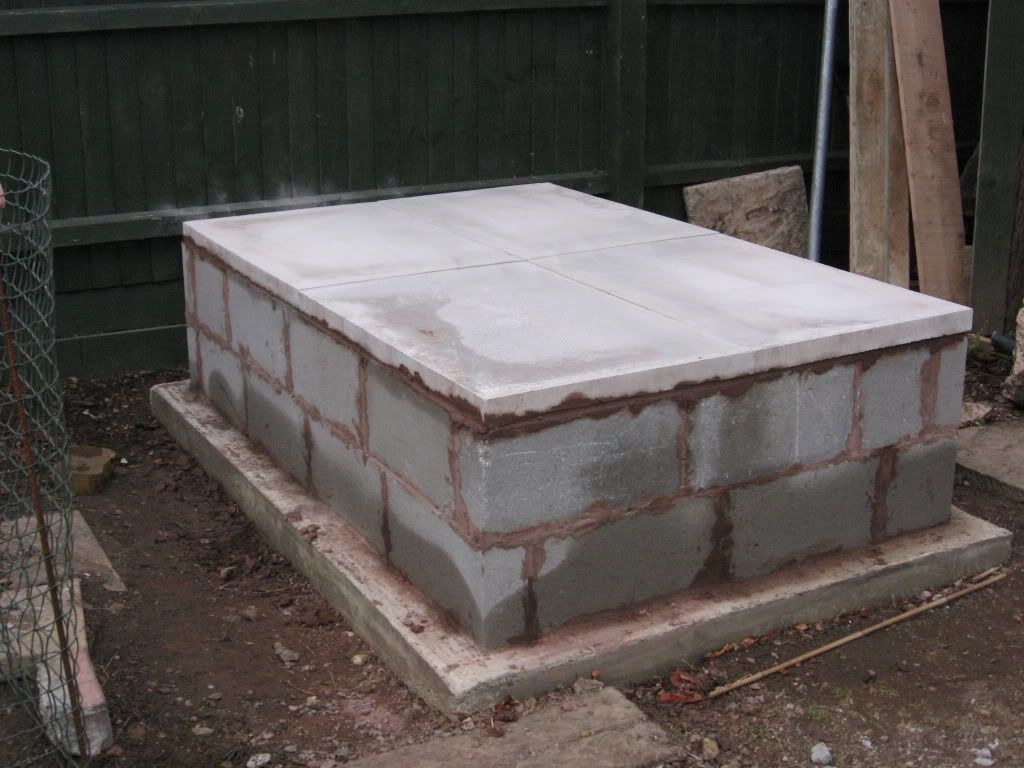 I hope that they all work. Anyway after a whole world of learning I have now got to the stage where I am going to be ordering my fire bricks etc. I am going to lay a course of Thermalite blocks down and the the fire bricks. I was thinking of putting the blocks on their side to give maximum insulation for the slab, does that sound like overkill? Also you can see that I have not left any gap underneath, I looked at most of the designs and felt that they were all a bit high for me but by reducing the hight made it difficult to make space underneath. Would it be a good idea to drill a couple of holes through the concrete blocks just to let the air circulate? Anyway please let me know what you think and be easy on me. I am here to learn so any and all advice is greatly appreciated. Dave |
|
|
|
Post by samuraidave on Mar 16, 2012 15:41:19 GMT
Thanks for the thoughts guys, I read a post on a pottery forum about durox blocks being used in a kiln and that they started to crumble after several firings. That said the kiln was gas fired and the direct heat on the blocks would be much higher that in my oven so I have decided to use them anyway.   Uploaded with ImageShack.usAnd a little play to see what it will look like. So they are mortared in and then the small gaps I brushed concrete powder into. This I think will set over time and the heat will never get far\ enough down to really damage the blocks and degrade the cement joint. Looking at the way that you have all done your arches the angle is quite low. I was thinking of having my vault ceiling 50cm high, this would allow for less cutting of bricks and tighter joints between the arch bricks. Is there any reason for the low arch or is it to do with heating the lowest vault possible to be most efficient? When my fire clay comes I am going to lay my fire bricks on a bed of 50/50 fire clay and sand and then make a home brew fire cement. I was planning on using some durox blocks as insulation on the walls of the oven and then having an external skin of concrete blocks and the render over that. Still undecided, may just fill the void between concrete block and the oven with loose vermiculite. I just hope that i can get this finished before the weather gets to bad and the temperature drops to low. Advice as always is greatly appreciated. Dave P.S. the height looks to be about right, that is why I layed the blocks on their sides to give it the extra height. |
|
|
|
Post by samuraidave on Mar 16, 2012 15:43:03 GMT
So I have been quite busy over the last week and now have my hearth down, wall and first two arch forms up. 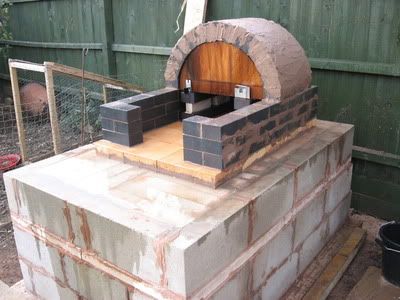 I am a little concerned about the mortar as it has cracked a little but hope that these are just superficial and I will be able to point it up once it has dried a little more. What are your experiences of home made fire mortar? Is there much shrinkage? I have used a mix of 3:1:1:1 of sand, fire clay, lime and cement. I will leave it covered for the next couple of days and am hoping for good weather on thursday as I have the day off and can get on and do a bit more. As always advice is greatly appreciated. Dave |
|
|
|
Post by samuraidave on Mar 16, 2012 15:43:50 GMT
And a bit more goes up. 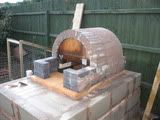 Ok so trial and error is still going on, I have made my mortar mix a little drier than before and have continued to point it up for a couple of hours after doing it. I think the gaps are a bit to big but cutting them all is a bit beyond me. I hope to get a little bit more done later on this week. Dave |
|
|
|
Post by samuraidave on Mar 16, 2012 15:45:14 GMT
Ok so the vault is finished. As noted I have made it quite high, this is so that I can fit a beer can chicken in through the door. I love beer can chicken! Anyway, I also figure that there is more surface area to retain the heat inside the oven. I am going to build several more courses of concrete blocks around the outside and fill it in with vermiculite as an insulation layer. I am hoping that there will be no need to add more thermal mass to the oven so no concrete blanket etc. If I require more heat then I can always put some more wood in and generate the extra heat that way. You will notice that I have been a bit poor with my arch calculation as I had to cut the key stone a bit to get it to fit. My mistake but they are a tight fit so I dont see it being a problem. The lintel is 2 lengths of 5mm angle iron bought for £5 from a local fabricator. I fully expect this to heat and expand and I think that the whole front may move from that point up but again I am not too worried. That is about it for the moment, budget is a bit tight so may have to slow things down for a while. Should I protect it from the weather over the winter? I dont think my gazebo will stand up to any really big storms. Anyway, on with the pics. 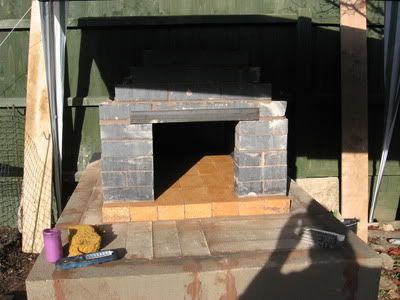 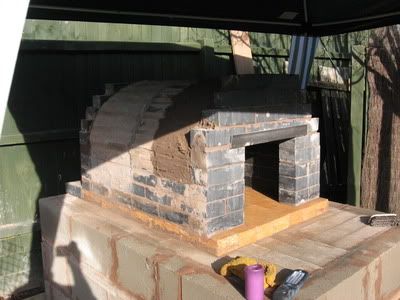 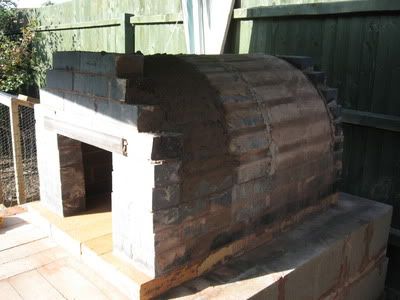 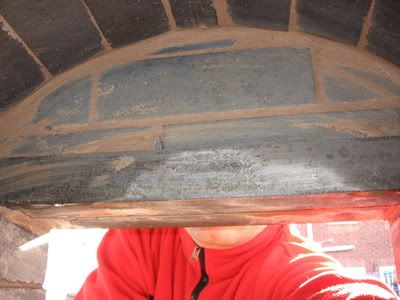 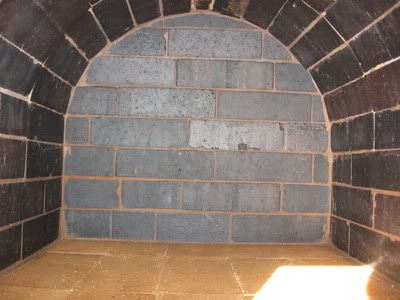 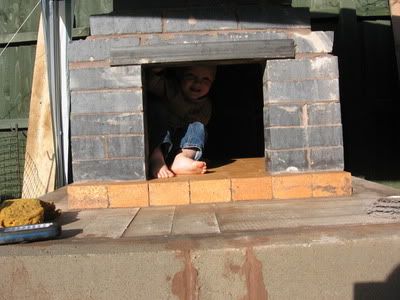 My little helper pointing the inside for me ;-) Like always please comment, good or bad it is always good to hear and allows me to learn from advice and experience rather than just my own mistakes. Dave |
|
|
|
Post by samuraidave on Mar 16, 2012 15:45:53 GMT
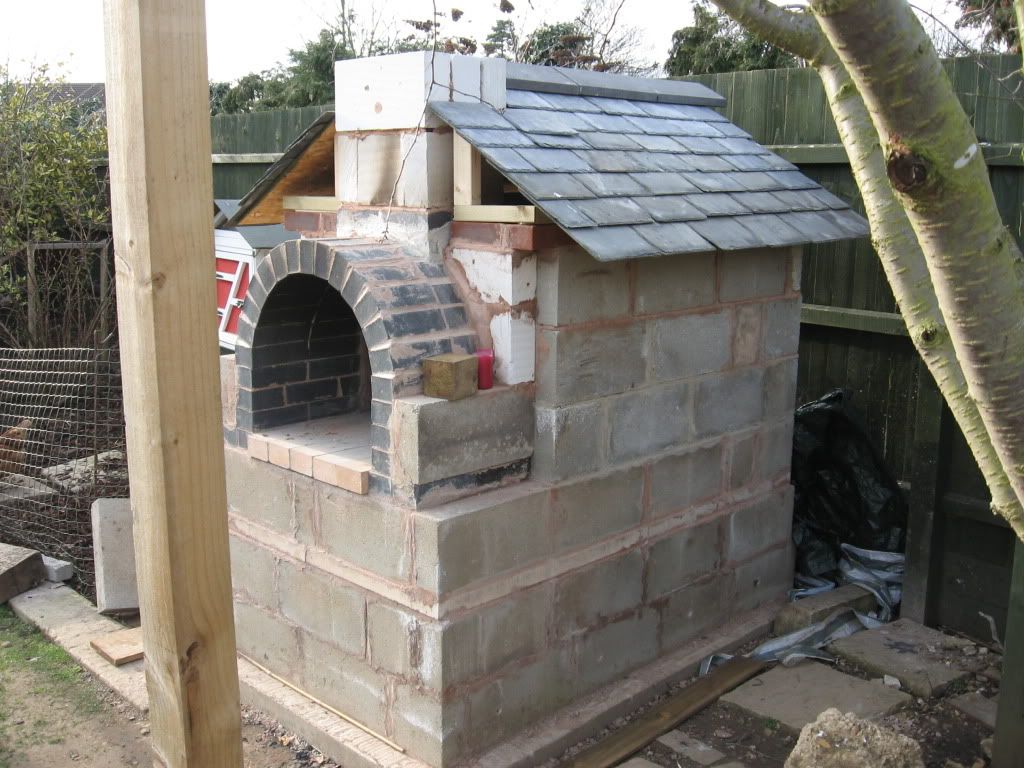
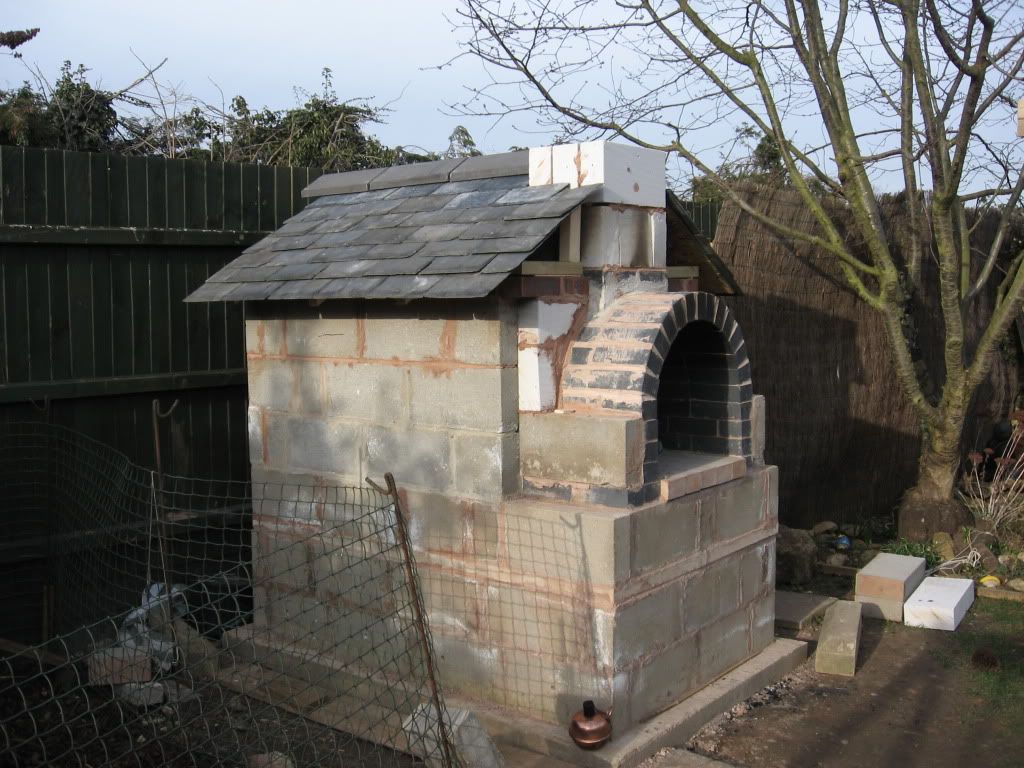
Hi there guys, Time and funds have been low over the last couple of months but I have finally got on and built some more of my oven. As you can see I have added two identical arch sections to the front of my oven. These form the landing, chimney and BBQ area of my project. I have not seen any ovens with a dedicated area at the front for BBQing so I have either had a genius idea or a very bad one. Time will tell I think. There is a thermal break between the oven and the outer arches. I will fill this with thermalite blocks. Then I have a chimney to put on the top. I just hope that having half bricks at the key stone area will not affect the strength too much. Will have to wait and see. 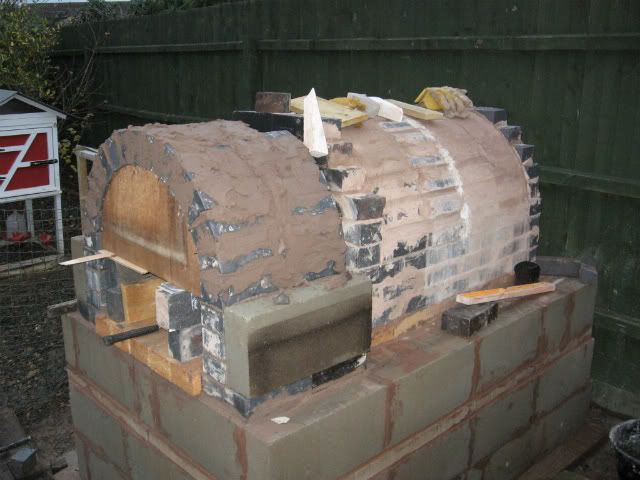 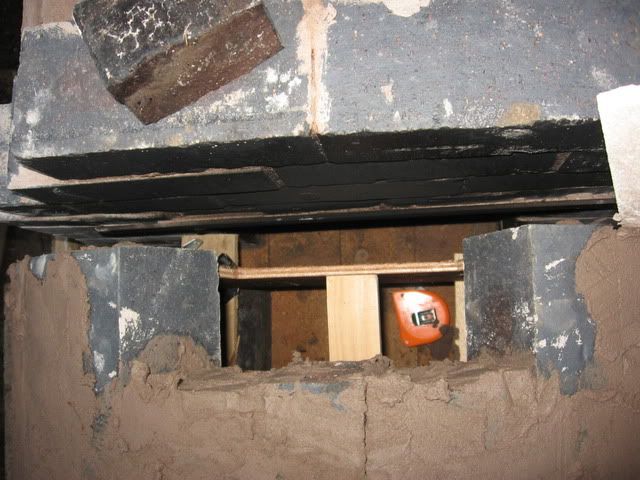 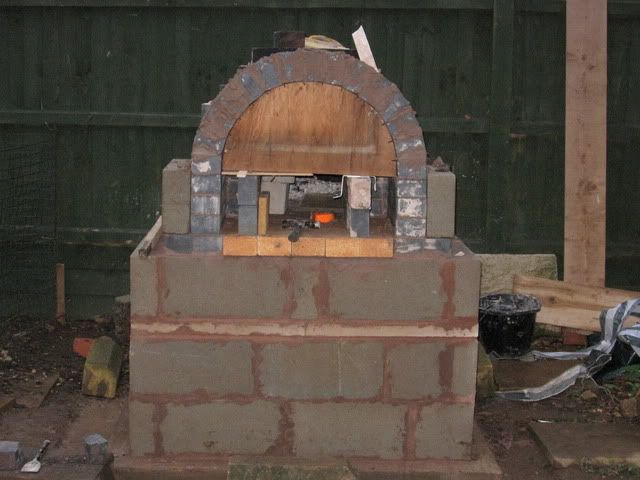 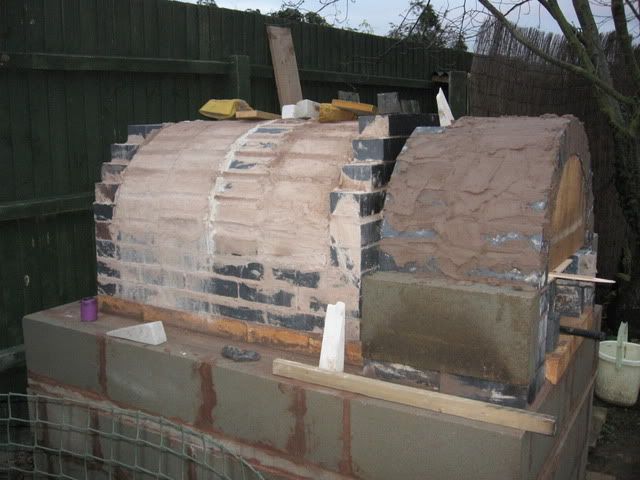 I have fired the oven several times and cooked a roast chicken in it. It gets very hot (no thermometer yet) after about an hour and once I have a door/plug that will aid heat retention. I can get inside the oven, just. This will allow me to undertake any repairs and pointing that may need doing from inside rather than dismantling it. So far so good. I am pleased with my results. I think the size of the oven is perfect and the landing area will be perfect for a large grill to fit on. The oven heats up without too much trouble. Without a chimney the draw of air and the exit of smoke looked perfect to my untrained eyes. half clear air at the bottom and the top half filled with hot gas and smoke exiting and going straight up. I just hope that my chimney will be big enough. Anyway that is about it I think for now. Have a very happy Christmas and I will see you all in the new year. Like always feedback good or bad is encouraged. Regards. Dave |
|
|
|
Post by samuraidave on Mar 16, 2012 15:46:40 GMT
Thanks Terry for your reply. I have done a little bit of tidying up and a bit of thinking. I will show the pics first and then I will let you know what I think is a brilliant idea. You be the judge.... 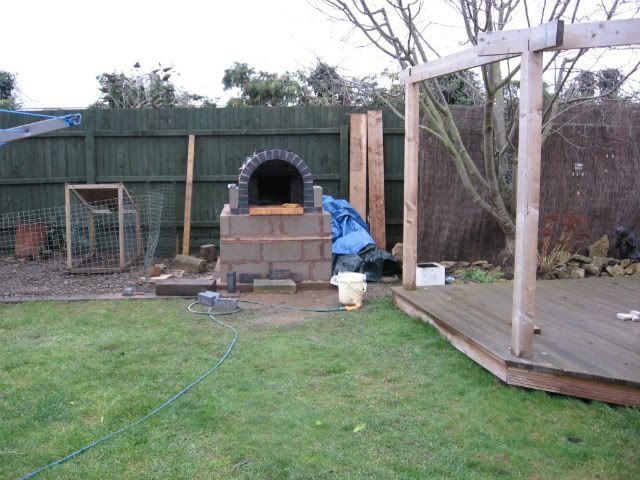 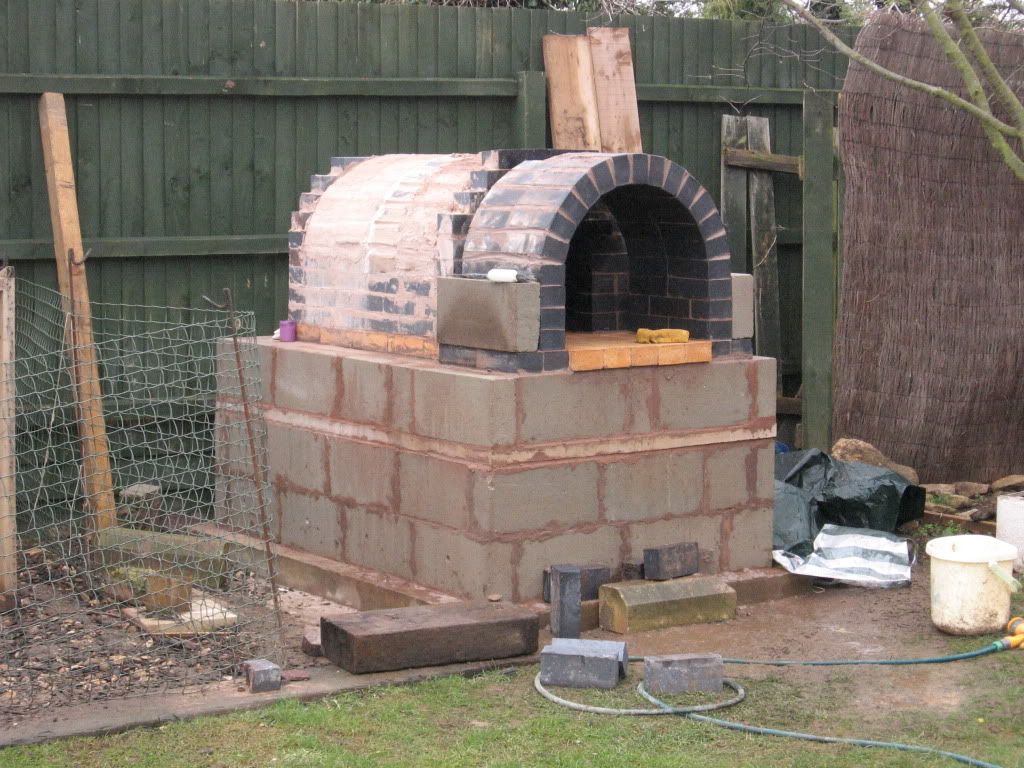 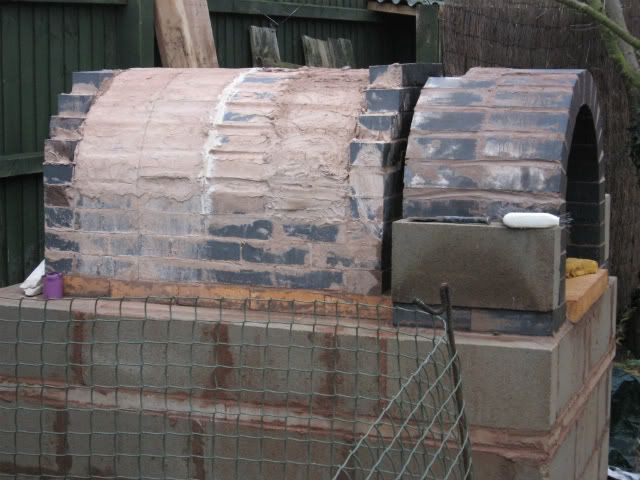 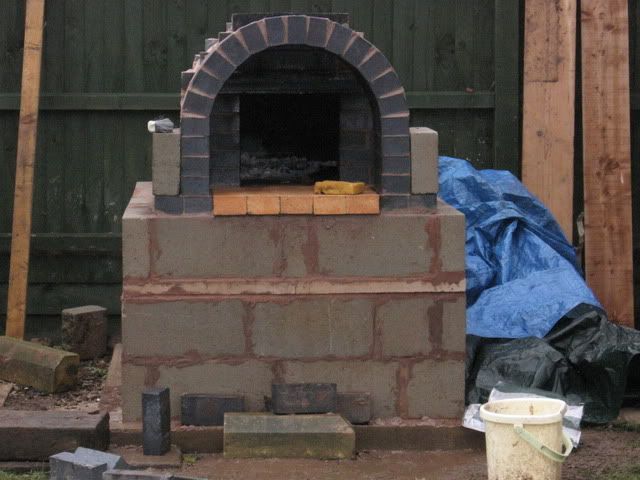 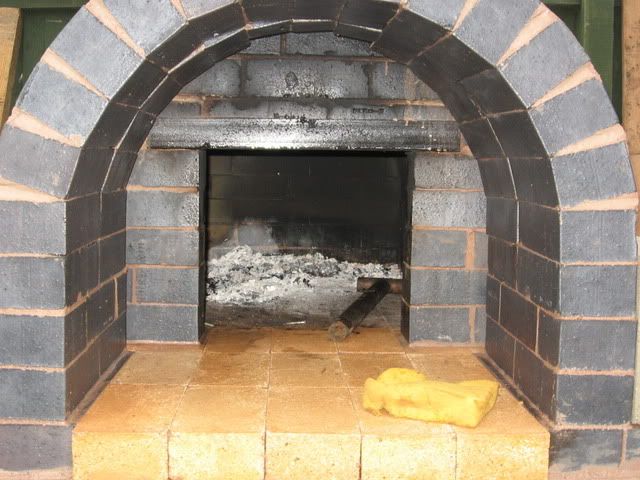 Ok so on to my idea.... I was unsure about the chimney transition and today I was out looking at it, trying out brick combinations and none of them looked any good. The inner of the two arches has only half a brick width in the key stone area and therefore the stress looked too much for it. Then the idea...... thermalite blocks are the way forward I feel. I can cut them to fit exactly, they are fire resistant and will not only do for the thermal break between the oven and the landing area but also then for the chimney section. It will all get rendered so it should look ok, I am planning on leaving the front one and a half bricks of the arches exposed and then having a pitched roof backwards from there. As with everything we will have to see what happens. Happy new year everyone and I am hoping to be making pizza etc within a couple of weeks. Dave |
|
|
|
Post by samuraidave on Mar 16, 2012 15:47:15 GMT
Ok so quick update, more pics than words this time but they do say a picture paints a thousand words.  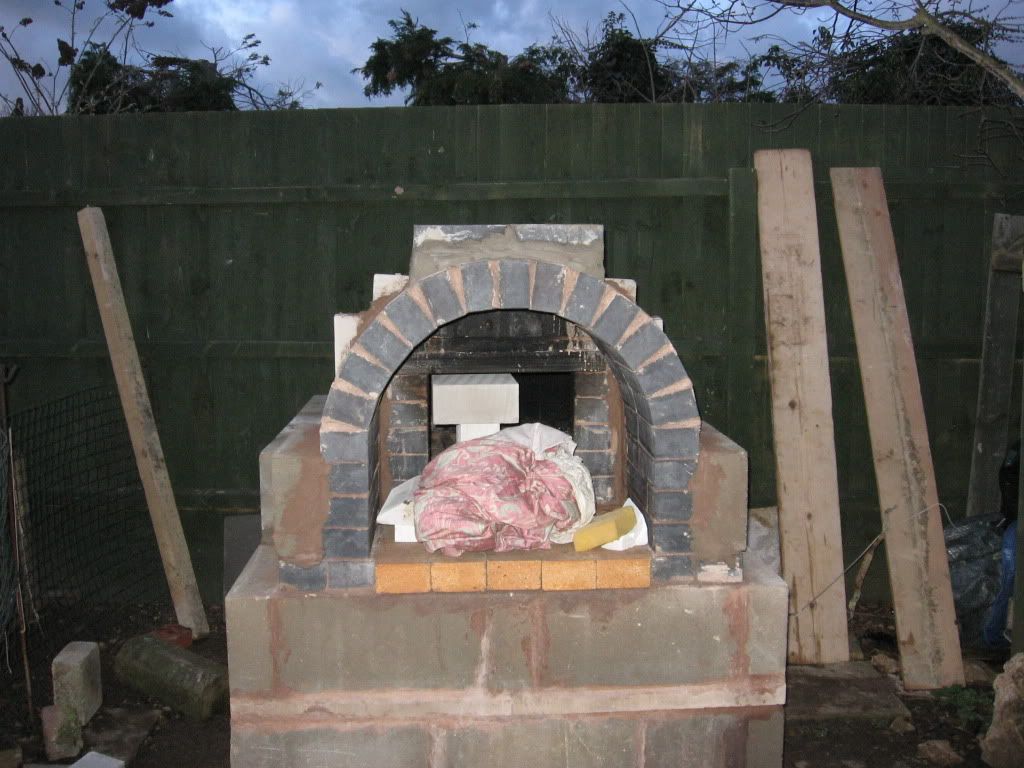 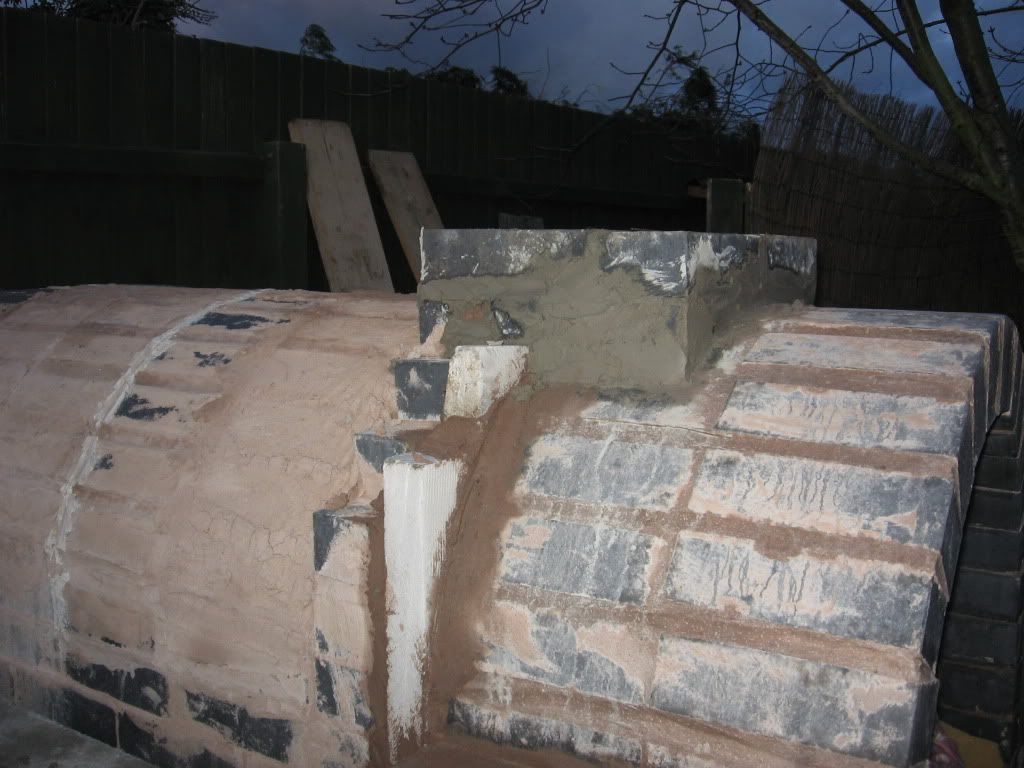 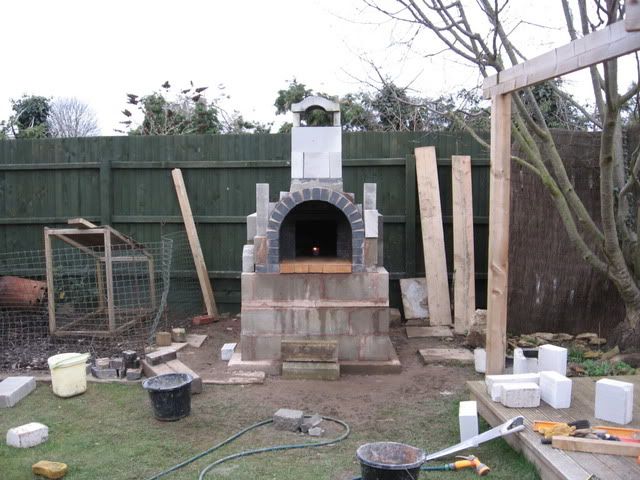 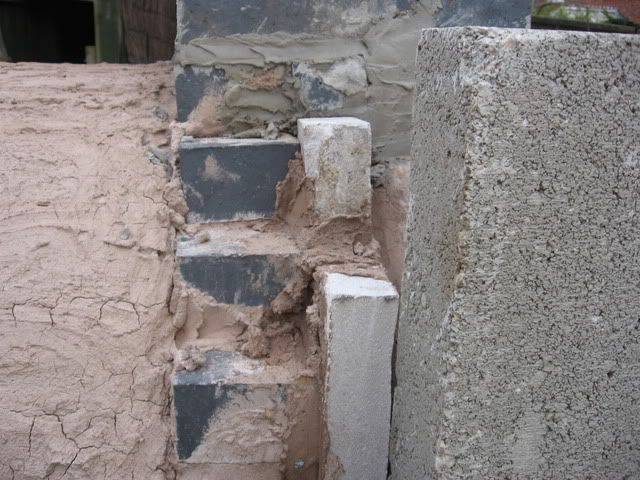  Thats it for now folks. Have a nice wekend. |
|
|
|
Post by samuraidave on Mar 16, 2012 15:57:26 GMT
|
|
|
|
Post by samuraidave on Mar 18, 2012 8:51:39 GMT
Hi there,
I am going to edit all of this in to a better order at some point but for the time being I thought that I would put down a draft list of things that I have used, dimensions etc.
The base is made of ballast, 6mm mesh and cement.
Then concrete blocks with paving slabs on top.
Then there is a layer of airated concrete blocks to insulate the base of the oven.
Fire bricks for the base.
Blue engineering bricks for the rest of the oven.
Home brew mortar for the oven. 3 parts sand, 1 fire clay, 1 hydrated lime and 1 cement.
The void in between the outer skin and the oven is filled with 4 bags of vermiculite.
The dimensions are:
The base slab is 200cm by 140cm.
The outer of the oven is 180cm by 140cm.
The internal length of the oven is 89cm, 60cm wide
Internal arch is 52cm
Oven opening is 34cm high and 37cm wide.
I will put up more when I have more time.
I would also like to thank everyone on this forum for their help. I could not have done it without you.
Dave
|
|
|
|
Post by samuraidave on Apr 7, 2012 13:48:54 GMT
Hi there guys, Happy Easter.
So I once again have some questions for you. Well it is really only the one;
How do I render the outside of my oven?
I have been winging it the whole way through this and now I have hit a bit of a wall. I am keen to get on and get this project finished so that I can enjoy the cooking part without always thinking to myself that there is still more to do.
Will the render need to be different at the front on the arch above the opening? Should I even render this arch or just tidy it up a bit.
Do I need to put water proofing on the outside? I want to paint it white I just dont know what to do now.
Thanks in advance for your help.
Dave
|
|
|
|
Post by cannyfradock on Apr 7, 2012 15:45:01 GMT
Hey Dave......This is the first time I've seen this thread....brilliant build.
Great idea on putting thermolite block between vault and external arch. I didn't put a thermal break between the two and now there are signs of cracking coming from this area. This external arch may still get hot so if you have any powdered fire-clay left over it would be good to use it in your render mix. If not then add lime to your render mix and put some chicken wire between two coats as this area will be prone to cracking.
For the outside I would put 2 coats of render...1st coat with waterproofer and the second....normal.
Terry
|
|
|
|
Post by samuraidave on Apr 23, 2012 20:16:38 GMT
Hi there Terry,
Thanks for the reply. This last weekend saw the first use of the oven in anger. One party down, 9 people fed with pizza and one very happy oven builder.
So now onto the question of finishing the project.
1. What are the proportions of the render mix? Should I make my own or get ready made? Do I need water proofer etc to add to the mix?
2. Could I use plaster board to clad the front, around the roof transition area and then render it? Then it would not be exposed to the elements and also fire resistant.
Now some observations:
I need about three plastic storage containers full of wood, all chopped up nice and small. I lit them with some smaller bits and then a whole load of planed wood. It catches great.
I need a proper door as this will help retain more heat and then allow me to cook more things over a longer time.
Lit the fire at 2pm, cooked at 5.30 at 11.00 the next day the temp inside was 150, day after 50.
I think that the level of insulation is spot on. It retains heat well and sustains it for a good time for cooking.
I am very happy with my build so far, it has taken a little longer than I had hoped but there you go. It is good fun, works well and there has been (so far) no spalling of the bricks.
All feedback is appreciated, good or bad.
Tanks for looking.
Dave
|
|
|
|
Post by cannyfradock on Apr 23, 2012 21:07:41 GMT
Dave posted.."I am very happy with my build so far,"......so am I Dave!!!.....I love seeing a Wood-fired oven build coming together, and yours is a fine example. The render for your walls should be 2 coats. The first coat is with waterproofer in the mix (the concentrate waterproofer (in 1 litre bottles) works well) the second coat is normal render 4:1 sand and cement with plasticiser. This final coat can then be painted with masonry paint for added protection. If you want a coloured render, then you could use K-rend, which is a waterproof render which comes in 25kg bags......it's a bit expensive but you can get 40% discount if you buy from Jewsons using the forums discount account... woodovenukforum.forumup.co.uk/viewtopic.php?t=678&mforum=woodovenukforum this is just an option, but many members have found this a good source of cheap materials. Plasterboard..as you say is fire-proofing in itself, but for the small amount required, I would be tempted to buy a fire-board to clad the front. There might be some condensation on the internal side which may cause the plasterboard to perish.......shame to spoil the ship for an h'pence of tar. You will probably find that after your 4th, 5th, 6th full firing you will only need 2/3rds of the wood you are using now to achieve the same...or better results...it's surprising how much moisture these beauties contain. Keep posting pics Dave, as often the afters are equally as good as the during. Terry p.s I appreciate you sharing this build with us. It will be a great inspiration for enthusiasts looking to start their own build. |
|