|
|
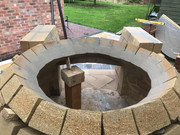
Post by truckcab79 on Sept 23, 2019 18:33:58 GMT
Very nice work.
|
|
|
|
Post by markmckenzie on Sept 23, 2019 19:05:24 GMT
Thanks.
I think I'll grind the tops of the bricks in the topmost ring to even out the bumps due to differences in brick thickness.
I'm finding out that building something so technical is made easier if each step is as good as I can make it.
More updates as I progress.
Regards,
Mark
|
|
|
|
Post by markmckenzie on Sept 28, 2019 10:06:31 GMT
Another layer on today. Looking to do the inner arch tomorrow and cut the next layer of dome bricks.     Getting tight on space under the gazebo. |
|
|
|
Post by oblertone on Sept 29, 2019 10:28:12 GMT
Very nice work.
|
|
|
|
Post by markmckenzie on Sept 29, 2019 14:29:26 GMT
Thanks! Got soaked today in the rain showers so not as much progress as planned. Pics show yet another use for insulation board. Hoping to get the inner arch cut and cemented into place by Wednesday.       Bye for now, Mark |
|
|
|
Post by simonh on Sept 30, 2019 7:57:10 GMT
looking liek a really neat build. Nice work.
|
|
|
|
Post by markmckenzie on Sept 30, 2019 8:34:39 GMT
Thanks Simon.
The internal height of the inner arch is approaching 69% so I'm going to lower the abutment points for the internal arch bricks by 30mm or so to bring me closer to 63%. (Plus, I don't want to be able to see bits of the dome brickwork cutting across the arch corners!)
After that, I think that the join between the inner arch and the dome will be the hardest part of the build.
I'll be glad when the arch is up and the next layer of dome bricks is on.
Regards,
Mark
|
|
|
|
Post by markmckenzie on Sept 30, 2019 15:36:30 GMT
Had a chance to lower the arch height and dry-fit the arch bricks in situ. I've eye-balled where I'll cut the arch bricks in order to allow for easier (hopefully) placement of the dome bricks - should give me just enough space to create the flue base. More updates as I progress. Mark    |
|
mm289
valid member
 
Posts: 26
|
Post by mm289 on Oct 1, 2019 8:28:05 GMT
Wow, that looks amazing Mark! Now I realise why you are cutting so many bricks, I thought you were just talking about the floor initially.
Cheers,
MM
|
|
|
|
Post by markmckenzie on Oct 1, 2019 15:55:22 GMT
|
|
|
|
Post by markmckenzie on Oct 1, 2019 19:42:05 GMT
Didn't want to wait to take the arch former out as I wanted the joints to harden under compression and to be able to clean the joints while it was still fairly easy - so former out after 4 hours drying.  Will try to make more progress on Friday. Mark |
|
|
|
Post by truckcab79 on Oct 1, 2019 23:32:24 GMT
Beautiful finish. Nobody will ever see it....but you’ll know.
|
|
|
|
Post by markmckenzie on Oct 2, 2019 15:55:12 GMT
A few clearer pictures of where I'm up to at the moment... Tackling the next ring on Friday.    |
|
|
|
Post by markmckenzie on Oct 4, 2019 12:58:51 GMT
Cut the next layer of bricks and laid the next dome layer today. This was a very tricky layer to get neat and was subject to quite a bit of fettling after these photos were taken. I need to find something to support the brick layers from inside - beach ball perhaps?? I'll post some more pictures when I've removed the supporting bricks etc. Bye for now.    |
|
|
|
Post by oblertone on Oct 4, 2019 16:07:38 GMT
You can use cheapo scissor action woodworking clamps but the easiest way is to cut a bit of board just bigger than the hole, then stand some full bricks on end to support it, fill the gaps with rags and make a sand dome to your desired height; worked for me.
|
|