|
|
Post by leetheldc on Jun 28, 2014 19:20:10 GMT
Rd great work as a block paver my self I can totally appreciate the cutting work here especially the granite pieces time and patience needed well worth it tho!
|
|
rokdok
WFO Team Player

Posts: 130
|
Post by rokdok on Jun 29, 2014 18:46:19 GMT
Thanks Lee, I admire you guys that do this kind of thing for a living. Topped out today , did another ring with small fingers of various stone and brick then cut a piece of lias for the cap stone. Nice bit of mussel fossil in the middle of it. 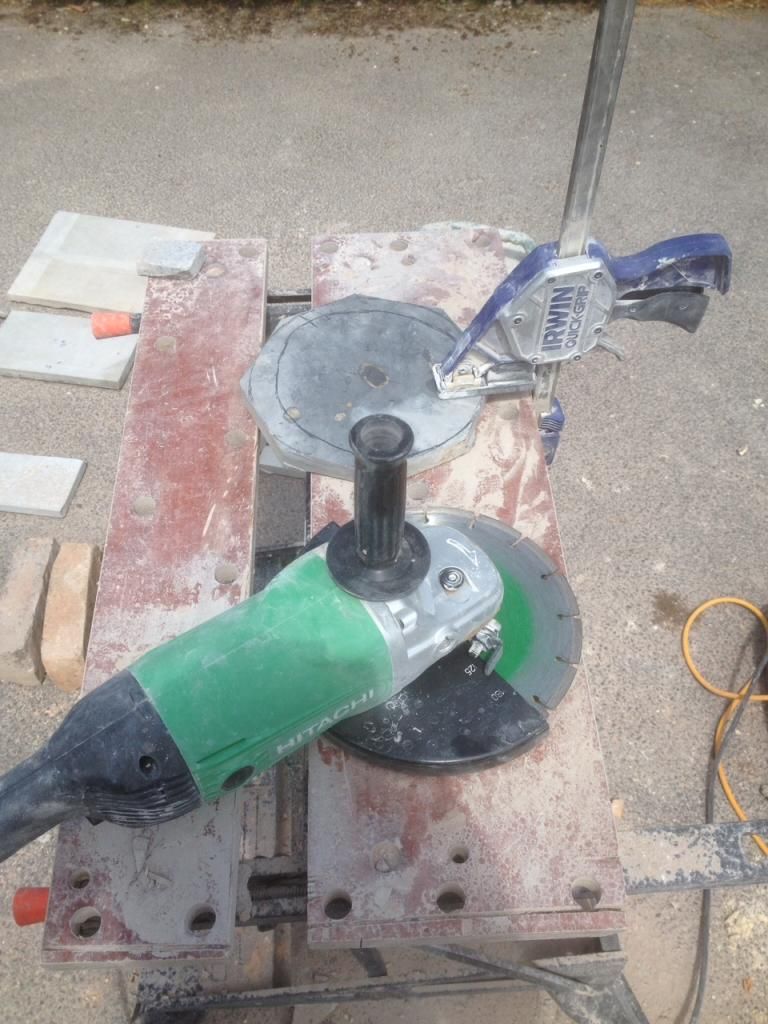 Tapped it into position. Finishing a bit early today. Looking forward to finishing off the landing tomorrow. 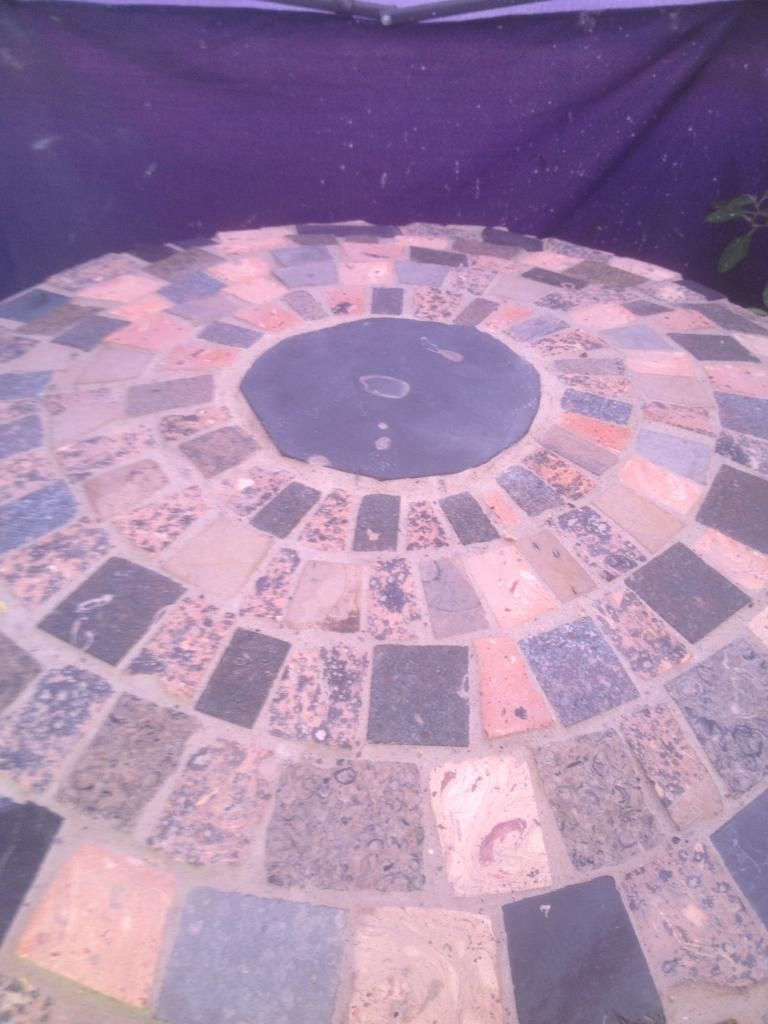 |
|
|
|
Post by dirtlover2005 on Jun 30, 2014 15:30:17 GMT
Fab to see the finished dome - hats off to you - the time and effort put in has really paid off.
|
|
|
|
Post by RokDokguest on Jul 2, 2014 18:35:25 GMT
Thanks Andy , can't quite believe that this last 2 1/2 months work is coming to an end. Got home from work tonight and chased out a piece of the landing that I wasn't happy with. I'll mortar it again at the weekend. Well yesterday I grinded a couple of bits of polished Purbeck offcuts that had clearly been destined for a work top, to go either side of the current landing. Cut a rough curve with the large grinder. 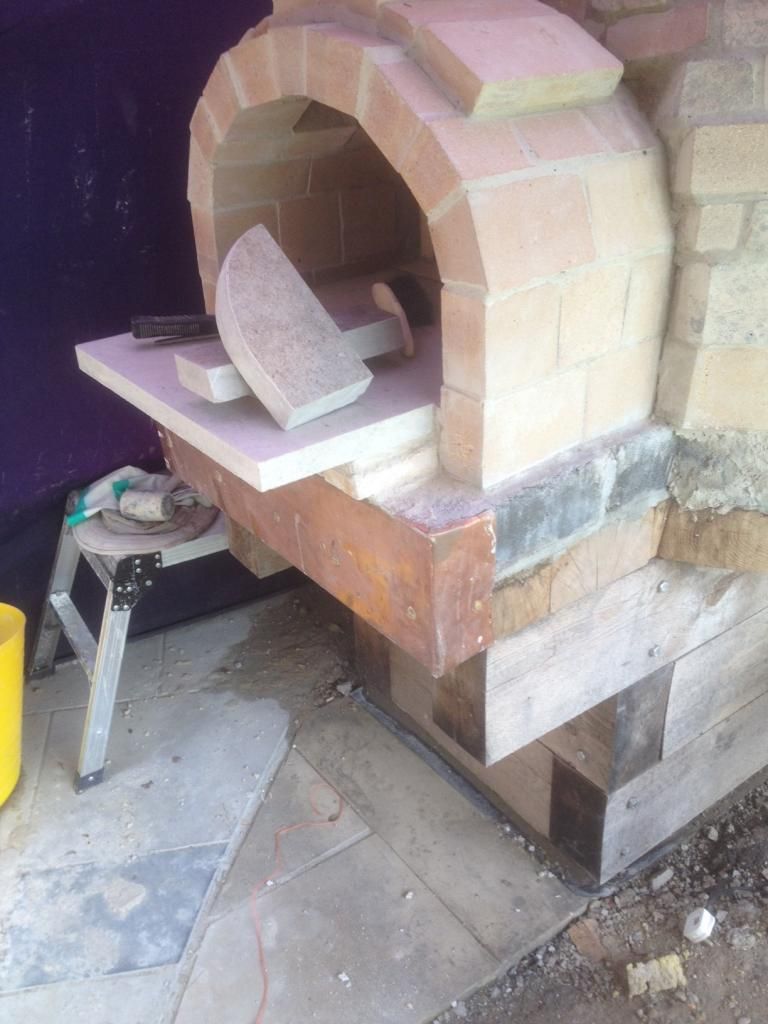 and mortared a couple of squares of Purbeck cap first to make up the height.Next was the chimney- I'd hollowed out some firebrick for the chimney. The lowest brick had a smaller diameter so that the flu wouldn't drop through and would also allow me to bed the flu on a little home-brew mortar, but fill the gap between the brick and flue with heat proof silicone. ( The silicone burs if in direct contact with flame or exhaust gases hence needing to bed the flu pipe on some mortar first) 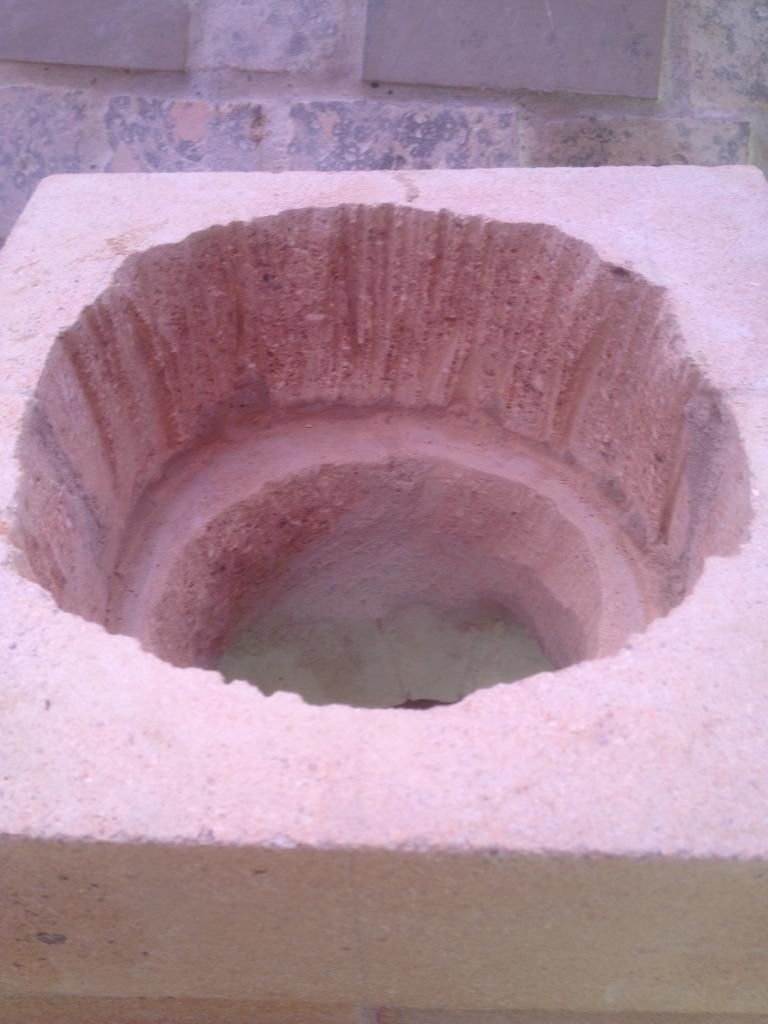 .After a bit of silicone I packed the space , not too tightly with some ceramic blanket. 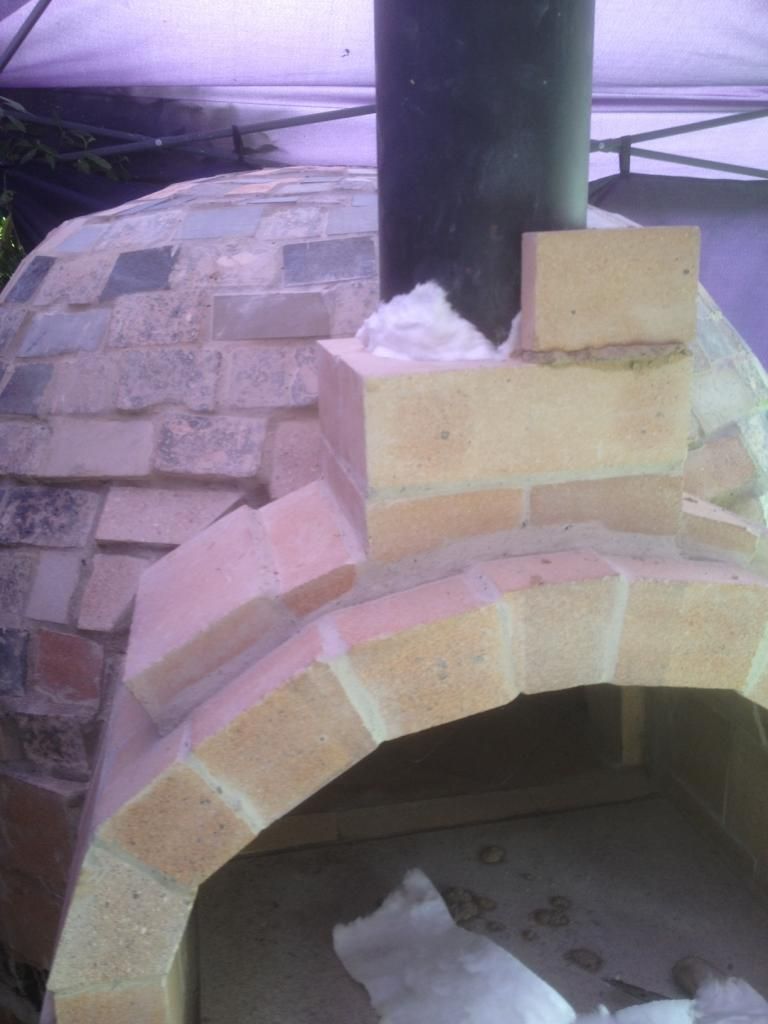 I then put another couple of hollowed out bricks on top of this , packed the gap with some blanket and then sealed the top with heatproof silicone.. Now, I'm intending to put a pottery sleeve around the steel flue in due course, but it's ready to go as is. Whilst I was doing the chimney I knocked out the left side of the landing , but on repositioning it din't get it quite level. Last night I didn't worry to much but tonight I chopped it out and will relay it at the weekend. Hoping to seal all the stone this weekend and get on with the copper surround.Anyone any experience of drilling and screwing into thermolite blocks- they are really fragile but I'll need to do that to hold the copper on. ??. 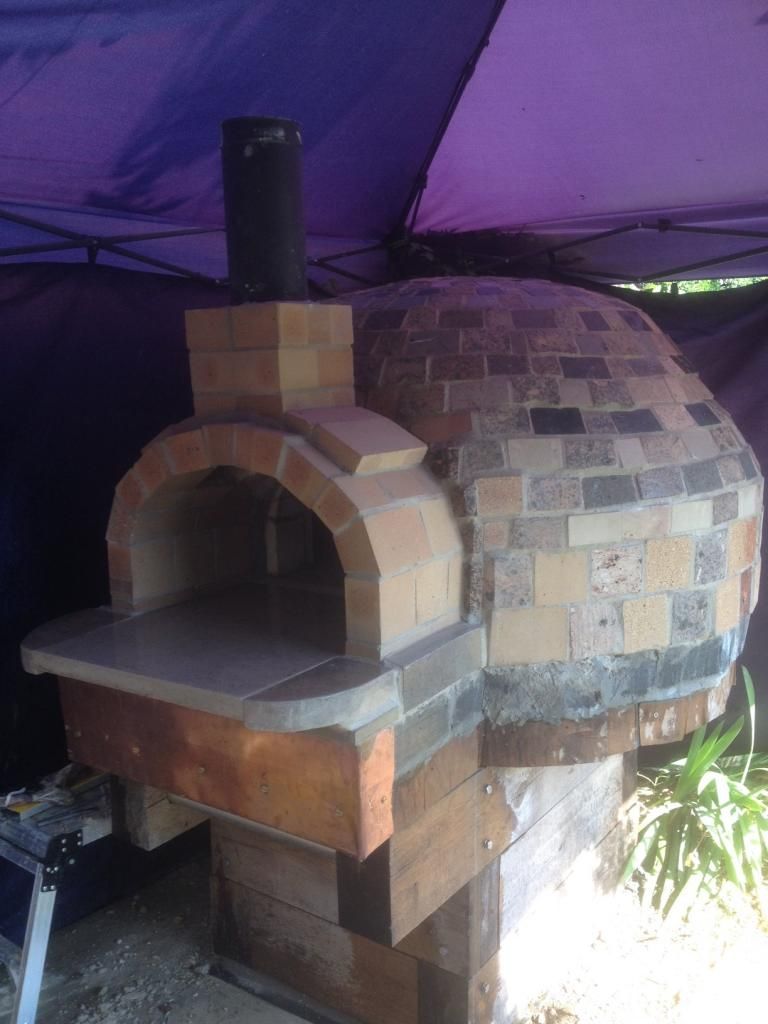 Cheers Paul |
|
|
|
Post by cherrycolavodka on Jul 4, 2014 19:43:20 GMT
Paul what a thing a great beauty you have created. I love it all, the fossil is awesome, the landing perfect. Well done. I have all the decorative stuff to go... You are inspiring me to go for something special!
|
|
rokdok
WFO Team Player
Posts: 130
|
Post by rokdok on Jul 5, 2014 18:36:42 GMT
Delaine, thanks. I have really enjoyed the outer dome- what a steep learning curve. If you can get some local old bricks and cut them into 2/1/2 " then 1" tiles you might find some really beautiful patterns inside. You've been a bit quiet on your build - are you still going to make your deadline ??. I spent this afternoon sealing the dome and landing using triple C stonetech. It's a colour enhancer and sealant combined and you add a UV blocker for outside work. Not cheap in terms of £ per litre , but I've only used about 600 ml to seal all the outside brick mortar and stonework. All the Best Paul . PS if you want some stone offcuts pm me and you can have them.
|
|
rokdok
WFO Team Player
Posts: 130
|
Post by rokdok on Jul 8, 2014 10:59:12 GMT
First curing fire. Have now done three. A little smoke escapes form the front at times but not much really chimney draws pretty well. The outside top of the oven gets slightly warm the fire was gong for an hour and a half or so. Tim , our village blacksmith came round yesterday and he's making few long handled tools for me together with a long handle on my peel. Putting more oak and copper around th bottom at the moment. 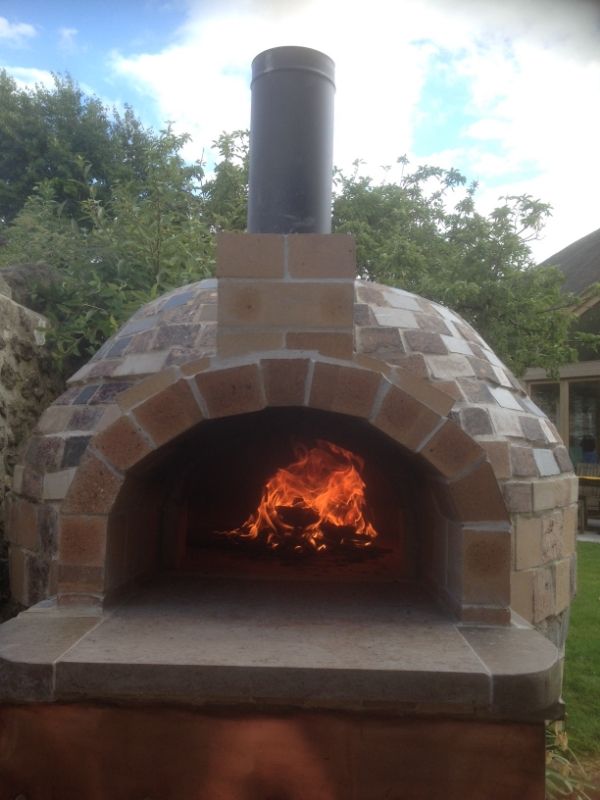 |
|
|
|
Post by unclebhuna on Jul 8, 2014 19:03:40 GMT
Looking fantastic rokdok! Superb!
|
|
|
|
Post by leetheldc on Jul 13, 2014 13:37:08 GMT
You have fire! Looks great how's the curing going?
|
|
rokdok
WFO Team Player
Posts: 130
|
Post by rokdok on Jul 14, 2014 8:21:26 GMT
Uncle, Lee thanks for your comments, great to see your builds coming along really well. What I thought was some smoke coming form the base of the chimney was in fact some steam escaping as it hasn't recurred. As the oven has taken a fairly long time to build and as its been under cover and so dry I did about 5 curing fires in all. What a journey, almost 3 months of obsession. Dug out the compressed soil and mortar from around the oven and got some turf and topsoil to make repairs. 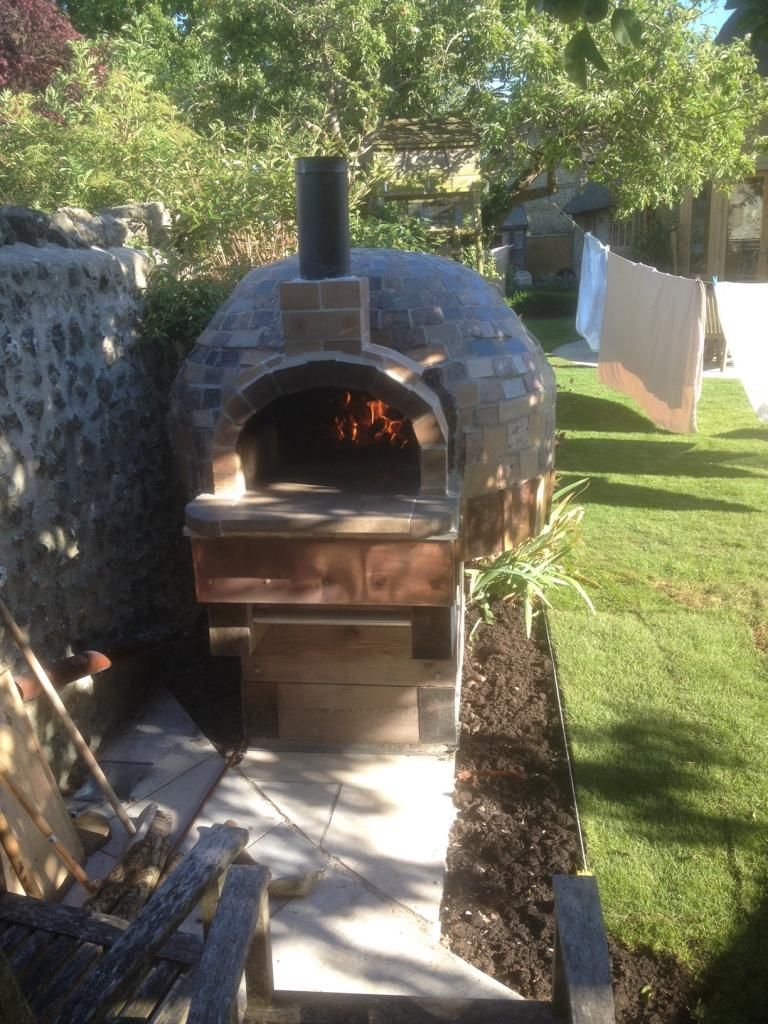 Also had to get all the encrusted mortar and stain off the flagstones which I did using brick cleaner discs which fitted in the small angle grinder. The first night's attempt at pizza was mixed the dough was a bit sticky and it tended to stick to the floor of the oven. My son made this Pissaldiere . He's at Uni and one of the lads in his flat was a chef in a former life and Rob's been learning from him. My first homemade meal as a student was a tin of baked beans with smash mixed in with it. Yuk. Anywway he made two this one got a bit stuck so we put the next on a tray 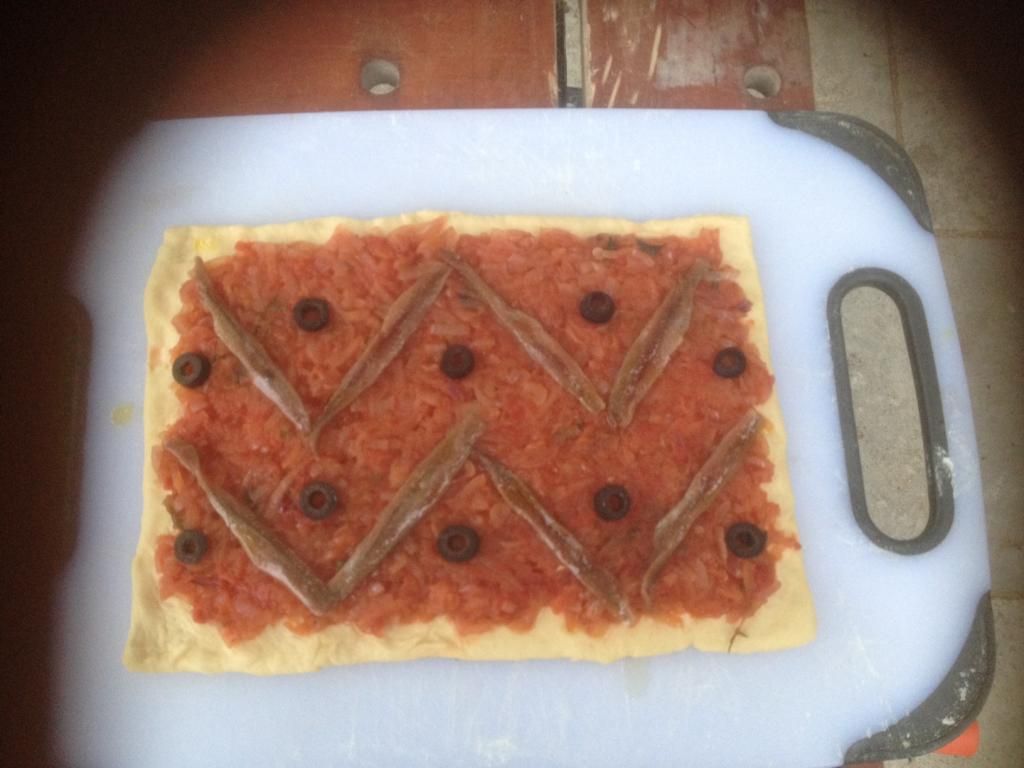 Had another go last night, this time using the 'keep it simple' dough recipe on here- thanks for that, and 00 flour, making sure that the base was well floured and non adherent. Result. 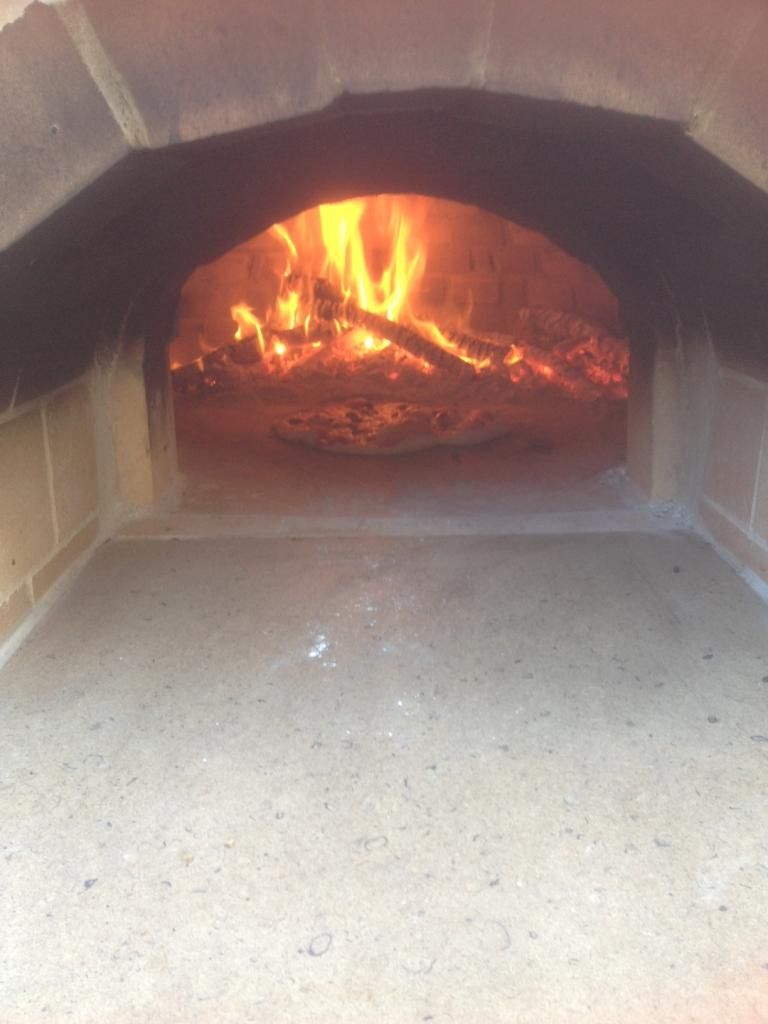 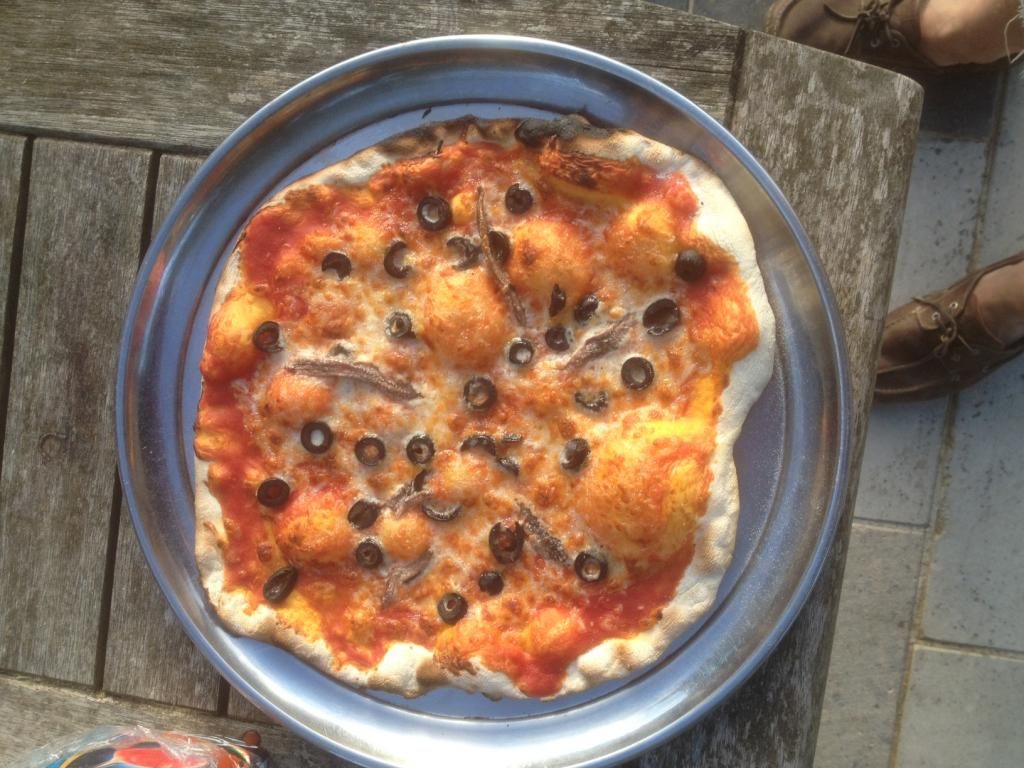 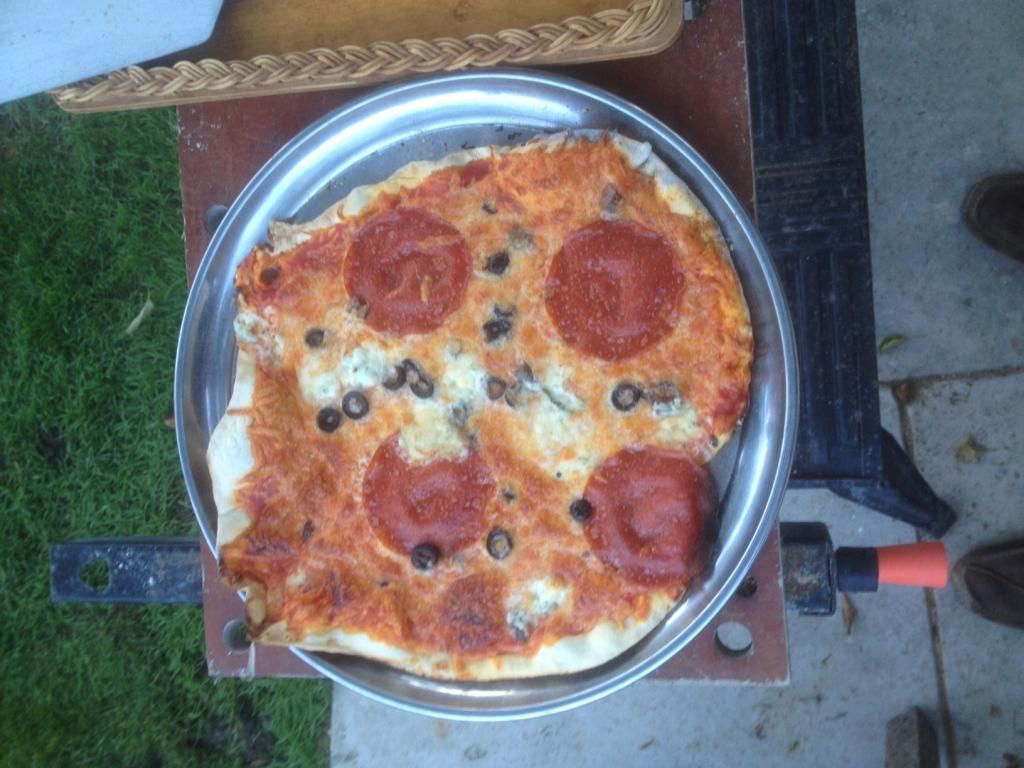 It really is as delicious as every one says it is. Not quite finished yet though, got a door to do and a pottery surround for the chimney. Huge thanks to all the contributors on here and especially to Terry who has brought a lot of happiness to people. Paul |
|
|
|
Post by unclebhuna on Jul 14, 2014 13:40:14 GMT
Fantastic. Love the picture with the fire and the pizza in the oven! Looks great and if my pizzas look anything like yours I will be more than happy.
|
|
|
|
Post by cannyfradock on Jul 14, 2014 18:19:40 GMT
Hey Rokdok...
I love what you've done with the oven. Haven't been able to get on line for a week and I've missed SO much. Great brick cladding btw. Love the finish.....and the pizza's. Now the fun begins and usually that "trial and error" pizza making takes on a whole new meaning. The pizza party's always go well but I found that I wanted to start trialing different pizza dough's.....and Naan breads.....and flat breads.....and using chick pea flour to make those little flatbreads that puff up like a balloon, perfect for filling...etc., etc.
Total respect btw to your lad for his version of a Pissaladiere. I can't stand anchovies myself but a Pissaladiere was one of the first pizza's I made in a WFO. I've baked some strange things in a WFO...but nothing ever seems to go to waste. Very often it's a labour of love building the thing, but as long as our climate give's us the opportunity, the rewards are very fruitful.
Terry
|
|
|
|
Post by leetheldc on Jul 14, 2014 18:24:39 GMT
Looks like you got the hang of pizza making on your first pizza night they look well tasty Paul . Thought it was a little strange you get smoke out the front just goes to show how much moister is in there!
|
|
|
|
Post by dirtlover2005 on Jul 15, 2014 17:05:52 GMT
Oh man that pizza looks good ! I'm going to look up that anchovy jobbie cos I love em!
|
|
rokdok
WFO Team Player
Posts: 130
|
Post by rokdok on Jul 19, 2014 13:37:07 GMT
Cheers guys , thanks. As you say Terry, I'm looking forward to trying other breads and recipes and I expect that there is a natural progression from this thread onto the cooking threads. Have now made a door. First I made an arch out of some remaining oak - basically cut blocks a bit like making the oven arches out of brick but instead of mortaring them I screwed them together. I cut a piece of copper to fit on one side and screwed it on, and cut a piece of oak plank for the front 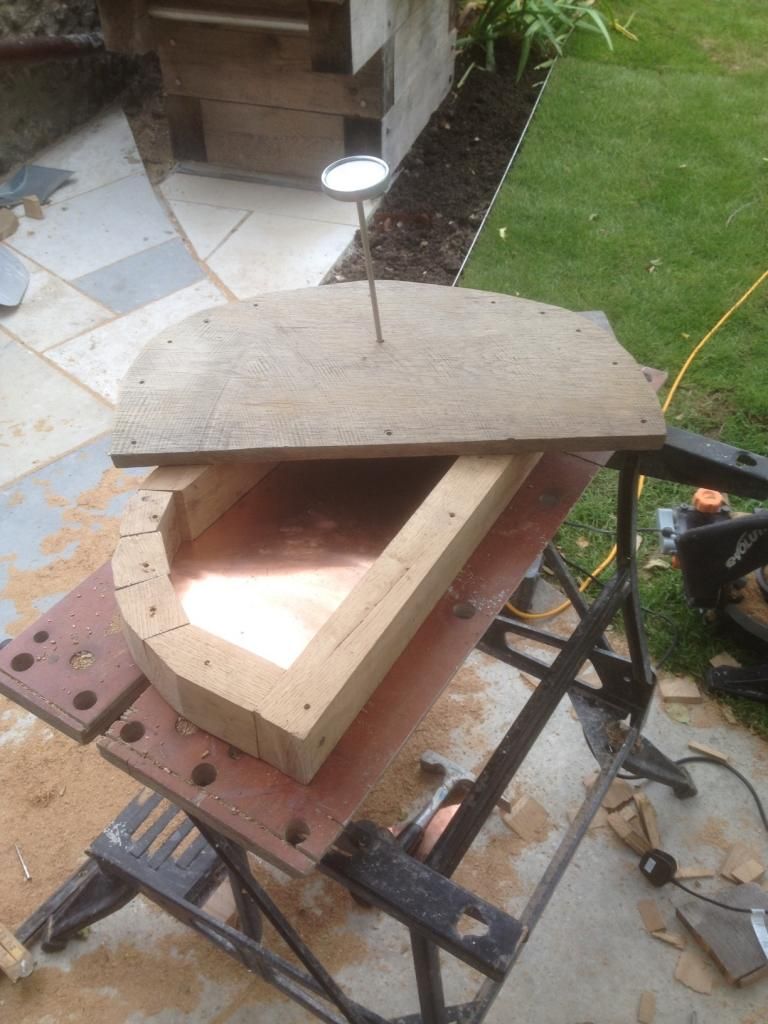 In the cavity I put alternating layers of ceramic insulating blanket and foil insulation which has air pockets within it. 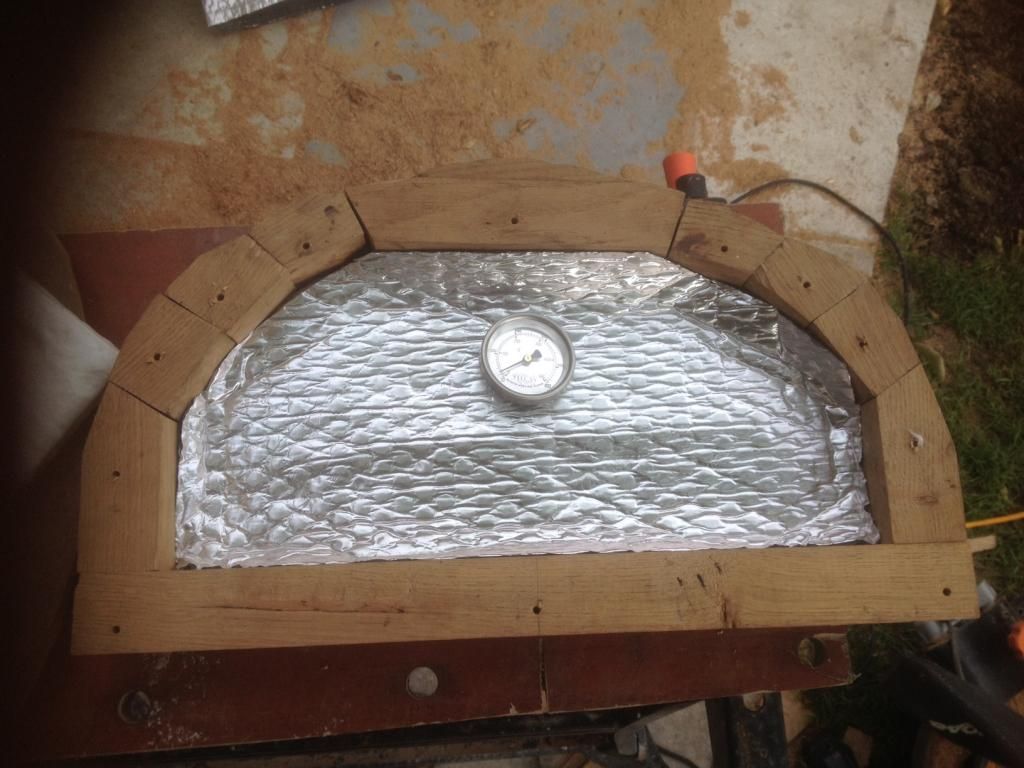 I then put a thermometer through it screwed it together . I cut a larger piece of the foil to make a kind of gasket between the front and the oak block frame. and put a couple of handles on the front ( I think I'm going to change these and put a couple of door knobs on for an easier grip) Heres the front and the back, hopefully will give it a whirl tonight if the storms hold off. RD 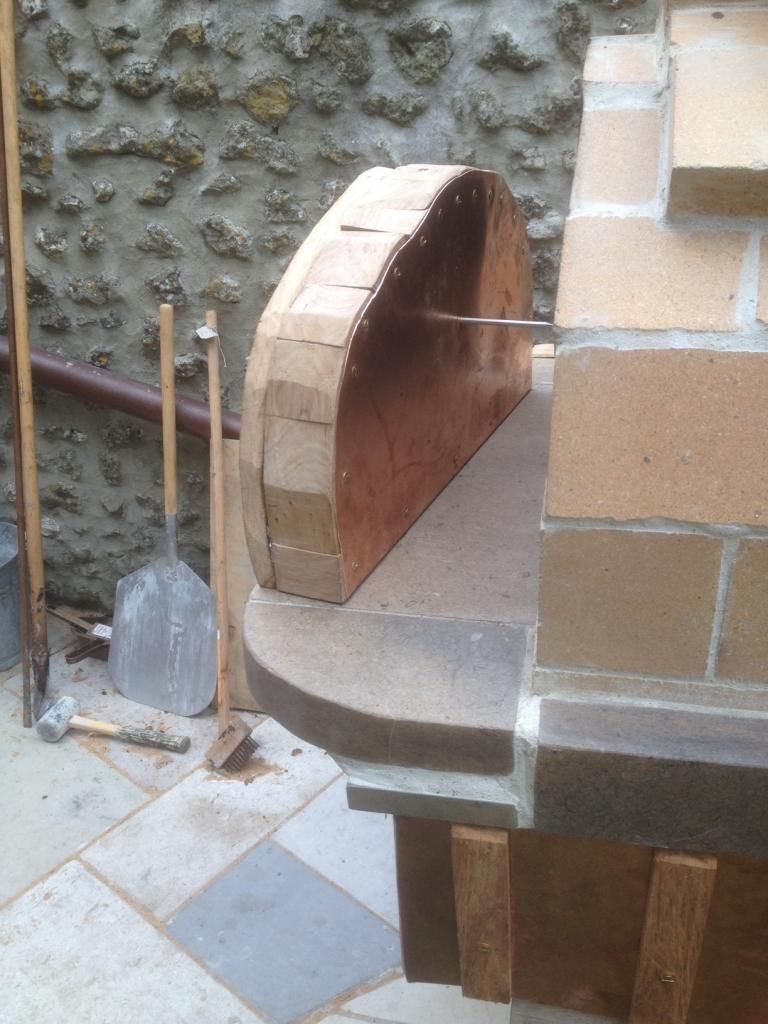 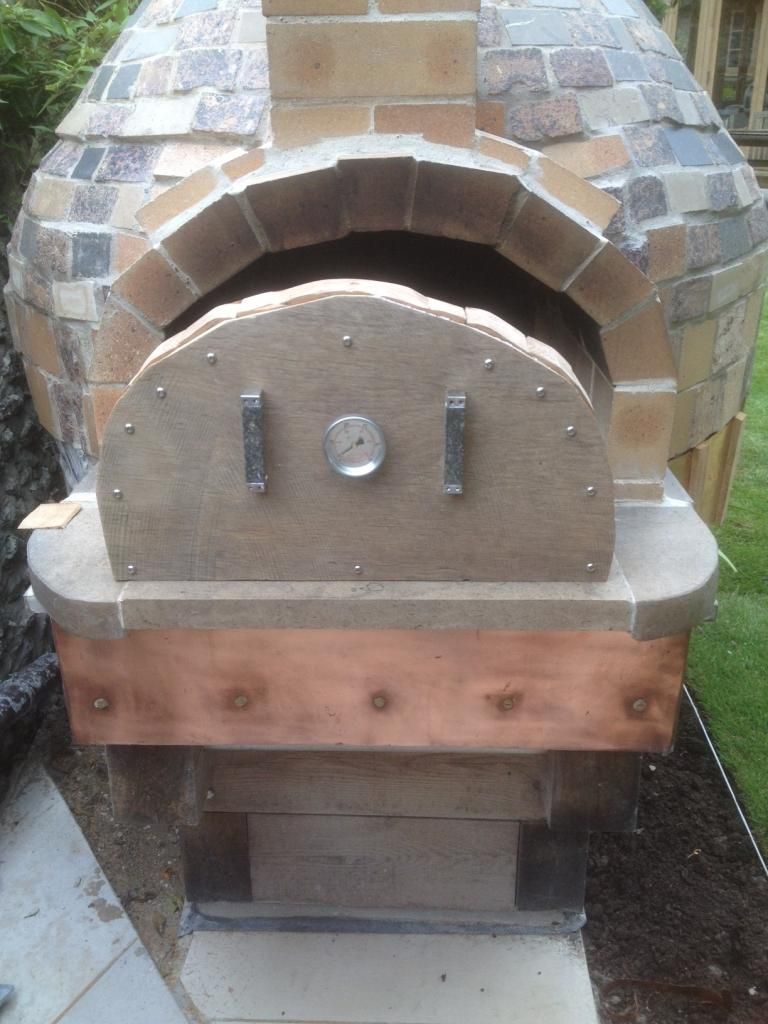 |
|


