baldywills
valid member
 Project finished and enjoying the scran
Posts: 73  Member is Online
|
Post by baldywills on Apr 29, 2018 16:43:10 GMT
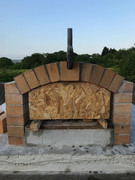
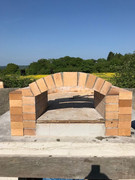
  Todays progress was to finish laying the oven floor and put into place the soldier course. Couldn't quite finish it tonight but happy with the result so far, I notice that I am gaining more confidence and speed with each brick I lay. I find myself looking ahead to starting the arch and how to tie each of the courses. More research and planning to do. |
|
baldywills
valid member
Project finished and enjoying the scran
Posts: 73
Member is Online
|
Post by baldywills on May 4, 2018 20:58:29 GMT
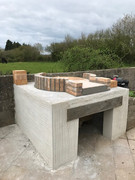
    Managed to finish the soldier course today apart from a little bit of pointing on one brick Today was a good day as I figured out it is best to use a sponge to clean up the brickwork as I am going along. I must now use a brush and some brick cleaner to clean up my previous work, obviously the inside only. Tomorrow will be spent cleaning the oven floor so i can cover it with some OSB to protect it during the rest of the build. Will dry lay and plan the internal arch and will clean off the soldier course whilst it is still easily accessible. I didn't create a rebate as suggested by some people as I had already cut and laid my landing bricks. I am however contemplating taking a one inch sliver of brick and pasting it to the side of the landing to create a rebate. Will see how it looks before committing to cement. Soaked some of the bricks before laying them today and it changed the whole way they went down. Will need to master the fine line between a damp and soaking brick and how wet my mortar is. Looking forward to a busy bank holiday weekend. Gary |
|
|
|
Post by oblertone on May 5, 2018 7:06:01 GMT
Looking good, hope to see some progress over the BH weekend. I'm assuming you're using an IT for the dome build but the rest of the floor cand be covered in just about anything to prevent mortar splash, I used old rags but cardboard is just as effective.
|
|
baldywills
valid member
Project finished and enjoying the scran
Posts: 73
Member is Online
|
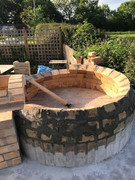
Post by baldywills on May 12, 2018 20:44:12 GMT
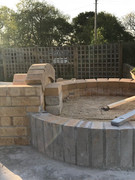
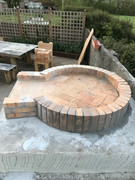
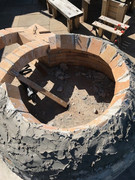
  Haven't achieved as much as I would have liked but: Cleaned off the interior with brick acid and the external part of the landing. Wow - amazing stuff and good to know I can fall back on this stuff to clean up if needed. Will clean as I go from now on though. Placed my oven hearth template on the base to protect the oven floor against muck during the build. The OSB is cut into many bits so it will be easier to remove at the end. Cut and positioned my internal arch form. It was my second attempt as I did not like the angles on the first go. Much happier with this one which is 12.5 inches above the floor and is made of a double thickness of OSB with blocks set between the sheets to widen it and give a wide base for the bricks The form is wedged in place to allow for it to be dropped and removed once finished. I have put plenty of bricks either side of the form incase i knock it with my size 10s. I can be clumsy sometimes!! Have cut some pad stones which the archway will rest against. They are not shown in the pics but will show tomorrow. Looking forward to tomorrow to lay the pad-stones for the whole landing area and then mortar the internal archway in. I also hope to get the IT cut to size and screwed in place and get a next course set in place. There are so many calls on my time (beekeeping, gardening, dog walking) that I feel the oven is progressing slowly but I only want to proceed once i am happy with the plan of what i am doing and how I expect it to look at the end. I wish I could take a week off work to smash most of the brick laying. |
|
baldywills
valid member
Project finished and enjoying the scran
Posts: 73
Member is Online
|
Post by baldywills on May 15, 2018 20:49:27 GMT
|
|
|
|
Post by devokewater on May 16, 2018 7:16:14 GMT
This is looking great and your photos have given me much more confidence with the thought of building the arch and initially joining it to the dome. Thank you. I'll follow very closely.
|
|
baldywills
valid member
Project finished and enjoying the scran
Posts: 73
Member is Online
|
Post by baldywills on May 16, 2018 18:50:45 GMT
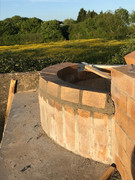
    Took the form out tonight and decided to lay the landing bricks to where the front arch will begin. Will wait for it to dry properly and will then set the rest of the bricks that will make up the vent area. Devokewater - if I can do it, anyone can do it. I have spent more time thinking than doing so far but I am finding my confidence is growing the more hands on i do. I am sure you will feel the same. Gary |
|
gez
valid member
Posts: 32
|
Post by gez on May 16, 2018 20:37:47 GMT
Looking good , I’m following with interest too ! Got all the materials here just need to get going 👍
|
|
baldywills
valid member
Project finished and enjoying the scran
Posts: 73
Member is Online
|
Post by baldywills on May 18, 2018 5:49:01 GMT
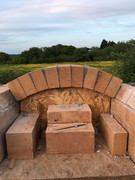
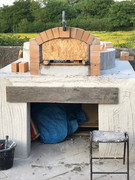
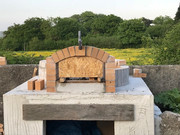
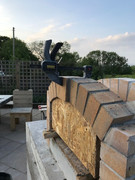
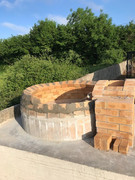
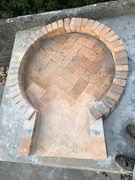
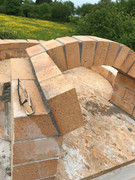
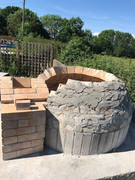
 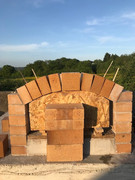 Last night i set out a trial for my external arch way. A bit of a conundrum - My landing is flared so the natural angle of the archway from each pier will be outward towards the front. I need to incorporate this angle to make it look natural and not out of place. Not sure if that makes sense, but in basic terms, if i built the archway from either side they would not be at 90 degrees to the landing wall and would meet in the middle a little further out than expected. The way around this can be seen (hidden) in the picture with the keystone being a large size and also proud of the rest of the bricks. Another issue about having a flared landing is that the external opening is wider than the inner arch and so use more than the 9 bricks i used for the inner arch. This gives me a slight problem and means either putting in two thinner cuts of bricks or finding another way to fill a gap. I have simply turned the brick around to a side on aspect. It means it is not as deep but I will "stick" another brick to it to give it the same depth as the others in the arch. The picture doesn't really show the size and depth of the key brick so i may add some more photos. Any comments welcome on the problems i would encounter if I went with my plan. I worry about the weight of the keystone. Thanks Gary |
|
|
|
Post by chas on May 18, 2018 8:42:06 GMT
Last night i set out a trial for my external arch way... I worry about the weight of the keystone. Thanks Gary It’s not so much the weight of the keystone - however big, there’s the same mass of brickwork hanging, magically, up there from side to side. It’s the lack of mass in the brickwork each side butressing it that may be an issue. Lateral thrust an all that... You seem to have room, I’d suggest adding at least an ‘end on’ brick each side to make a 9” pier. Since a straight vertical joint is inevitable now, maybe bring it forward half an inch to make it more of a design feature than an afterthought? Chas |
|
baldywills
valid member
Project finished and enjoying the scran
Posts: 73
Member is Online
|
Post by baldywills on May 18, 2018 11:36:26 GMT
Cheers for the steer Chas. I may use a more decorative brick to widen the pier and adjusting the position is a sound idea.
|
|
baldywills
valid member
Project finished and enjoying the scran
Posts: 73
Member is Online
|
Post by baldywills on May 18, 2018 20:02:50 GMT
|
|
baldywills
valid member
Project finished and enjoying the scran
Posts: 73
Member is Online
|
Post by baldywills on May 19, 2018 16:25:01 GMT
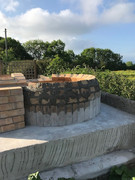
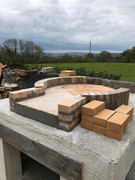
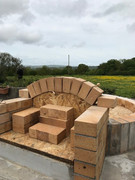
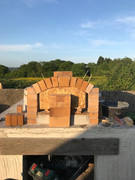
   The form removed and the archway is still standing.... Have placed another pier of bricks on the outside of the archway as per the advice from Chas. Will cement them in tomorrow morning |
|
baldywills
valid member
Project finished and enjoying the scran
Posts: 73
Member is Online
|
Post by baldywills on May 27, 2018 21:54:11 GMT
|
|
baldywills
valid member
Project finished and enjoying the scran
Posts: 73
Member is Online
|
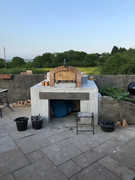
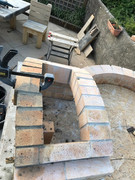
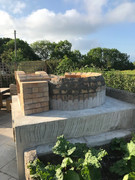
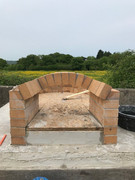
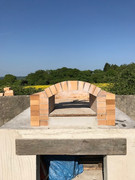
Post by baldywills on Jun 3, 2018 15:55:03 GMT
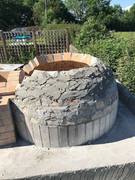   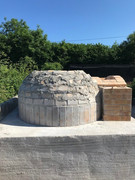 The walls are getting higher and it actually looks like a dome! Have ran out of bricks so I have to take a rain check until next weekend to finishing the brickwork. Was investigating the cost and where to procure a flue from recently. WOW I didn't realise how much these things cost. I can't seem to find what i need on fleabay so i am going to have to spend around £100 on a flue and then pay for the base plate and cowl. Will keep looking in the hope that I can find a second hand one. Got some pointing to do whilst i am waiting for my bricks to turn up on saturday. |
|